
Craft Fair Candle Display Ideas That Actually Sell
Use tiered height, warm LED lighting, a curated scent menu, and one unlidded tester per scent to convert browsers into buyers. These eight craft fair candle display ideas are the highest-impact setups vendors use at markets right now:
- Tiered risers: Three height levels keep every candle visible from the aisle.
- Hero pedestal: One statement piece at eye level draws shoppers in.
- Tester station: 3–4 open scents with a coffee-bean reset bowl.
- Branded backdrop: A single banner anchors the booth and reads from a distance.
- Warm LED lighting: 2700K strips make wax glow; cool white makes it look flat.
- Curated scent lanes: Group by scent family or use-case, not alphabetically.
- Bundle pricing sign: One clear sign (“8 oz $18 or 2 for $32”) raises average sale.
- Portable ladder shelf or backwall: Folds flat, sets up in minutes, doubles display height.
Pro Tip: Your booth signage should be readable at roughly 20 feet. If you can’t read it from across the aisle, a shopper walking past won’t stop.
Pro Tip: Keep no more than 3–4 open testers at any one time. More than that triggers sensory fatigue, and shoppers leave without buying.
Key Takeaways
A tiered three-level layout, warm LED lighting at 2700K, 3–4 open testers with a coffee-bean reset bowl, and a single clear bundle pricing sign are the four highest-impact changes a candle vendor can make before the next show.
| Point | Details |
|---|---|
| Three-level rule | Use front, middle, and back rows at increasing heights so every candle is visible from the aisle. |
| Tester limit | Keep 3–4 open scents maximum; a coffee-bean bowl resets shoppers’ noses between samples. |
| Warm LED lighting | 2700K strips make wax look richer; cool white flattens color and reduces perceived quality. |
| Bundle pricing sign | One clear sign (“8 oz $18 or 2 for $32”) raises average sale without extra explanation. |
| Latviancandles molds | Consistent silicone mold sizing across pillar, tea light, and specialty shapes simplifies stacking, labeling, and pricing at the booth. |
Table of Contents
- What makes craft fair candle display ideas work: the three-level rule
- How should you set up a scent-sampling system at a craft show?
- How do you build a booth that tells a consistent visual story?
- What lighting setup makes candles look their best at a market booth?
- How many SKUs should you bring, and how should you price them?
- Booth safety, stability, and staff flow
- Which candle shapes and mold sizes display best at a market?
- Printable setup checklist for show day
- How do you manage stock and inventory at the booth?
- Lessons learned at markets
- Display-ready molds for makers who want consistent shapes
- Sources
- FAQ
What makes craft fair candle display ideas work: the three-level rule
The three-level rule is the single most reliable layout principle for a candle booth. Front row sits at table height, middle row rises 6–8 inches, and the back row reaches 12–18 inches or higher. That staggered profile lets a shopper standing at the aisle see every candle in one glance, rather than a flat sea of jars.
Practical riser options that pack flat and set up fast:
- Wooden risers or crates: Warm, natural look that complements beeswax tones.
- Cake stands: Ideal for hero scents; elevate one jar to pedestal status.
- Acrylic blocks: Clean, modern look; let vessel color show through.
- Folding wire shelves or collapsible ladder shelves: High capacity, pack flat, and save setup time.
Keep the front row stocked with your bestsellers and seasonal picks. The middle row holds curated groupings by scent family or color. The back row is your visible stock reserve, not a storage dump.
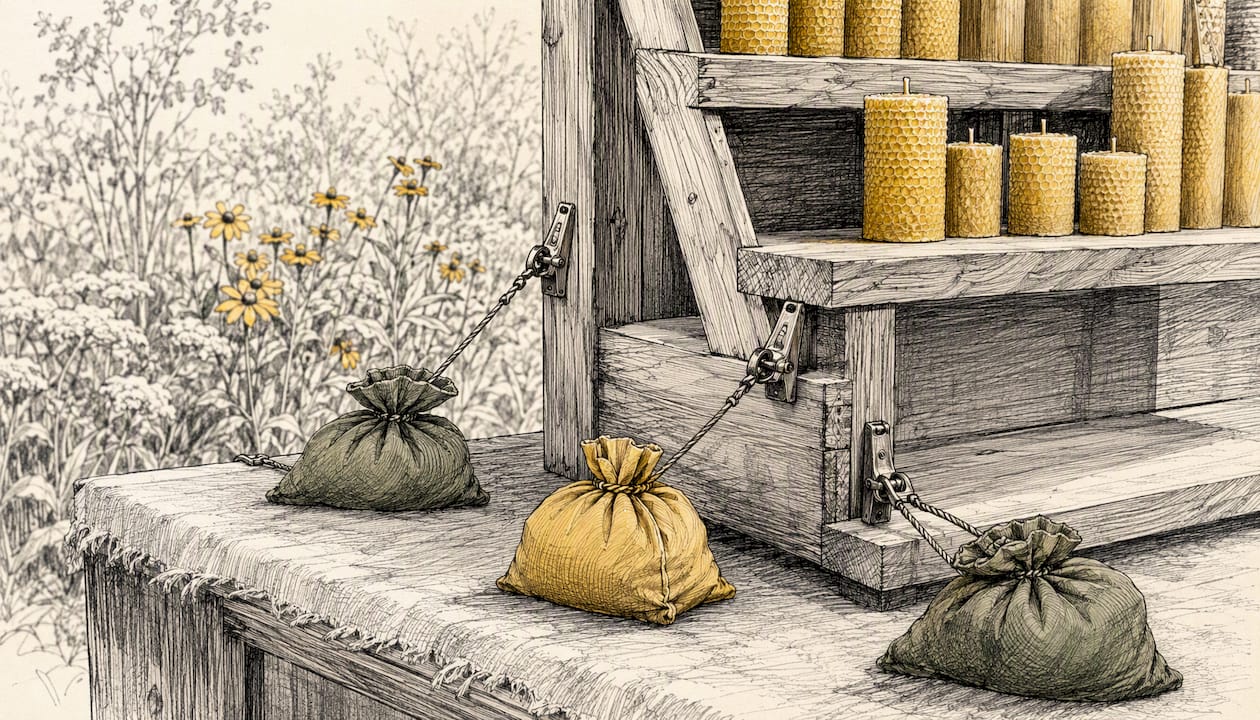
Pro Tip: At outdoor markets, anchor tall risers with sandbag weights or clamp them to the table frame. A single gust can topple an unweighted ladder shelf and break inventory.
How should you set up a scent-sampling system at a craft show?
Unlidded tester jars increase shopper engagement and sales. The protocol below keeps sampling clean, safe, and effective:
- Label every tester clearly with scent name, wax type, and burn time.
- Remove the lid from one jar per scent — the “cold throw” is enough; no flame needed.
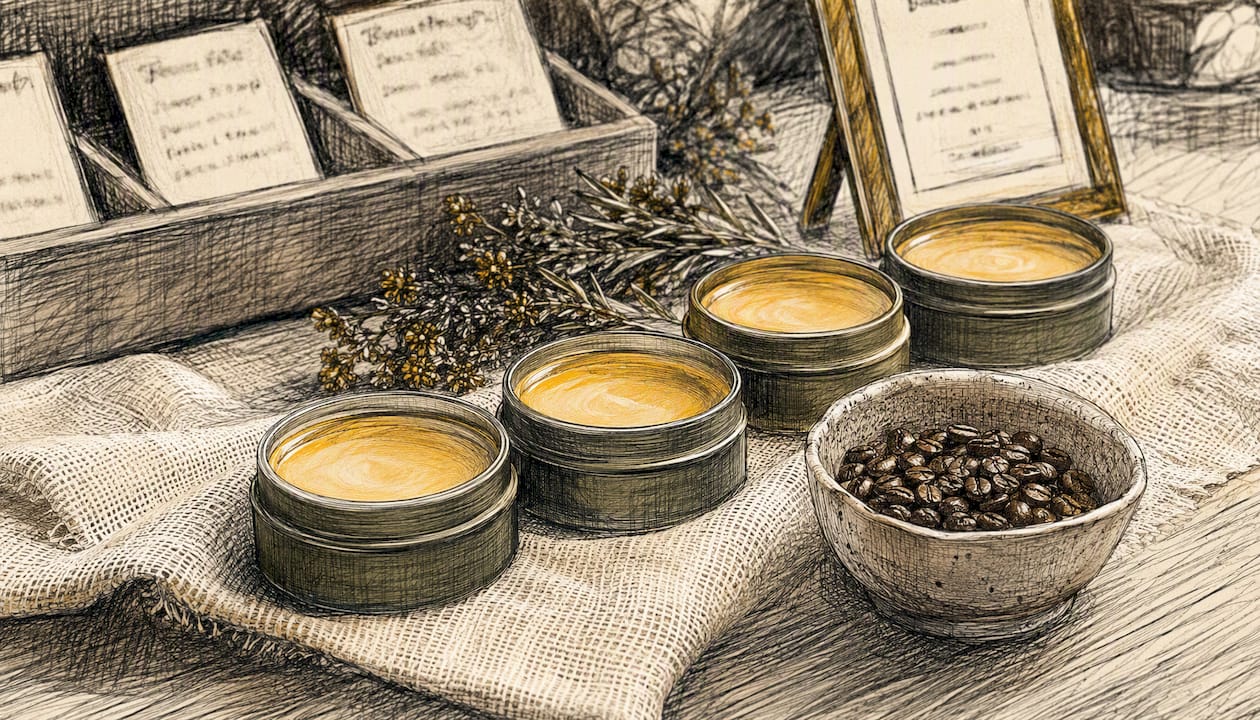
- Place a small bowl of coffee beans next to the testers so shoppers can reset their sense of smell between scents.
- Rotate testers every hour. Swap in a fresh jar; re-lid the previous one.
- Keep backup stock lidded and out of direct sun to preserve scent integrity.
- Check venue rules before the show. Most indoor craft fairs prohibit open flames; flameless demos and cold-throw testers are always compliant.
Limit open testers to 3–4 scents at a time to prevent sensory overload. More options do not increase sales — they increase indecision.
Pro Tip: Place testers at the front corners of your table or on the hero pedestal. Shoppers who reach for a tester are already engaged — that’s the moment to start a conversation.
How do you build a booth that tells a consistent visual story?
Grouping by scent, color, and price progression creates a retail narrative that guides shoppers from low-risk impulse picks to premium upsells. A booth that looks cohesive sells higher-priced candles because perceived quality rises with visual consistency.
Grouping approaches that work:
- By scent family: Florals together, woods together, citrus together. Shoppers self-select by mood.
- By use-case: “Relax” zone (lavender, chamomile), “Energize” zone (eucalyptus, mint), “Seasonal” zone (cinnamon, fir).
- By color palette: Neutral vessels in one section, bold colors in another. Visually clean and easy to shop.
Signage rules:
- Main banner readable at roughly 20 feet, with your brand name and one short descriptor (“Hand-poured beeswax candles”).
- Individual product signs: scent name, burn time, wax type, price. Three lines maximum.
- One bundle pricing sign per table, not one per product.
Vessel silhouette and finish communicate brand value before a shopper smells anything. Frosted glass reads as spa-premium. Raw beeswax pillars read as artisan-natural. Tins read as practical and gift-friendly. Pick one lane and stay in it across your whole table.
Pro Tip: Print your labels on the same paper stock and font across every vessel size. Mismatched label styles on the same table undercut the premium story your display is trying to tell.
What lighting setup makes candles look their best at a market booth?
Warm-toned LEDs at around 2700K make wax look richer and draw shoppers closer. Cool white lighting flattens wax color and kills the cozy atmosphere that sells candles. For tealight holder styling and ambient lighting ideas, the same 2700K principle applies whether the setting is a living room or a market booth.
Lighting checklist for your booth:
- Warm LED strip lights along the back edge of the table or under risers.
- Clip spotlights aimed at hero scents on pedestals.
- Backlit signage if the venue allows it — dramatically increases visibility in dim halls.
- Flameless candles placed among real stock for ambiance without fire risk.
- Battery-powered options for venues without power access.
Matte vessels absorb light and look handcrafted. Glossy vessels reflect it and look polished. Neither is wrong — but mixing both on the same table without intention looks unplanned. A before-and-after test is simple: photograph your table under cool white, then swap to warm LED and photograph again. The difference in wax color and perceived warmth is immediate.
How many SKUs should you bring, and how should you price them?
Bring a modest number of SKUs, with 2–3 core scents heavily stocked. A couple of seasonal additions round out the selection. Too many scents at a single show create decision fatigue; shoppers who can’t choose quickly move on.
SKU selection rules:
- Lead with bestsellers. If lavender and vanilla outsell everything else at every show, they anchor the table.
- Add one or two seasonal scents relevant to the event (pumpkin spice in fall, fir in December).
- Avoid duplicating scents in different vessel sizes unless the size difference is obvious and the price gap is clear.
Pricing and bundle template:
| Size | Retail Price | Bundle Price |
|---|---|---|
| 4 oz sampler | $10 | 3 for $32 |
| 8 oz everyday | $18 | 2 for $32 |
| 12 oz statement | $18 | 2 for $32 |
A single clear price sign at eye level outperforms individual stickers on every jar. Shoppers read the sign, understand the bundle, and self-select. You spend less time explaining and more time closing.
Booth safety, stability, and staff flow
Secure tall displays, follow venue flame rules, and keep an unobstructed path to checkout. These are non-negotiable for a safe, functional booth.
Stability checklist:
- Weight anchors or sandbags on any riser taller than 12 inches.
- Non-slip mats under all table legs on smooth floors.
- Table clamps for ladder shelves attached to the table frame.
- No open flames unless the venue permit explicitly allows them.
Fire and safety notes:
- Use flameless candles for ambiance; label all testers clearly as “tester — do not light.”
- Keep a small fire extinguisher under the table if your venue allows open flames.
- Store extra inventory in a closed box under the table, not stacked on top of risers.
For outdoor markets, use reflective or light-colored tablecloths and rotate stock rather than exposing all candles to direct sun. Store most inventory in a shaded container and bring it to the table in small batches. This prevents wax from softening and deforming in heat.
Staff flow: one person at the front of the table for greetings and scent guidance, one person at the back for packing and payment during busy periods. A single vendor handling both simultaneously loses sales.
Which candle shapes and mold sizes display best at a market?
Choose vessel silhouettes that read clearly from three feet away. Pillars and medium jars work well on a busy table because their shape is immediately recognizable. Overly intricate micro-detail disappears at table distance and adds no display value.
Mold size guidance by table position:
- Small (2–4 oz): Samplers and impulse gifts. Place at the front edge of the table or near checkout. Bee cells tea light molds produce consistent small-format pieces that stack cleanly and price well as add-ons.
- Medium (6–10 oz): Everyday bestsellers. These anchor the middle row. Classic pillar shapes in two or three sizes give the middle row visual rhythm without clutter.
- Large (12–20 oz): Statement pieces. One or two on the hero pedestal. Spiral pillar molds and geometric folk sign molds produce shapes that photograph well and stop shoppers at the aisle.
As noted in the vessel guidance above, silhouette and finish communicate brand value before scent does. Group by silhouette on the table: round vessels together, pillars together, tapers together. Mixed shapes with no grouping logic look like a clearance table.
Pro Tip: Consistent mold sizing across your product line makes stacking, pricing, and labeling faster. When every 8 oz candle comes from the same mold, your labels fit, your bundles make sense, and your table looks intentional.
Printable setup checklist for show day
Arrive, unload, set backdrop, place risers, arrange testers, add price signs, set lighting, run a final sweep. That sequence takes 45–60 minutes with a packed kit and a clear plan.
Show-day setup sequence:
- Arrive at least 90 minutes before opening.
- Unload and stage all boxes behind the table.
- Set backdrop or banner first — it anchors everything in front of it.
- Place risers and ladder shelves; anchor tall pieces immediately.
- Arrange candles by tier: front row, middle row, back row.
- Set up tester station: label jars, remove lids, place coffee bean bowl.
- Place price signs and bundle sign.
- Run LED strips and clip spotlights; test all batteries.
- Do a final sweep: straighten labels, check stability, confirm checkout area is clear.
- If a scent sells out mid-show, swap in the closest scent family and update the tester label on the spot.
Pack checklist by category:
- Display: Risers, crates, ladder shelf, table clamps, non-slip mats, tablecloth.
- Stock: Candles by SKU in labeled boxes, backup inventory in a sealed container.
- Tools: Scissors, tape, spare labels, marker, small toolkit for shelf assembly.
- Paperwork: Vendor permit, price list, receipt book or card reader.
- Lighting: LED strips, clip lights, extension cord, spare batteries.
- Safety: Fire extinguisher (if permitted), first aid kit, hand sanitizer for tester station.
If lighting fails, position the table near a window or natural light source and move the hero pedestal to the brightest spot. If a tester jar breaks, re-lid the remaining testers and replace from backup stock before reopening the station.
How do you manage stock and inventory at the booth?
Keep most inventory in labeled, closed boxes under the table. Bring only 3–5 units of each SKU to the table surface at a time. Restocking from under the table takes 30 seconds and keeps the display looking full without overstocking the surface.
Use a simple tally sheet or a phone-based inventory app to track units sold per SKU throughout the day. This tells you which scents to restock first and which to pull from the next show’s pack list. At the end of the day, count remaining stock before packing — not after. Discrepancies are easier to catch on-site than at home.
Label every storage box with the SKU name and unit count before you leave for the show. Searching through unlabeled boxes mid-show wastes time and creates gaps in the display.
Lessons learned at markets
Fewer scents drive more sales. A table with 30 scents looks impressive and sells less than a table with 10 scents presented well. Shoppers need a clear path to a decision.
Three vendor-tested observations worth applying:
-
Hero pedestal placement doubled pickup rate. Moving the best-selling scent from the middle row to a raised pedestal at the front corner increased the number of shoppers who picked it up and smelled it. Pickups correlate directly with purchases.
-
Warm LED lighting increased perceived value. The same candles under cool fluorescent lighting and under 2700K warm LEDs looked like different products. Shoppers commented on quality more often under warm light.
-
One bundle sign per table outperformed per-product stickers. A single “2 for $32” sign generated more bundle purchases than individual stickers on each jar. Shoppers read the sign once and applied it to everything.
Markets are iterative. Test one change per show — swap the lighting, move the hero pedestal, or try a new grouping approach — and note the result. After three or four shows, the data tells you what your specific customer responds to.
Display-ready molds for makers who want consistent shapes
Makers who want reliable, display-ready stock benefit from molds that produce consistent silhouettes every pour. Latviancandles offers over 180 silicone mold designs built specifically for beeswax, with sizing guidance included so your labels, pricing, and stacking all stay consistent across production runs.

Three product categories worth considering for market stock:
- Beeswax pillar molds: Produce tall, stackable shapes that read well from the aisle and work as hero-pedestal pieces.
- Tea light molds: Small-format, consistent sizing for sampler sets and checkout impulse items.
- DIY starter kits: Include molds, wick holders, and guidance — a practical starting point for makers scaling to vendor production.
Check the sizing details on each product page before ordering to confirm the finished candle dimensions fit your pricing tiers and display risers. Browse the full 180+ silicone mold collection to find shapes that match your booth’s visual story.
Sources
- Candle Display Ideas for Craft Fairs: 24 Ways to Display Candles and Sell More in 2026 | TheCraftMap
- How to Create the Best Craft Show Candle Display
- Candle Containers 101: Professional Guide for Brands
- Product Grouping in Retail: How IKEA’s Candle Shop Turns Segmentation into Experience — STEER
FAQ
How many candles should you display at a craft fair booth?
Display 8–12 SKUs with 3–5 units of each on the table surface at a time. Restock from labeled boxes under the table as units sell.
What are some creative ways to display candles at a market?
Tiered risers, hero pedestals, curated scent lanes grouped by use-case, and warm LED lighting are the most effective setups. A single statement piece on a raised pedestal draws more pickups than several jars laid flat.
How do you prevent candles from melting at an outdoor craft fair?
Use a reflective or light-colored tablecloth, keep most inventory in a shaded container, and rotate stock to the table in small batches rather than exposing all candles to direct sun or heat.
What is the best lighting color temperature for a candle booth?
Warm LEDs at around 2700K make wax glow and create the atmosphere that sells candles. Cool white lighting makes wax look flat and reduces perceived quality.
How many scent testers should you put out at a craft fair?
Limit open testers to 3–4 scents at a time. More than that causes sensory fatigue, and shoppers leave without deciding. A small bowl of coffee beans next to the testers helps reset customers’ noses between scents.


