
Freeze 2–3 Hours, Store Flat: Silicone Mold Storage for Beeswax Makers
Store only clean, fully dry silicone molds flat or lightly supported, away from heat and direct sunlight. Never fold, crush, or stack them under weight. Silikona veidņu glabāšana comes down to three things: clean, dry, and unstressed. Get those right and a good beeswax mold will hold its detail through hundreds of pours.
TL;DR:
- Freezing a used mold for two to three hours is the most effective way to contract and remove beeswax without damaging details.
- Always dry molds thoroughly by inspecting for trapped water in deep cavities before storage, as moisture causes surface spots and odors later.
- Flat storage on a tray with separator sheets is best for detailed or flexible molds, while upright storage works only with stable, wide-based shapes.
- Avoid stacking, folding, or sealing damp molds in containers, since these habits cause warping, dents, and long-term damage.
- Keep molds away from heat, strong solvents, and use proper accessories like wick holders to minimize handling stress and extend mold lifespan.
Table of Contents
- Silikona Veidņu Glabāšana: A Quick Storage Checklist
- Cleaning: Removing Leftover Beeswax Without Damaging Detail
- Drying and Inspection: How to Know a Mold Is Storage Ready
- Storage Methods: Flat, Upright, and Container Options
- Long-Term Care and Common Mistakes
- Fixing Stuck Wax, Seam Leaks, and Tacky Surfaces
- What Latvian Candles Learned From the Workbench
- What Most Storage Advice Gets Backwards
- Gear That Makes Storage Easier
- Where to Go Next
- Sources
- FAQ
Silikona Veidņu Glabāšana: A Quick Storage Checklist
Right after you pull a candle out of the mold, follow these steps in order. Skipping ahead to washing before the wax is out usually means more scrubbing and more risk to fine detail.
- Freeze or peel first. Let the mold sit until leftover wax hardens, or freeze it briefly so bulk wax shrinks and releases on its own.
- Wash gently. Use warm water and mild soap with a soft cloth or brush for grooves and lettering, then rinse well.
- Wipe and air-dry. Blot visible water with a lint-free cloth, then leave cavities open to the air rather than sealing the mold while damp.
- Support it flat. Lay the mold on a tray with a separator sheet, label it, and keep it off any surface near a heater or window.
- Toss wax scraps in the trash, not the drain. Beeswax hardens fast in pipes and causes clogs that are annoying to clear.
Pro Tip: Keep a stack of cheap wax paper or parchment squares near your workspace. Slide one under and between molds every time you store them. It costs pennies and saves you from compression marks on raised details.
Cleaning: Removing Leftover Beeswax Without Damaging Detail
Chunks of wax left in a mold do two things: they clog your sink over time, and they force you into more scrubbing than the silicone needs. Clearing bulk wax before you ever touch soap and water protects both your plumbing and your mold’s surface.
The freeze-and-peel method solves most of this on its own. Latvian Candles recommends freezing a used mold for two to three hours before handling it. The wax contracts as it cools, pulls away from the silicone, and often lifts out in one piece or a few large shards when you flex the mold gently.
Once the bulk wax is gone, wash with:
- Warm (not hot) water
- A mild dish soap with no added abrasives
- A soft cloth for open areas
- A soft-bristle brush for grooves, lettering, and raised patterns
Skip steel wool, scouring pads, and strong solvents. They scratch silicone or leave a film that changes how future candles release. Care guides for candle molds also warn against prolonged soaking in hot water, since thin-walled sections can distort under sustained heat. That matters more with beeswax than other waxes, since it melts at a relatively low 144°F (62°C), so a mold that’s still warm from a pour is more prone to bending out of shape than one you’ve let cool fully first.
If a waxy film or lingering scent won’t budge, test a small area with rubbing alcohol before treating the whole mold, and check what the mold’s manufacturer allows.
Drying and Inspection: How to Know a Mold Is Storage Ready
A mold that looks dry often isn’t. Trapped water in deep cavities is the most common cause of surface spotting and lingering odor in stored silicone, and it hides easily in narrow bee cell patterns or detailed rims.
Work through this before anything goes into storage:
- Wipe every visible surface with a lint-free cloth, then leave the mold open to the air rather than covering it right away.
- Hold the mold under a bright light and check seams, rims, and thin wall sections for water beads or leftover residue.
- Tilt narrow cavities to drain pooled water, or use a low-pressure blast of cool compressed air. Skip a hair dryer or any high heat source.
- If anything feels even slightly damp after an hour, repeat the drying pass. Never seal a mold into a bin while it’s still wet.
That last point is the one most makers get wrong. A quick wipe followed by an immediate lid closure is exactly how odor and moisture problems start weeks later.
Storage Methods: Flat, Upright, and Container Options
Most beeswax molds do best lying flat with light support underneath, especially anything with fine texture like bee cells or lettering. Flat storage spreads the mold’s own weight evenly and avoids the compression marks that come from gravity pulling on an unsupported shape over time. Care guidance for candle molds backs this as the safer default over upright storage for anything flexible.
Upright storage can work, but only for molds with a wide, stable base, like some pillar or taper shapes. A tall, narrow mold leaned against a shelf wall without support will slowly warp along that lean line.
For small workshops, a few setups cover most needs:
- Shallow labeled trays stacked with a spacer sheet between each layer
- A dedicated shelf with trays sized to your most-used molds
- Clear bins with foam or felt dividers so you can see contents without digging
Whatever you choose, avoid tight-fitting bins that force molds to bend to fit, and never nest one mold inside another under pressure. Stacking heavy items on top of a stored mold, even briefly, is one of the fastest ways to leave a permanent dent in a detailed cavity.
Pro Tip: If you’re short on shelf space, hang shallow flat molds using clips on a pegboard instead of stacking them. It keeps weight off the silicone entirely and makes your whole collection visible at a glance.
Long-Term Care and Common Mistakes
Heat is the enemy of silicone longevity. Direct sunlight, a spot near a radiator, or a shelf above an oven will all degrade silicone faster than normal use, causing warping or a permanently tacky surface.
Strong solvents cause a similar problem. They strip whatever protective quality the silicone surface has and leave it feeling sticky, which then attracts dust and lint in storage.
A few habits worth building:
- Never fold a mold to fit a space. Folding creases silicone in a way it doesn’t fully bounce back from.
- Retire any mold that’s warped enough to lose its shape, since it won’t hold detail no matter how carefully you pour.
- Keep a mental (or written) note of deep scratches, torn rims, or thinning walls. Those are wear signals, not cosmetic issues.
Fixing Stuck Wax, Seam Leaks, and Tacky Surfaces
- Stuck candle: Freeze the mold again for a short period, or warm it slightly with your hands while flexing gently and supporting the candle from underneath.
- Seam leaking during a pour: Check that registration keys are seated correctly, clean any wax film off the seam faces, and secure the mold with multiple strong rubber bands rather than one.
- Persistent tackiness or smell: Rewash thoroughly, air-dry longer than usual, and test with a scrap pour before trusting it with a full batch. If it’s still tacky, retire it.
What Latvian Candles Learned From the Workbench
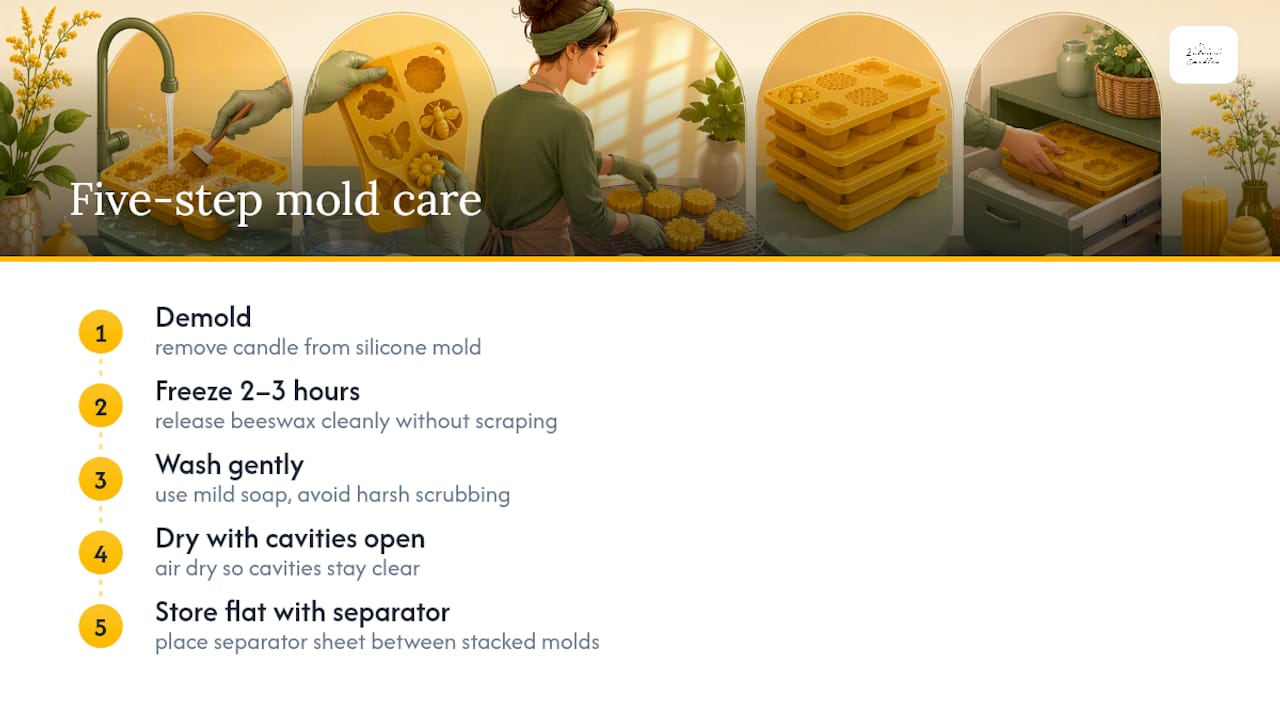
Latvian Candles built its freeze-to-remove-wax guidance around a simple observation: two to three hours in the freezer releases beeswax cleanly without touching the mold’s detail, far better than scraping or hot-water soaking. Our own workflow follows a short sequence every time: demold, freeze off bulk wax, wash gently, dry with cavities open, then store flat with a separator sheet. For makers running wick holders and starter kits alongside their molds, keeping wicks centered during setup reduces the handling stress that leads to torn rims later.
What Most Storage Advice Gets Backwards
Most guides treat mold storage like an afterthought tacked onto the end of a recipe. That’s backwards. The habits that ruin a beeswax mold, folding it into a drawer, sealing it damp, stacking heavy trays on top, happen in seconds, while the mold itself might represent hours of design work and a decent chunk of your supply budget.
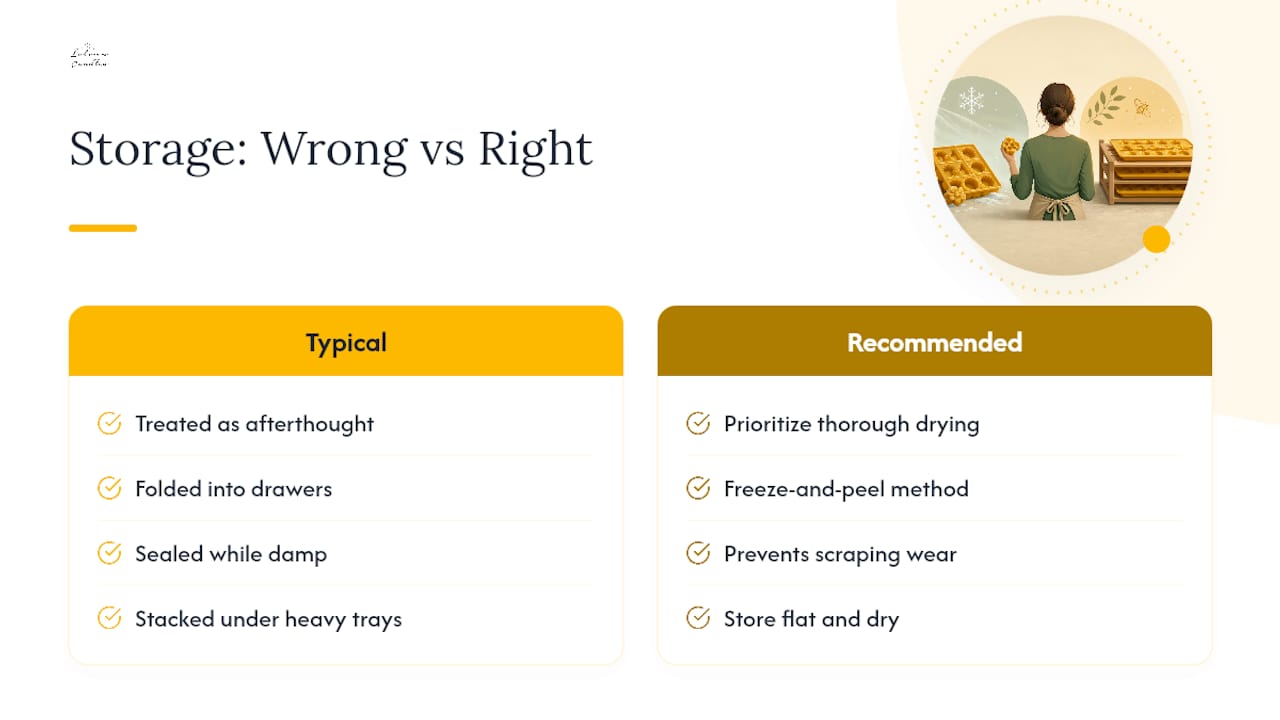
The freeze-and-peel method deserves more attention than it gets. It’s not just a cleaning shortcut. It’s the single step that prevents the most common form of damage: aggressive scraping that thins out detailed cavities over repeated use. Skip it, and you’re trading five minutes of patience for slow, cumulative wear you won’t notice until a candle stops releasing cleanly.
If you take one thing from all of this, prioritize drying over everything else. A mold that’s clean but slightly damp will cause more long-term problems than one that’s imperfectly washed but bone dry. Moisture hides, and it does its damage quietly.
— Marks
Gear That Makes Storage Easier
Good storage habits go further when the mold itself is built for beeswax from the start. Latvian Candles designs its silicone molds specifically for beeswax, which means thicker cavity walls in detailed areas like bee cells, better resistance to the gentle heat beeswax needs, and shapes that hold up to flat storage without warping the way thinner generic molds sometimes do.

Two-piece pillar and taper molds benefit from a set of wick holders that keep wicks centered during pours, which cuts down on the handling stress that damages rims over time. If you’re just getting your workspace set up, the DIY candle making starter kit bundles molds and accessories sized for the kind of small-batch workflow this guide is built around. Browse the full collection of bee cells, taper, and seasonal mold designs to find shapes that fit your storage space as well as your candle designs, then check out when you’re ready to build out your mold collection.
Where to Go Next
For the exact freeze-and-peel steps referenced throughout this guide, read the full wax removal walkthrough. For a broader look at day-to-day care, the five workshop-tested protection tips cover inspection habits this article only touches on. Pair either read with the beeswax mold collection if you’re shopping for molds built to survive this kind of long-term storage.
Sources
- How to Clean and Store Candle Molds to Prevent Damage and Distortion - DIY Products 101
- What Is The Step-By-Step Process For Making A Beeswax Candle Using A Silicone Mold? A Guide To Perfect Results - HonestBee
FAQ
How long should you freeze a silicone mold to remove beeswax?
Two to three hours in a standard freezer is enough for most beeswax residue to contract and release cleanly, according to Latvian Candles’ care guidance. Flex the mold gently afterward and the wax should lift out in shards rather than requiring scraping.
Can you store silicone candle molds upright?
Yes, but only if the mold has a wide, stable base that can support its own weight without leaning. Flexible or narrow molds do better stored flat with light support, since upright storage without a stable base leads to slow warping.
Why does my silicone mold feel sticky after washing?
Tackiness usually comes from leftover fragrance oil, soap residue, or damage from a harsh solvent. Rewash with mild soap, air-dry completely, and avoid abrasive cleaners going forward, since they strip the surface and make the sticky problem worse over time.
Does Latvian Candles sell accessories for mold storage and setup?
Latvian Candles offers wick holders and a starter kit that support proper setup and reduce handling stress on molds. Pricing for individual mold designs and accessories is listed on each product page on the site.
How do you know when to retire a silicone mold?
Retire a mold once it’s warped enough to lose its shape, has torn rims, or shows thinning walls that no longer hold fine detail. A mold that stays tacky or scented after thorough washing and a full air-dry cycle is also a candidate for replacement.


