
Nine Times Out of Ten, Beeswax Makers Don't Need to Oil Silicone Molds
No, silicone molds usually don’t need oil or release spray for beeswax. Silicone’s low surface energy lets most castings pop free on their own once fully cooled. The exception: highly detailed molds or very soft, slow-curing beeswax blends, where a very light silicone-safe mist can act as insurance. Watch your pour temperature and give the wax a full cure before you judge whether release was ever needed.
TL;DR:
- Silicone molds generally do not require oil or release spray for beeswax, thanks to silicone’s low surface energy that allows castings to release easily once cooled.
- Use a silicone-safe release spray only on highly detailed molds, deep undercuts, or when working with soft, slow-curing beeswax blends to prevent sticking issues.
- Proper mold preparation includes cleaning, applying a light, even spray from 8 to 12 inches, and waiting for it to dry before pouring to avoid surface defects.
- Improving process factors like wax firmness, mold prewarming, full cure time, and gentle demolding often fixes sticking problems more effectively than using release spray.
- Regular mold maintenance and patience, including freezing or gentle peeling, can prevent damage and reduce the need for release agents altogether.
Table of Contents
- Do You Really Need to Oil a Silicone Mold for Beeswax?
- How to Apply a Silicone Mold Release the Right Way
- Process Fixes That Solve Sticking Without Any Spray
- Stuck Candle? Here’s the Safe Way Out
- Cleaning and Care That Keep Molds Releasing Cleanly
- What We’ve Learned After a Decade of Beeswax Pours
- Ready to Pour Without the Guesswork?
- Sources
- FAQ
Do You Really Need to Oil a Silicone Mold for Beeswax?
Silicone has naturally low surface energy, which is a technical way of saying wax has almost nothing to grip onto. That’s why most makers skip release spray entirely and still get clean releases pour after pour.
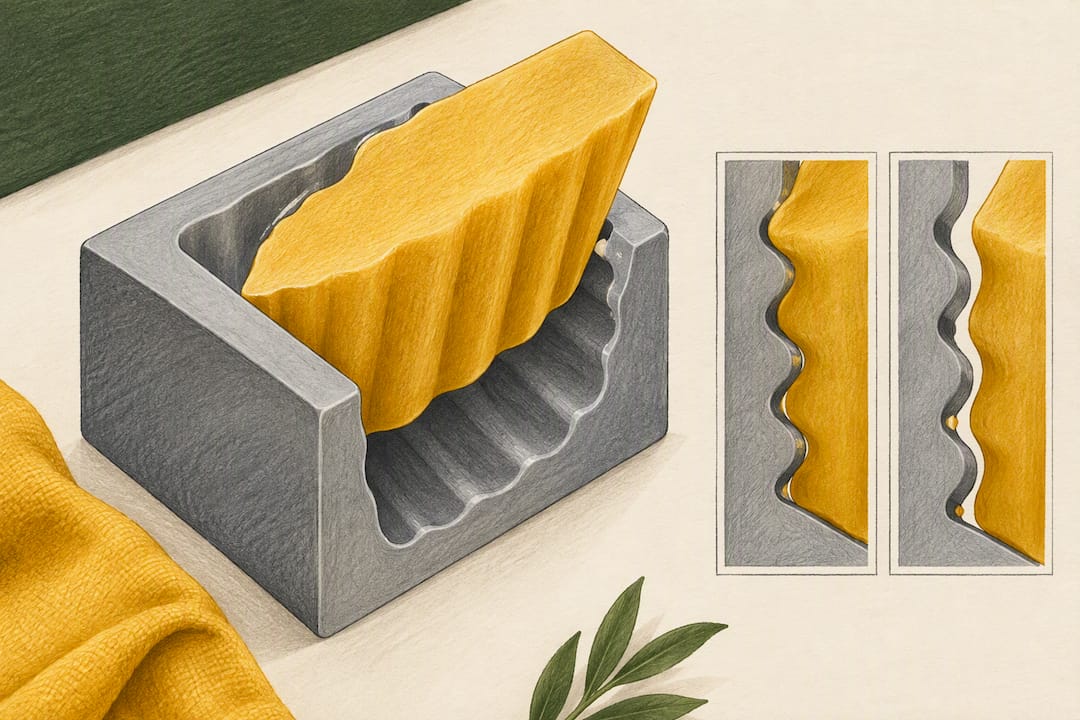
Beeswax complicates the picture slightly compared to paraffin or soy. It doesn’t shrink much as it cools, so it doesn’t pull away from the mold walls the way a shrinkier wax does. That’s the real reason some beeswax makers reach for release spray when others never touch it.
A few situations actually raise your sticking risk:
- Molds with very fine detail, like individual bee cells or engraved textures
- Deep undercuts where wax has to flow around a shape rather than straight down
- Soft or slow-curing beeswax blends that stay pliable longer than firmer pillar waxes
- Very large or heavy castings where the wax’s own weight works against a clean pull
Every one of those comes with a trade-off. Spray too much and you risk a thin residue film or slightly dulled detail on your next few pours. Skip it entirely on a delicate design and you risk tearing a $40 mold trying to force out a stuck candle. Before you decide, run through four questions: how intricate is the mold, how firm is your wax blend, how big is the batch, and how much would it cost you to lose this particular piece?
How to Apply a Silicone Mold Release the Right Way
If your mold and wax combination lands on the “use release” side of that checklist, technique matters more than the product you pick.
- Pick a silicone-safe release spray made for candle molds. Skip heavy cooking oils or all-purpose lubricants. They sit on the surface longer than a proper release and tend to leave behind a greasy film that shows up as a matte patch on your finished candle.
- Clean the mold completely first. Old wax, dust, or oily fingerprints under a fresh coat of release just get sealed in and transferred straight onto your next candle.
- Hold the can 8 to 12 inches away and apply one quick, light pass. A single light mist at that distance coats the surface without pooling in the fine detail, which is exactly where over-spraying does the most damage.
- Let the film dry per the manufacturer’s directions before pouring. Pouring hot wax onto a wet spray is how you end up with surface bubbles or a hazy finish.
- Pour at your normal temperature, secure the mold, and let it cool fully before testing a demold.
- Always run one proof candle before committing a full batch. If it releases clean, you’ve confirmed both the release and your pour setup work together.
Pro Tip: Spray release once, then reuse that same mold for two or three pours before you spray again. A single light coat almost always outlasts one pour, and re-spraying every single time is the fastest way to build up residue you’ll have to scrub off later.
Process Fixes That Solve Sticking Without Any Spray
Before you buy a can of release, try fixing the process. Most sticking problems trace back to wax choice or timing, not the silicone itself.
- Switch to a firmer, pillar-specific beeswax blend. Softer blends stay tacky longer and cling to detail; a firmer blend holds its shape and releases more predictably.
- Prewarm the mold slightly before pouring. A mold at room temperature or lightly warmed lets wax flow into fine detail instead of seizing up on contact and trapping air pockets that read as flaws later.
- Give the candle a full cure, not just a cool-to-the-touch check. A small votive might be ready in an hour or two; a large pillar can need several hours or overnight before it’s fully firm.
- Support the mold so it doesn’t warp mid-pour. A soft silicone shell needs a rigid outer support or a snug holder, especially for tall taper shapes.
- Pour slowly down the interior wall and tap the mold gently a few times. This releases trapped air before it becomes a bubble baked into your finished candle.
Proper prewarming and cooling technique fixes more sticking problems than any spray ever will, and it costs you nothing but a little patience.
Stuck Candle? Here’s the Safe Way Out
Stop pulling on the candle the moment you feel real resistance. Pulling on the wax itself stresses thin sections and snaps off fine details, especially on a beeswax pour with texture.
- Peel the silicone away from the wax, not the other way around. Roll the mold back off the candle the same way you’d peel a sock off a foot, working from the edges inward.
- Support the base and give it more time. A candle that feels the least bit soft or warm at the center isn’t ready. Firm and cool at room temperature is your real signal.
- A brief stint in the freezer can help. A few minutes of chilling shrinks the wax just enough to loosen its grip on the mold walls.
- A short warm water bath can work too, but only briefly and only on the outside of the mold. Beeswax softens fast, and soaking too long risks distorting fine surface detail instead of freeing it.
- Never use solvents on beeswax. They can cloud or discolor the surface permanently, and they do nothing that patience and a peel technique don’t already solve.
- Small chips can usually be repaired with a gentle topping-up pour, blending fresh wax carefully into the damaged spot rather than starting over.
Pro Tip: If a mold fights you on every single pour despite good technique, that’s a signal to retire it, not to force it harder. A torn or overstretched silicone mold only gets worse with each use.
Cleaning and Care That Keep Molds Releasing Cleanly
A mold that’s properly cleaned rarely needs release spray at all, which makes maintenance the cheapest fix available to you.
- Freeze-and-pop for stubborn residue. A short trip to the freezer shrinks leftover wax film enough to flake it off with your fingers.
- Warm water and mild dish detergent for regular cleaning. This handles most everyday wax buildup without stressing the silicone.
- A soft, non-abrasive tool for scraping stuck spots. Never use metal scrapers or abrasive pads, which scratch silicone and create texture that grabs future pours.
- Isopropyl alcohol for greasy leftover residue, applied sparingly. Skip harsh solvents entirely, since they degrade silicone over repeated use.
- Dry fully and store flat or supported, away from direct UV and heat, so the mold doesn’t warp out of shape between uses.
Run a quick check after every use: rinse, dry, inspect for tears or thinning at stress points, and store it flat. A dedicated mold care routine extends the working life of detailed molds far more than any release spray does. If detail is visibly softening or a seam is starting to split, that mold has reached the end of its run.
What We’ve Learned After a Decade of Beeswax Pours

Most beeswax makers reach for release spray before they’ve actually diagnosed the problem. In our experience, nine times out of ten the fix isn’t a can of spray. It’s pour temperature, cure time, or a wax blend that’s too soft for the mold’s detail level.
Learn the process first. Get your pour temperature dialed in, respect full cure times, and handle demolding with a peel, not a pull. Release spray earns its place only as light insurance on your most detailed or most expensive molds, the ones where losing a piece to a bad pull actually costs you something. That’s the order Latvian Candles has taught since we started making molds for beeswax in 2015: technique first, product second. Our step-by-step usage guide walks through the exact pour and cooling sequence that makes release spray unnecessary for most designs.
— Marks
Ready to Pour Without the Guesswork?
Every tip above assumes you’re working with a mold actually engineered for beeswax, not a generic mold made for soy or paraffin. That’s the gap Latvian Candles fills: molds built specifically for beeswax candle making, designed to hold detail and release cleanly without you needing to reach for a spray can on every pour.

Browse the full catalog of silicone molds, from bee-cell textures to clean taper shapes, and pick up a matching wick holder to keep your wick centered while the wax cures. If you’re testing the guidance in this article for the first time, start with a single mold, run one proof candle the way we described above, and confirm your process before committing wax to a full production batch. Your next pour is one order away.
Sources
- Is Spray Release Necessary When Using Silicone Molds For Candle Making? Master The Art Of Flawless Demolding - HonestBee
- Candle Mold Release: Is It Always Necessary? | CyCandle
- How to Use Silicone Candle Molds Properly (Temps, Wicking, Demolding) - DIY Products 101
FAQ
Should I Oil a Silicone Mold Before Pouring Beeswax?
No, silicone molds usually don’t need oil before a beeswax pour. Silicone’s low surface energy already keeps wax from bonding to the surface, so oil is unnecessary and can leave residue on your next casting.
When Should I Use a Release Spray Instead of Skipping It?
Reach for a release spray on molds with very fine detail, deep undercuts, or when working with a soft, slow-curing beeswax blend. Beeswax doesn’t shrink much on cooling, which is what makes those specific molds riskier than simple shapes.
How Do I Get a Stuck Beeswax Candle Out of a Silicone Mold?
Peel the silicone away from the candle rather than pulling the wax out, and give it more time to fully firm up first. A brief chill in the freezer can help shrink the wax just enough to loosen its grip.
What’s the Correct Way to Spray Mold Release Without Ruining Detail?
Hold the can 8 to 12 inches from the mold and apply a single light mist, never a heavy coat that pools in fine texture. That light distance and pass is enough to coat the surface without dulling detail.
Does Latvian Candles Sell Molds That Release Beeswax Without Spray?
Latvian Candles designs its molds specifically for beeswax rather than adapting molds meant for soy or paraffin, which is why most designs release cleanly with good technique alone. Current pricing and the full mold lineup are available on the Latvian Candles site.


