
No More Sinkholes: Latvian Beeswax Mold Method With 5–10% Top Up
The reliable way to make beeswax candles in silicone molds is straightforward: melt pure beeswax to the right temperature, pour it into a flexible silicone mold with a properly sized wick, let it cool, then reserve part of the batch for a second pour once shrinkage creates a dip at the wick. Skip the second pour and you get a sunken, cracked top almost every time. Get the wick size wrong and you get tunneling. Master those two variables and the rest of the process falls into place.
TL;DR:
- Using a second pour to top off sinks while the candle is still warm reduces cracks and creates a smooth top surface.
- Beeswax shrinks significantly more than soy or paraffin, so a reserve of 5 to 10 percent of melted wax helps prevent sinkholes and allows for effective top-ups.
- Wick size must be increased by two to three levels from soy charts, and systematic testing is essential to find the optimal diameter for clean burning without tunneling.
- Pour beeswax at 145 to 150°F and let it cool gradually, avoiding rapid cooling or over-pouring to prevent frosting, cracking, and surface roughness.
- Never use stearin with silicone molds, as it degrades silicone over time; natural beeswax is best for long-lasting, detailed candle shapes.
Table of Contents
- Materials and Tools for Latvian Sveču Formu Amatniecība
- Step-by-Step Molding Workflow for Beeswax Candles
- Wick Sizing, Temperature Control, and Troubleshooting
- Mold Selection and Care for Long-Lasting Detail
- Why Latvian Candle Molds Carry Centuries of Tradition
- Design Motifs and Symbolism in Latvian Candle Molds
- Natural Materials Beyond Beeswax in Traditional Candle Craft
- Safety Precautions for Beeswax Candle Molding
- Finishing Techniques for Latvian-Style Beeswax Candles
- Storing Handmade Beeswax Candles for Long-Term Quality
- What I’ve Learned Making Beeswax Candles in Latvia Since 2015
- Get Started With Molds Built for Beeswax
- Sources
- FAQ
Materials and Tools for Latvian Sveču Formu Amatniecība
Latvian sveču formu amatniecība, the craft of shaping candles in molds, depends less on fancy equipment and more on getting a handful of details right. Pure beeswax behaves nothing like soy or paraffin. It has a higher melting point, more viscosity while liquid, and it shrinks more as it cools. That shrinkage is exactly why mold-based beeswax work needs its own toolkit and its own rules, not a borrowed soy recipe.
Buy filtered, cosmetic-grade beeswax blocks or pellets rather than raw comb wax, which carries debris that clogs wicks. Pellets melt faster and measure more consistently than a block you have to chop.
Here’s what belongs on your bench before you light a burner:
- A digital kitchen scale accurate to a gram, for measuring wax and any fragrance oil by weight
- A candy or wax thermometer, since eyeballing temperature is the single most common cause of failed pours
- A double boiler or a dedicated wax melter, never a direct flame or microwave
- A metal pouring pitcher with a spout, which controls flow far better than a mixing bowl
- Wick holders or centering bars to keep the wick straight while wax sets
- Cotton or wood wicks in at least two adjacent sizes up from what a soy chart recommends
- A small reserve of extra melted wax, roughly 5 to 10 percent of the batch, set aside for topping up
Skip the reserve wax and you will end up remelting a finished candle later, which never blends as cleanly as topping it while still warm.
Step-by-Step Molding Workflow for Beeswax Candles
Treat each batch like a small experiment: weigh everything, log your numbers, and change one variable at a time if a candle comes out wrong. That habit, common in beginner candle-making tutorials, turns a hit-or-miss craft into something you can repeat on command.
- Weigh the wax. Calculate the volume your mold cavity needs, then weigh out roughly 10 percent more to account for the reserve pour.
- Melt slowly. Use a double boiler, keeping water at a gentle simmer rather than a rolling boil, following the safe melting approach outlined in general beginner candle guides.
- Watch the thermometer. Beeswax typically melts fully in the 145 to 150°F range. Let it climb a bit higher, then cool slightly before pouring, since pouring too hot causes frosting and cracks, and pouring too cool leaves a rough, pitted surface.
- Add fragrance by weight, if using it. Calculate fragrance load as a percentage of wax weight, not by eye, and stir it in once the wax has dropped a few degrees from peak melt.
- Set and center the wick. Anchor the wick tab at the base of the mold cavity, then use a centering bar or two clothespins across the top edge to keep it plumb as the wax sets.
- Pour steadily and slowly, tilting the pitcher against the mold wall rather than pouring straight down the middle, which reduces bubbles and surface seams.
- Let the candle cool undisturbed at room temperature. Do not refrigerate beeswax to speed things up; rapid cooling causes cracking.
- Check for a sinkhole once the surface has firmed but the candle is still faintly warm, usually within an hour or two depending on size.
- Reheat your reserved wax to the same pour temperature and top off the depression in one thin layer.
- Unmold once fully cooled, generally after several hours for smaller shapes, longer for pillars.
The official Latvian craft instructions on candle making describe this same staged pour and top-up sequence, along with handling precautions for hot wax, which is worth reading if you want the government-documented version of this exact method.
Pro Tip: Pour your top-up layer thin. A thick second pour shrinks on its own and can create a second, smaller sinkhole right where you just fixed the first one.
Wick Sizing, Temperature Control, and Troubleshooting
Beeswax needs a noticeably larger wick than soy or paraffin because it burns denser and pools less. If you have a wick chart built for soy, size up two to three increments and test each option in identical mold cavities before committing to a full batch.
A short test run beats guessing. Pour three or four identical candles from the same batch, each with a different wick size, then burn them side by side for a few hours and compare the melt pool. This kind of systematic, one-variable testing is exactly what comprehensive candle-making guides recommend when troubleshooting wick and formula problems.
Here are the most common issues and their fixes:
- Tunneling (wax burns straight down the middle, leaving unmelted wax on the sides): the wick is too small. Size up and retest.
- Sinkholes (a dip forms around the wick as wax cools): reheat your reserved wax and top off while the candle is still warm.
- Cracking on the surface: the pour was too hot or the candle cooled too fast. Pour a few degrees cooler next time and let it rest away from drafts or cold windows.
- Rough or grainy finish: the pour was too cold. Reheat the next batch a bit higher before pouring.
Room temperature matters more with beeswax than with other waxes. A workshop at 60°F in winter will cool your pour faster than the same recipe run at 75°F in summer, so adjust your pour temperature a few degrees warmer in cold months to compensate.
Keep a simple batch log: wax weight, pour temperature, room temperature, wick size, and the result after burning. Artisans who reserve 5 to 10 percent of a batch for topping report far fewer sinkholes than those who pour once and hope. A log turns three failed batches into one clear answer instead of three separate mysteries.
Mold Selection and Care for Long-Lasting Detail
Silicone molds dominate detailed beeswax work for a practical reason: their flexibility lets you peel a finished candle away from fine details like bee cells, textured hexagons, or raised folk patterns without tearing the wax or damaging the mold. Rigid metal or hard plastic molds can trap detailed wax and require release agents that leave residue on natural beeswax.
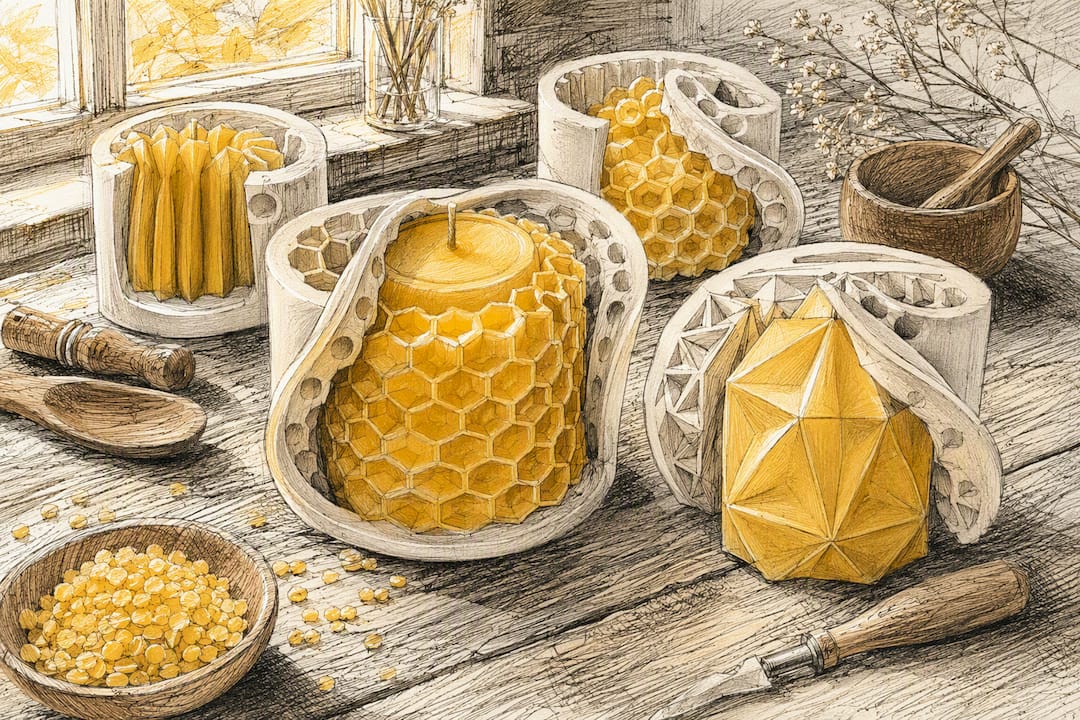
Deeper cavity detail changes your approach. A mold with fine texture, like a bee cells design, needs a slightly hotter pour to capture every line before the wax skins over, while a simple pillar shape tolerates a wider temperature window.
Never add stearin to beeswax destined for a silicone mold. Stearin is a hardening additive some crafters use with paraffin, but it degrades silicone over repeated use, shortening the life of a mold that should otherwise last for dozens of pours.
- Wash molds in lukewarm water with mild soap, never scalding water, which can warp fine cavity detail.
- Dry completely before storage to avoid trapped moisture.
- Store flat or gently rolled, away from direct sunlight, which degrades silicone over time.
- Avoid sharp tools when releasing wax. Flex the mold gently instead of prying with a knife.
Pro Tip: Dust a stubborn cavity with a tiny bit of cornstarch before your next pour if a previous candle left the surface slightly tacky. It helps release without leaving residue on natural wax.
Why Latvian Candle Molds Carry Centuries of Tradition
Candle making in Latvia predates modern silicone by centuries. Rural households traditionally rendered beeswax from their own hives, then poured it into carved wooden or clay forms shaped for household use, seasonal festivals, and Jāņi, the midsummer solstice celebration where candlelight held ritual weight.
Beeswax itself carried symbolic value beyond its practical use as a light source. Bees held a respected place in Latvian folk belief, associated with industriousness and household fortune, which is part of why bee-themed motifs, cells, combs, and hive shapes, remain some of the most enduring patterns in Latvian candle craft today.
Wooden molds were often family possessions, passed down and recarved as designs wore out, which meant regional variation was common. A mold pattern from one district might never appear in another, shaped by local woodworkers rather than a standardized commercial catalog. Modern silicone molds inherit that same instinct for pattern and detail, just rendered in a material that survives far longer than carved wood and releases far more cleanly than the older stearin-based casting methods some households eventually adopted.
Understanding that lineage matters for more than nostalgia. It explains why so many contemporary Latvian mold designs lean on geometric repetition and natural forms rather than abstract or purely decorative shapes. The craft was never purely ornamental. It was tied to the calendar, the harvest, and the hive.
Design Motifs and Symbolism in Latvian Candle Molds
Three motif families show up again and again in Latvian candle mold design, and each one carries meaning beyond its shape.
Bee and hive patterns are the most direct link to the craft’s origin. Hexagonal cell textures, stacked comb shapes, and bee silhouettes reference the beeswax itself, closing the loop between material and design in a way few other crafts manage.
Sun and solar symbols appear frequently, tied to the same solstice traditions that made candlelight significant in the first place. Radiating lines, circular disks, and segmented sun wheels reflect a broader Baltic folk art vocabulary that shows up in textiles and woodwork as much as in candle molds.
Folk signs, geometric marks drawn from traditional Latvian ornamentation, represent protection, fertility, or household luck depending on the specific sign. These patterns tend to be more angular and abstract than the bee or sun motifs, often built from repeated diamonds, crosses, or interlocking lines.
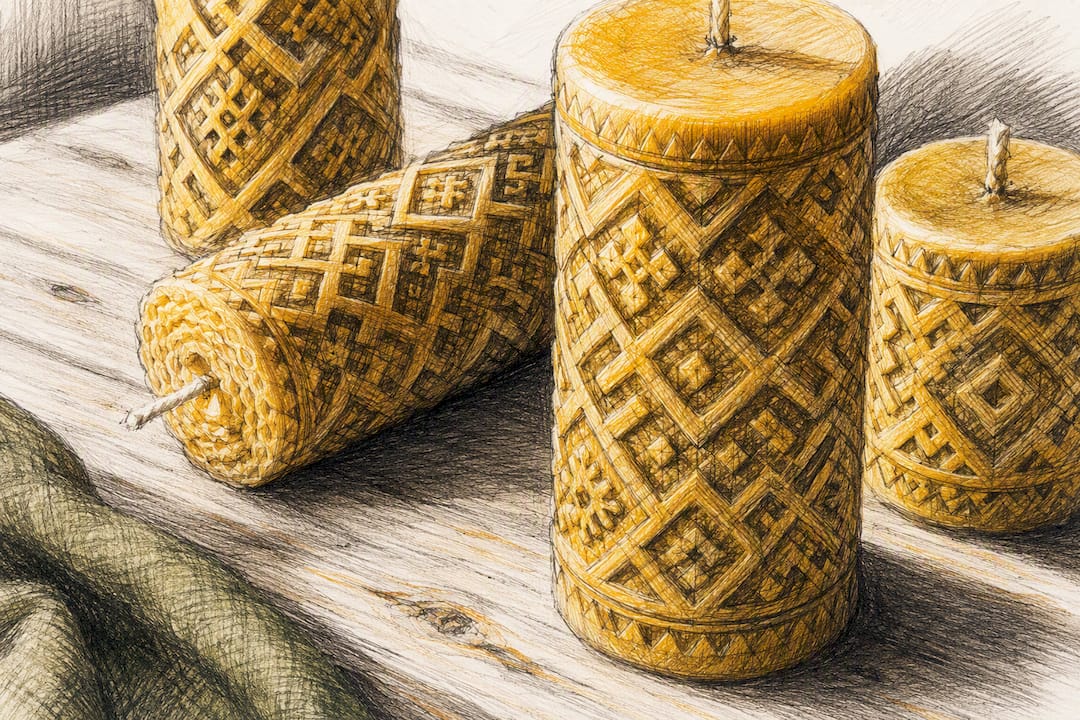
Modern mold makers, including Latvian folk sign designs, keep these patterns in active production rather than treating them as museum pieces. That matters for texture depth: a fine geometric folk sign needs a hotter, more careful pour than a smooth pillar, since sharp interior angles skin over fast and can trap air if you pour too quickly. Choosing a motif isn’t purely aesthetic. It shapes the pour technique you will need to use.
Natural Materials Beyond Beeswax in Traditional Candle Craft
Beeswax was never the only material in the traditional Latvian candlemaker’s kit. Rural households historically sourced tallow, rendered animal fat, as a cheaper substitute when beeswax was reserved for church use or trade, since beeswax was a valuable commodity that could be sold or bartered.
Rushlights, made from dried plant reeds dipped repeatedly in fat, served as an even more basic light source in households that could not afford dedicated candle wax at all. Flax fiber and hemp were common wick materials before commercial cotton wicking became widely available, twisted by hand and often braided rather than spun for extra burn stability.
Some regional traditions also used resin from pine and spruce, either blended into wax to extend a small beeswax supply or burned separately as a torch-like light source. Resin candles burned faster and smokier than pure beeswax, so they were typically reserved for outdoor use or short-duration tasks rather than indoor lighting.
Preparing these materials took real effort compared to today’s filtered wax pellets. Raw beeswax needed straining through cloth to remove comb debris and dead bees before it could be poured cleanly. Tallow required careful rendering over low heat to avoid scorching, which produced an unpleasant smell that lingered in the finished candle. That labor is part of why modern crafters increasingly favor cosmetic-grade, pre-filtered beeswax. It delivers the same natural material with none of the historical prep work.
Safety Precautions for Beeswax Candle Molding
Beeswax runs hotter than most crafters expect, and it holds heat longer than water at the same temperature, which makes a spill more dangerous than it looks.
Never melt wax over direct heat. A double boiler keeps wax away from an open flame and prevents the scorching that happens when wax touches a hot pan surface directly, a precaution echoed in official Latvian craft instructions for candle making. Keep a lid nearby. If wax ever ignites, smother it rather than reaching for water, which will scatter burning wax rather than extinguish it.
Work on a heat-resistant, flat surface, and keep your pouring area clear of anything that could tip a hot pitcher. Wear an apron and consider heat-resistant gloves when handling a full pot of melted wax, especially with larger batch sizes where a spill covers more surface area.
Ventilate your workspace, particularly if you are adding fragrance oil. Some fragrance compounds release stronger fumes when heated, and a stuffy room concentrates that smell fast.
Keep children and pets out of the workspace while wax is on the heat. Melted beeswax cools slowly enough that a curious hand can still get burned minutes after you’ve taken it off the stove. Let poured candles cool undisturbed on a stable, level surface where they won’t get bumped before the wax has fully set.
Finishing Techniques for Latvian-Style Beeswax Candles
A clean pour is only half the job. Traditional Latvian finishing techniques focus on surface texture and natural presentation rather than heavy paint or dye, since pure beeswax’s golden color and faint honey scent are considered part of the appeal, not something to cover up.
Light buffing is the most common finishing step. Once a candle has fully cured, a soft cloth rubbed gently over the surface brings out a natural sheen, similar to buffing a wood surface, without adding any coating.
Trimming the wick to roughly a quarter inch before the first burn is standard practice, since beeswax wicks that are left too long tend to mushroom and produce more soot than a properly trimmed one.
For decorative pieces, some crafters lightly warm the surface with a heat gun for a few seconds to smooth minor mold seams or fingerprints left during unmolding, a quick pass rather than a full remelt. Others press dried botanicals, small flowers or herb sprigs, onto a still-warm candle body for texture, though this works best on pillar shapes with flat surfaces rather than intricate cavity molds where the detail is the whole point.
Bee-cell and folk-sign designs are usually left unadorned, letting the mold’s own texture carry the visual interest. Adding polish or decoration to a highly detailed cavity mold often muddies the pattern rather than enhancing it, so restraint tends to produce the better-looking result.
Storing Handmade Beeswax Candles for Long-Term Quality
Beeswax candles age better than paraffin or soy, but they still need the right storage conditions to stay looking and burning their best.
Keep finished candles away from direct sunlight, which fades color and can cause the surface to sweat slightly in warm rooms. A drawer, closed cabinet, or box works better than an open shelf near a window.
Store candles flat or upright in a stable position, never stacked, since beeswax stays slightly softer than paraffin even at room temperature and can deform under weight over time. Temperatures above roughly 80°F risk softening detailed shapes, so avoid attics, car interiors, or anywhere that gets warm in direct sun.
Wrap finished candles loosely in tissue paper or place them in a breathable box rather than sealed plastic. Beeswax can develop a light white surface haze called bloom, a natural, harmless result of the wax’s composition. It wipes off easily with a soft cloth or a brief pass of gentle warmth from your hand, and it has no effect on burn quality.
Properly stored, a beeswax candle holds its detail and scent for a year or longer, considerably longer than most paraffin blends, which is one more reason careful storage is worth the extra few minutes it takes.
What I’ve Learned Making Beeswax Candles in Latvia Since 2015
Latvian Candles has been a family operation since 2015, and in that time we’ve built out more than 180 silicone mold designs, largely because no single mold shape ever satisfies a crafter for long. The itch to try a new cavity, a new detail level, a new size, is part of what keeps this craft interesting.
If you’re new to mold work, expect your first five to ten candles to be a learning curve, not a showcase. Wick sizing takes real trial runs to dial in, and most beginners underestimate how much shrinkage beeswax produces compared to soy. Give each candle a full cure of at least 24 to 48 hours before judging the burn. A candle that looks slightly off right after unmolding often firms up and finishes cleanly once fully cooled.
Start with a simpler cavity shape before moving to fine detail work like bee cells or folk signs. Our mold usage guide walks through mold-specific prep if you want a next step.
— Marks
Get Started With Molds Built for Beeswax
Latviancandles designs every mold specifically for beeswax, not as an afterthought to a paraffin-first catalog. That distinction removes most of the guesswork this article just walked through: cavity volumes are calculated for beeswax’s shrinkage rate, detail depth is tuned for a clean silicone release, and wick recommendations already account for beeswax’s larger burn diameter instead of a generic soy chart.

If you’re starting from zero, a starter kit is the fastest way to put this workflow into practice. A typical setup pairs one mold, like the bee cells tea lights design, with pre-sized wicks matched to that specific cavity, so you skip the multi-size test run described earlier in this article and go straight to a working recipe. For crafters ready to try more detailed cavity work, the bee cells pillar mold is a natural next step once your basic pour technique is solid.
Browse the full collection of over 180 beeswax mold designs and pick the shape that matches where you are in the craft right now.
Sources
For readers who want to go deeper on any single step covered here, these resources are worth bookmarking:
- Latvian craft / instructional document on candle making (Sveču instrukcija)
- Candle Making How To: Step-by-Step Guide for Beginners - Village Craft & Candle
- Candle Making: Complete Guide to Waxes, Wicks, Fragrance, Testing & Safety - DIY Products 101
- How to Make Candles - A Beautiful Mess
FAQ
What temperature should I pour beeswax into a silicone mold?
Melt beeswax to roughly 145 to 150°F, then let it cool a few degrees before pouring, since pouring too hot causes cracking and pouring too cool leaves a rough finish.
Why does my beeswax candle have a sinkhole in the middle?
Beeswax shrinks more than soy or paraffin as it cools, creating a dip around the wick. Reserve 5 to 10 percent of your batch and pour a thin top-up layer once the surface has firmed but is still warm.
Do I need a bigger wick for beeswax than for soy candles?
Yes. Beeswax burns denser than soy, so size up two to three increments from a soy wick chart and test each size in identical mold cavities before committing to a full batch.
Can I use stearin with silicone candle molds?
No. Stearin degrades silicone over repeated use. Pure beeswax is the safer choice for keeping detailed silicone molds usable for dozens of pours.
How long should a beeswax candle cure before burning it?
Give a molded beeswax candle at least 24 to 48 hours to fully cure before the first burn, since the surface can look slightly uneven right after unmolding but firms up as it finishes cooling.


