
Candle Troubleshooting Basics: Fixing Common Wax and Wick Problems
Candle troubleshooting is a short diagnostic loop: identify the visible symptom, check wick, wax, and environment, apply one small fix, then retest. Most candle problems trace back to just four sources: wick sizing, wax formulation, pouring and cooling conditions, or something in the room itself, like a draft or a cold windowsill. You rarely need to overhaul a recipe to fix a burn problem. You need to find which of those four categories is misbehaving, then make one change and watch what happens.
Here are the most common symptoms and the lowest-risk first fix for each:
- Tunneling (wax burns straight down the middle, leaving a thick outer wall): let the candle burn longer on its first burn until the melt pool reaches the edge of the container.
- Frosting (a white, chalky film on the surface): usually cosmetic in natural waxes; try a slower cool-down before assuming it’s a defect.
- Sinkholes (a crater or dip near the wick): reheat gently with a heat gun and do a small second pour to fill the gap.
- Wet spots (patches where wax pulls away from glass): warm the container before pouring and cool the finished candle more slowly.
- Mushrooming (a carbon bulb forming on the wick tip): trim the wick to a quarter inch and check for drafts.
- Heavy soot or smoking: extinguish, trim the wick, and move the candle away from vents or doorways.
- Weak scent throw: confirm the fragrance load sits within a normal working range and extend the cure time before adding more oil.
- Rough or uneven tops: pour at a slightly higher temperature and avoid disturbing the candle while it sets.
According to Stock Fragrance’s troubleshooting framework, nearly every burn issue comes down to three interacting variables: wax blend, wick series and size, and fragrance composition. Shift one of those even slightly and the burn behavior can change noticeably, which is exactly why one-variable-at-a-time testing matters more than guesswork.
Safety note: if a candle still soots heavily, overheats its container, or produces an unstable, roaring, or repeatedly self-extinguishing flame after two careful fixes, stop testing it. Retire that batch rather than pushing it further.
Key Takeaways
Most candle problems come from a wick, wax, or cooling mismatch that a single documented test can identify and fix within one or two batches.
| Point | Details |
|---|---|
| Check environment and wick first | Rule out drafts, wick trim, and burn duration before touching your wax formula. |
| Change one variable at a time | Document wax, wick, fragrance, and pour temperature so results are attributable. |
| Give every candle a full first burn | Burn two to four hours on the first light to establish an edge-to-edge melt pool. |
| Cool candles slowly and evenly | Slow, controlled cooling prevents most sinkholes, wet spots, and cracking. |
| Run a 5-candle test before scaling | Compare wick types side by side under identical conditions before a full production run. |
| Use consistent molds for beeswax testing | Latviancandles’ silicone molds hold uniform cavity geometry so cooling and wick tests stay comparable batch to batch. |
Table of Contents
- What Is Candle Troubleshooting Basics? Understanding the Diagnostic Approach
- Surface and Appearance Problems: Frosting, Sinkholes, and Wet Spots
- Fixing Tunneling, Small Melt Pools, and Uneven Burns
- Sooting, Mushrooming, and Fragrance-Related Burn Problems
- Getting Pour Temperature and Cooling Right
- Choosing and Testing Wicks: The 5-Candle Test
- Building a Systematic Troubleshooting Method
- Beeswax-Specific Troubleshooting for Molded Candles
- Safety Checks: When to Stop Troubleshooting
- Learning to Troubleshoot Like a Craft
- Get Consistent Results With Molds Built for Testing
- Sources
- FAQ
What Is Candle Troubleshooting Basics? Understanding the Diagnostic Approach
Candle troubleshooting basics means working through a structured checklist, wick, wax, temperature, and environment, before assuming a recipe is broken. It’s the difference between randomly trying fixes and actually solving the problem for good.
Most new candle makers troubleshoot backward. They see a bad melt pool and immediately blame the wax. In reality, the Wicks Unlimited guide to candle troubleshooting points out that incorrect wick size or type is the primary driver behind tunneling, mushrooming, sooting, and weak melt pools. The wick delivers fuel to the flame through capillary action, so if that mechanism is even slightly off, everything downstream looks wrong even when your wax and fragrance are fine.
This matters for how you approach every fix in this guide. Before touching your formula, rule out the cheap, reversible variables: wick length, draft, room temperature, and burn duration. Only after those check out should you consider changing wick series, adjusting fragrance load, or reformulating your wax blend. That order saves time, saves wax, and keeps you from “fixing” something that was never actually broken.
Surface and Appearance Problems: Frosting, Sinkholes, and Wet Spots
Appearance issues rarely mean a candle won’t burn safely. They mean it won’t look retail-ready, and for most of these, the cause sits in cooling rate and pour temperature rather than a bad recipe.

Frosting shows up as a white, crystalline film on the surface or sides of a candle, most often in soy and other plant-based waxes. It happens because these waxes are naturally prone to recrystallization as they cool, and it is largely cosmetic. CandleScience’s soy wax troubleshooting guide attributes much of this to cooling rate and pour temperature, and recommends controlled cooling as the primary fix. Some makers choose to embrace frosting as a natural characteristic of plant-based wax rather than fight it. Others pour at a more consistent temperature and add a slower cure to minimize it for retail sale.
Sinkholes and holes near the wick happen when wax contracts unevenly as it cools, usually because the outer layer solidifies before the wax underneath finishes shrinking. That leaves a hollow pocket. The fix is a second pour: gently reheat the surface with a heat gun, then pour a thin layer of matching wax on top to fill the gap. For candles that develop sinkholes repeatedly, slower and more controlled cooling addresses the root cause instead of patching it after the fact.
Wet spots, sometimes called wax pull-away, appear as cloudy or uneven patches where the wax has separated from the glass. This is an adhesion and shrinkage issue, not a wax defect. Pre-warming your containers before pouring and cooling the finished candles at a steadier, slower rate reduces the stress that pulls wax away from the container wall.
Pro Tip: Run a quick diagnostic before you change anything: pour two identical candles side by side, cool one at room temperature and one in a slightly warmer, draft-free spot. If the slower-cooled candle shows less frosting and fewer sinkholes, cooling rate is your culprit, not your wax.
| Appearance Issue | Likely Cause | Quick Fix | Confirming Test |
|---|---|---|---|
| Frosting | Fast cooling, wax recrystallization | Cool more slowly, adjust pour temp | Compare two pours cooled at different rates |
| Sinkholes near wick | Uneven cooling, trapped air | Heat-gun smoothing, second top-up pour | Cut a test candle in half to check for internal voids |
| Wet spots | Container too cold, adhesion failure | Pre-warm container, slow cooling | Pour into a warmed vs. unwarmed container and compare |
| Rough or cracked tops | Disturbed during set, pour too cool | Raise pour temp slightly, avoid moving candle | Let one batch sit undisturbed for full cure |
Whether you fix frosting or leave it depends on what you’re selling. A rustic, hand-poured candle sold at a craft fair can carry natural frosting as part of its charm. A candle destined for a boutique retail shelf next to polished commercial competitors probably needs the smoother, more controlled finish that comes from tighter temperature management.
Fixing Tunneling, Small Melt Pools, and Uneven Burns
Tunneling is the most common burn complaint, and it starts on the very first burn. If a candle doesn’t melt edge-to-edge that first time, it tends to keep tunneling down the center for the rest of its life, because wax “remembers” the shape of its first melt pool.
The fix begins before you even light a match: give the candle a proper first burn. Most containers need somewhere between two and four hours on that initial burn, depending on diameter, according to The Soapery’s candle troubleshooting guide. Wider candles need the longer end of that range. Cutting the first burn short is the single most common cause of chronic tunneling.
If tunneling persists even after a proper first burn, work through this sequence:
- Check wick exposure. Trim the wick to a quarter inch before every burn. A wick buried in old soot or leaning to one side burns unevenly.
- Look for drafts. A window, vent, or ceiling fan pulling air across the flame will push heat to one side of the candle, causing lopsided melting even with a correctly sized wick.
- Confirm burn duration. Give the candle at least one to two hours per burn so the melt pool has time to develop, and never blow it out the moment the surface looks wet.
- Only then, test wick size. If tunneling continues after two clean burns with proper timing and no drafts, the wick is likely undersized for that container’s diameter, and it’s time to size up rather than keep adjusting burn habits.
DIY Products 101’s guide to fixing wick problems recommends this exact approach: apply the smallest, safest correction first, and only escalate to a wick change after repeated failures. Jumping straight to a bigger wick before ruling out drafts or short burns wastes wax and can overcorrect into a flame that’s too large and sooty.
As a rough rule of thumb, wick diameter needs to scale with container diameter, and wick series (cotton braided, paper-core, wooden) changes how aggressively that wick burns even at the same size. A wick that’s perfect for a 3-inch tin can drown in a 4-inch tumbler because it can’t generate enough heat to maintain a full melt pool across that wider surface.
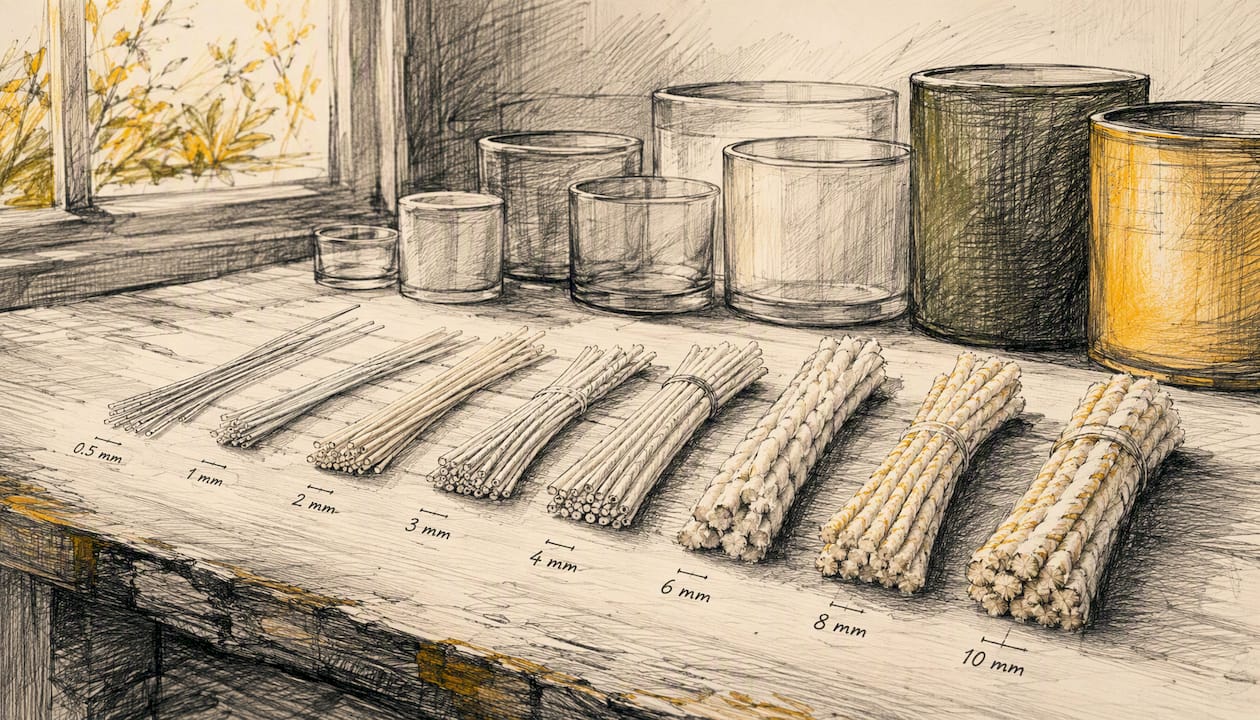
Pro Tip: When a wide container keeps underperforming even with a larger single wick, don’t keep sizing up indefinitely. Test two smaller wicks placed symmetrically instead of one oversized wick. Multiple wicks often produce a cleaner, more even melt pool in containers wider than about four inches than a single wick ever will.
Sooting, Mushrooming, and Fragrance-Related Burn Problems
Mushrooming is the carbon bulb that forms at the tip of a wick after repeated burns, and it’s usually the visible warning sign before heavier soot follows. Both point to incomplete combustion, meaning the flame isn’t fully burning off everything the wick is pulling up.
The immediate care fixes are simple: extinguish the candle, let it cool completely, trim the mushroomed tip away, and remove the candle from any draft before relighting. This alone solves the problem for a large share of sooting complaints, since drafts are one of the most common triggers for incomplete combustion.
Fragrance load plays a bigger role in sooting than most beginners expect. Too much fragrance oil overwhelms the wick’s ability to burn cleanly, leaving unburned oil to smoke off as soot. The Soapery suggests a starting fragrance range around 6% to 10% as a reasonable testing baseline, adjusted based on your specific wax and wick combination. Going well above that range without retesting your wick size is one of the fastest ways to turn a clean-burning candle into a smoky one.
Fragrance oil sweating, sometimes called leaching, shows up as small oily beads on the candle’s surface. It happens when the wax can’t fully bind the amount of fragrance oil you’ve added. If you see consistent sweating across a batch, that’s a signal to reduce your fragrance percentage rather than trying to mask it with a different pour temperature.
If heavy soot, a persistent mushroom cap, or oil sweating continues after you’ve corrected fragrance load and wick trimming twice in a row, that formula needs reformulating, not more testing at the same ratios. Continuing to burn a candle that soots heavily despite basic corrections isn’t a testing opportunity anymore. It’s a sign the wax, wick, and fragrance combination doesn’t work together, and it should be pulled from your production line.
- Trim wick to a quarter inch before every single burn, no exceptions.
- Keep fragrance load within a tested range for your specific wax and wick pairing.
- Watch for oily beads on the surface as an early sweating signal, not a fragrance density boost.
- Never add fragrance oil above manufacturer-recommended thresholds just to strengthen scent throw.
Getting Pour Temperature and Cooling Right
A huge share of the appearance and burn problems covered so far trace back to two decisions made before the candle ever hits your workbench: how hot the wax was when you poured it, and how it cooled afterward.
Different wax families need different pour temperatures, and there’s no single “correct” number. Soy waxes generally pour well in the mid-120s to mid-130s Fahrenheit range, while some paraffin and blended waxes run hotter. Beeswax tends to need higher pour temperatures because of its higher melting point. Pouring even 10 degrees below the recommended band for your wax can trap air and encourage sinkholes; pouring too hot can slow the set and increase shrinkage. Testing within your wax supplier’s recommended range, rather than a single fixed number, gives you room to fine-tune for your specific container and climate.
Container prep matters just as much as temperature. Follow this basic checklist before every pour:
- Warm your containers slightly before pouring, especially in cooler workspaces. A cold glass surface accelerates cooling on contact, which is a major driver of wet spots.
- Clean and dry every container thoroughly. Dust or residue creates weak adhesion points where wax pulls away later.
- Pour at a stable room temperature, ideally somewhere without direct sun, drafts, or air conditioning blowing directly on the setting candles.
- Let candles cool undisturbed for several hours before moving them, and avoid the temptation to speed things up in a refrigerator, which cools unevenly and often causes cracking.
- Cure for the recommended period, often around two weeks for scented candles, before testing the burn.
Pro Tip: For larger or intricately shaped molds, wrap the mold in a towel or place it in an insulated box right after pouring. Slowing the cooling rate this way reduces the internal stress that causes cracks and sinkholes in complex shapes, especially multi-cavity designs where different sections of wax cool at different speeds.
Choosing and Testing Wicks: The 5-Candle Test
Guessing at wick size wastes wax and time. A structured test tells you, with actual data, whether your wick choice is right instead of leaving it to a hunch.
Wick material matters as much as size. Cotton braided wicks are versatile and widely used across wax types. Paper-core wicks tend to self-trim and work well in container candles. Wooden wicks produce a distinctive crackle and burn cooler, which suits some soy and coconut blends but often struggles in denser waxes like beeswax without careful sizing. Beeswax in particular tends to need a slightly larger wick than soy or paraffin at the same diameter, because it burns hotter and denser.
The 5-candle test is the standard way to compare wick options without wasting a full production run. Pour five otherwise identical candles, changing only the wick between them, and burn each one under the same conditions for a fair comparison.
Here’s how to run it:
- Pour five candles with the same wax, container, fragrance, and pour temperature. Vary only the wick.
- Label each candle clearly with its wick type and size.
- Burn each one for the same duration, ideally the standard three to four hour window per session, over the same number of sessions.
- Record results after each burn: melt pool diameter, flame height, any soot or mushrooming, and how quickly the wick draws down.
- Compare across the batch to find the wick that reaches a full melt pool without excess soot or an oversized flame.
A simple notebook or spreadsheet table works well for tracking this:
Once you have this data, the decision tree is simple: if the melt pool never reaches the edge, size up. If soot or mushrooming shows up early, size down or switch series. If two wicks perform similarly, choose the one with the cleaner, more consistent flame across repeated burns rather than the fastest melt pool. Full guidance on matching wick type to your specific wax can shortcut a lot of this trial and error, especially for beeswax candles where wick behavior differs noticeably from soy or paraffin.
Building a Systematic Troubleshooting Method
The fastest way to waste a batch of wax is to change three things at once and then have no idea which change actually fixed, or broke, the burn. A disciplined, one-variable-at-a-time method is what separates makers who solve problems permanently from makers who keep guessing.
Work through problems in this order: rule out environment and burning habits first (drafts, burn duration, wick trimming), then wick care and sizing, and only then consider formulation or container changes. This hierarchy matters because environmental fixes are free and instant, while formulation changes cost wax, time, and cure days. According to Stock Fragrance’s guidance, changing only one variable at a time is what makes results attributable, so you actually learn something from each test rather than muddying the data.
A basic test plan looks like this: change one variable, burn at least two candles under that new condition, and wait a full cure cycle if fragrance or wax percentage is involved before judging the result. Jumping to conclusions after a single burn, especially with fragrance changes, often leads to false fixes because scent throw can still improve slightly during the first week of curing.
Keep a burn log with consistent fields for every batch: date, batch ID, wax type, wick type and size, fragrance percentage, pour temperature, ambient room temperature, and the result of the first burn. This sounds tedious until the third or fourth time you solve a problem in minutes because your notes already show you tried that exact fix two months ago.
Pro Tip: Give every recipe version a short, consistent name like “Beeswax-Tea-01” instead of vague labels like “test 3” or “new batch.” When you’re comparing ten burn logs six weeks from now, a clear naming convention is the difference between finding your answer in thirty seconds and re-running a test you already completed.
Beeswax-Specific Troubleshooting for Molded Candles
Beeswax behaves differently than soy or paraffin in ways that catch a lot of makers off guard the first time they switch. It expands and contracts more with temperature swings, binds fragrance more strongly, and is noticeably more sensitive to cooling rate, especially in molded shapes rather than simple jars.
That expansion and contraction is the root cause of most cracking and sinkhole problems in molded beeswax candles. A multi-cavity silicone mold cools unevenly by nature: the thin edges of a shaped cavity set faster than a thicker center section, and that mismatch creates internal stress as the wax pulls in different directions while solidifying. The result is edge cracks or hollow pockets that don’t show up until you demold and inspect the piece.
A maker working with a detailed multi-cavity mold noticed consistent edge cracking on one cavity design but not others. The fix wasn’t a different wax blend. It was pouring at a slightly lower point within the recommended beeswax range and staging the demolding, letting the piece sit an extra 20 minutes before releasing it, so the outer wax had fully set before any handling stress hit the edges.
For complex shapes, uneven cooling is usually the dominant cause of structural defects, not a flaw in the wax itself. Staged demolding and insulated cooldowns reduce that internal stress considerably, especially on pieces with fine detail or thin sections.
Pre-warming your mold before pouring matters here more than with a simple glass jar. A cold silicone mold pulls heat away from the wax unevenly across its cavities, which is exactly the kind of temperature mismatch that leads to surface defects later. Properly sized cavities that match your intended wick placement also reduce stress on the finished piece, since a wick sitting off-center in an oversized cavity forces wax to cool unevenly around it.
If you’re working through repeated cracking issues on a specific mold design, it’s worth checking whether reusable silicone molds built specifically for beeswax are giving you the cavity consistency your test batches need, since inconsistent cavity geometry from one pour to the next makes it nearly impossible to isolate whether a defect came from your wax or from mold variation itself.
Pro Tip: Beeswax candles generally need a wick one size larger than you’d use for soy or paraffin at the same diameter, because beeswax burns hotter and denser. If you’re seeing a small melt pool on a beeswax pour despite a wick that worked fine in soy, size up before assuming the wax formulation is the problem.
Safety Checks: When to Stop Troubleshooting
Most candle problems are cosmetic or performance related, not dangerous. A small number of symptoms cross into genuine safety concerns, and those deserve a hard stop rather than another round of testing.
Watch for these red flags:
- Excessive, continuous soot that doesn’t clear up after trimming the wick and removing drafts.
- A container that feels hot to the touch on the outside, not just warm, which signals the flame is burning too large or too hot for that vessel.
- An unstable, roaring, or flickering-high flame that doesn’t settle after a fresh trim.
- A wick that repeatedly self-extinguishes even after basic corrections. ContentBase’s guide on diagnosing a weak flame recommends inspecting wick height, surface wax buildup, and drafts once the candle has cooled, and treating persistent failure after those corrections as a signal to retire the candle rather than keep relighting it.
The immediate low-risk actions for any of these signs are the same: extinguish the flame, let the candle cool completely, move it away from drafts and flammable materials, and trim the wick before ever relighting it. Apply that sequence twice. If the same red flag shows up a third time, stop. That candle needs reformulating or it needs to be retired, not relit for another attempt.
Container integrity deserves its own mention here. Any crack, chip, or visibly uneven glass thickness in a container is a reason to retire that candle outright, regardless of how the wax or wick is performing. A structurally compromised vessel can fail under heat stress even if the burn itself looks normal.
One safety rule with no exceptions: never place a candle vessel on a stove burner or in an oven to “fix” a sinkhole, soften a surface, or speed up a pour correction. Direct stovetop or oven heat on a finished candle risks cracking the glass, igniting the wax directly, or creating a container failure that has nothing to do with the wick or wax formulation you were trying to troubleshoot in the first place.
Learning to Troubleshoot Like a Craft
Most of the fixes in this guide are simple once you know them. What actually shortens the learning curve is treating troubleshooting as a habit of documentation rather than a series of one-off rescues.
Every maker I’ve watched improve quickly shares one trait: they write things down before they change anything. Not a vague mental note that “the frosting seemed worse that time,” but an actual record of pour temperature, wick size, and cure time next to a description of the result. That habit turns a frustrating, repeating problem into a solvable pattern within two or three batches instead of ten.
Curiosity matters more than perfectionism here. A cracked candle or a sooty flame isn’t a failure. It’s data. The maker who treats every batch as a small experiment, changing one variable, recording the result, and comparing it against the last test, ends up with a far more reliable process than the one chasing a “perfect” recipe from a single Pinterest post. Small, repeatable improvements compound. A single lucky fix rarely does.
If you’re building out that habit, it helps to read around the edges of your own testing. Latviancandles keeps a running set of guides for common beginner mistakes and mold-specific notes that pair well with your own burn log, not as a replacement for testing your own batches, but as a way to recognize a pattern faster when you see it in your own workshop.
Get Consistent Results With Molds Built for Testing
Every fix in this guide assumes you can trust your container’s geometry from one pour to the next, and that’s exactly where inconsistent molds quietly sabotage a maker’s testing. If cavity size shifts slightly between pours, you can’t tell whether a sinkhole came from your cooling rate or from a mold that measures differently than it did last batch. Latviancandles builds its silicone molds specifically for beeswax, with cavity dimensions that stay consistent pour after pour, so your wick-to-wax ratio and cooling behavior stay comparable across a full 5-candle test.

For makers running their first structured tests, the DIY candle making starter pack bundles molds and basic accessories sized for exactly this kind of controlled experimentation. If you’re troubleshooting a multi-cavity design specifically, the Bees on Cells mold is a good reference point for even cavity geometry in a shape that’s otherwise prone to uneven cooling. Start with a small batch, log your pour temperature and cooling setup for each candle, and compare results before committing to a full production run.
Sources
- Soy Wax Trouble Shooting Guide — CandleScience
- Candle troubleshooting — The Soapery
- Common candle problems guide — Stock Fragrance
- How to Fix Common Candle Wick Problems - DIY Products 101
- Candle Wick Keeps Going Out: Diagnose A Weak Flame — ContentBase
- An introduction to candle troubleshooting — Wicks Unlimited
Wick selection is best cross-checked against the Wicks Unlimited and ContentBase guides above, wax-specific defects against CandleScience, and fragrance testing ranges against The Soapery’s guidance.
FAQ
What is the 3-hour rule for candles?
The 3-hour rule means burning a candle for roughly three to four hours per session, long enough to reach a full melt pool without letting the container overheat, and it’s a common benchmark cited in first-burn recommendations like The Soapery’s.
What is the 5-candle test?
The 5-candle test is a wick comparison method where you pour five otherwise identical candles, change only the wick between them, and burn each under the same conditions to see which wick produces the cleanest, most complete melt pool.
Why is my candle not burning properly?
Uneven or weak burning almost always traces back to wick size, a draft, a short first burn, or a fragrance load outside the tested range for that wax and wick combination; check those four variables before assuming your recipe is broken.
How do I know when to stop troubleshooting and retire a candle?
Stop after two careful fixes if the candle still soots heavily, the container feels hot to the touch, the flame stays unstable, or the wick keeps self-extinguishing, since those signs point to a safety issue rather than a simple adjustment.
What causes frosting on beeswax and soy candles?
Frosting is a white, crystalline film caused mainly by cooling rate and pour temperature in plant-based waxes, and it’s largely cosmetic; some makers embrace it as a natural finish while others slow the cooling process to minimize it.


