
Beeswax Makers: Avoid Tears, Choose Food Grade Silicone With 3–4 mm Walls
Food-grade silicone is generally safe and well suited for making beeswax candles, provided the mold carries a real heat rating and comes from true silicone rather than a silicone-look plastic. It handles beeswax’s higher pour temperatures, releases detailed shapes cleanly, and holds up over dozens of pours. The results still depend on you: wicking, pour temperature, and curing time matter just as much as the material itself.
TL;DR:
- Choose silicone molds with a minimum wall thickness of 3 to 4 millimeters to withstand repeated pours without tearing.
- Confirm the mold’s temperature rating is well above beeswax pouring temperatures, typically around 185°F (85°C).
- Use molds made from RTV or LSR silicone, avoiding hybrids or plastics that are not designed for hot wax pouring.
- Always run a small test pour to check for fit, shrinkage, and mold performance before producing a full batch.
- Store molds in a cool, dark place and avoid oil-based release agents to prolong their lifespan.
Table of Contents
- What Does “Food-Grade” Actually Mean for Candle Molds?
- Silicone vs. Plastic Molds: Why Silicone Usually Wins
- How Do You Use a Silicone Mold for Beeswax Candles?
- How Do You Keep Silicone Molds Lasting Longer?
- Where Should You Buy Molds, and What Should the Listing Show?
- What I’ve Learned Making Molds Built Specifically for Beeswax
- Get Molds Built for Beeswax From the Start
- Sources
- FAQ
What Does “Food-Grade” Actually Mean for Candle Molds?
“Food-grade” is a material safety claim, not a durability promise. It tells you the silicone itself is free of toxic fillers and safe for contact with food or skin, which matters for candles you’ll handle constantly and burn indoors. It says nothing about wall thickness, heat tolerance under repeated pours, or how well the mold will survive beeswax’s shrinkage as it cools.
Reading a product listing correctly means checking several things beyond the “food-grade” label itself. Silicone mold makers typically use one of two base systems, RTV (room-temperature vulcanizing) or LSR (liquid silicone rubber), and the processing differences between these and rigid plastics affect how well a mold holds fine detail and resists tearing.
Before adding anything to your cart, look for these specs on the product page:
- Temperature range: a listed maximum heat tolerance, ideally well above beeswax pour temperatures
- Silicone type: confirmation it’s RTV or LSR silicone, not a silicone-coated plastic hybrid
- Wall thickness: at least 3 to 4 millimeters for anything you plan to reuse
- Wick hole or base plug: a defined opening rather than a guess-and-poke setup
- Construction: single-piece pour versus a split mold needing external support bands
- Shipping and return policy: clear terms in case the mold arrives damaged or mislabeled
Red flags are just as telling as good specs. Walk away from listings with no temperature rating at all, vague wording like “silicone-like material,” walls so thin you can see light through them, or a blunt warning that says “not for hot use.” Any of those signals a mold built for cold-process soap or resin, not for pouring molten wax.
Silicone vs. Plastic Molds: Why Silicone Usually Wins
Silicone beats plastic for shaped candle work because it flexes. That elasticity lets you pull a finished candle out of tight undercuts, sharp points, and textured surfaces without cracking either the mold or the wax. Plastic molds are rigid: they demold well for simple cylinders but fight you on anything with detail, and they usually need a release spray to let go at all.
Silicone’s combination of nonstick surface, heat resistance, and elasticity is what makes it the default choice for intricate shapes like honeycomb cells, fluted tapers, and holiday figures. That said, quality varies. Thin-walled or bargain silicone can still tear, especially around a mold’s narrowest points after repeated stretching.
- Silicone: flexible, detail-friendly, tolerant of undercuts, minimal release agent needed
- Plastic: rigid, cheaper per unit, better suited to smooth cylinders and mass production
- Metal: fastest cooling, glossy finish, but zero flexibility for anything but straight-sided pillars
Plastic and metal molds still make sense for high-volume glossy pillars where speed and shine matter more than shape complexity.
Pro Tip: If you’re torn between two molds of the same design, pick the one with the thicker wall every time. Detail rarely suffers from an extra millimeter of silicone, but durability always suffers from too little.
How Do You Use a Silicone Mold for Beeswax Candles?
The workflow matters more than most beginners expect, because beeswax shrinks harder than paraffin or soy as it cools, and that shrinkage is where sinkholes and cracked wicks come from.
- Prep the mold. Wash it, dry it fully, and if it’s a floppy or oversized shape, drop it into a rigid outer box or wooden frame so it holds its form during the pour.
- Set the wick. Thread it from the base hole through to the top, seat the tab or knot flat against the base plug, and secure the top with a wick bar or a toothpick laid across the opening to keep it centered.
- Check pour temperature. Beeswax typically pours hotter than soy or paraffin, often in the range of 185°F (85°C), though your exact wax blend and studio temperature will shift that number.
- Pour along the side wall, not straight down the wick, to reduce trapped air. Pause partway through so vents can release bubbles before topping off.
- Top off a second time once the surface sinks slightly, which it usually does with beeswax’s higher shrinkage rate. This second-stage pour fills the well that forms around the wick.
- Cool fully at room temperature. Rushing this step in a refrigerator or cold room is a common cause of cracked or dull-surfaced candles.
- Demold by peeling. Roll the silicone down and away from the candle like removing a sleeve, rather than pulling the candle straight out.
Beeswax runs significantly hotter at pour time than typical soy or paraffin recipes, which is exactly why a mold’s stated heat tolerance matters more for beeswax makers than for anyone working with softer waxes.
If a candle sticks on release, don’t force it. A quick pass in the freezer for two or three minutes contracts the wax just enough to break the seal, and the standard demolding method still applies once it loosens: peel the silicone away rather than pulling the wax out of it.
How Do You Keep Silicone Molds Lasting Longer?
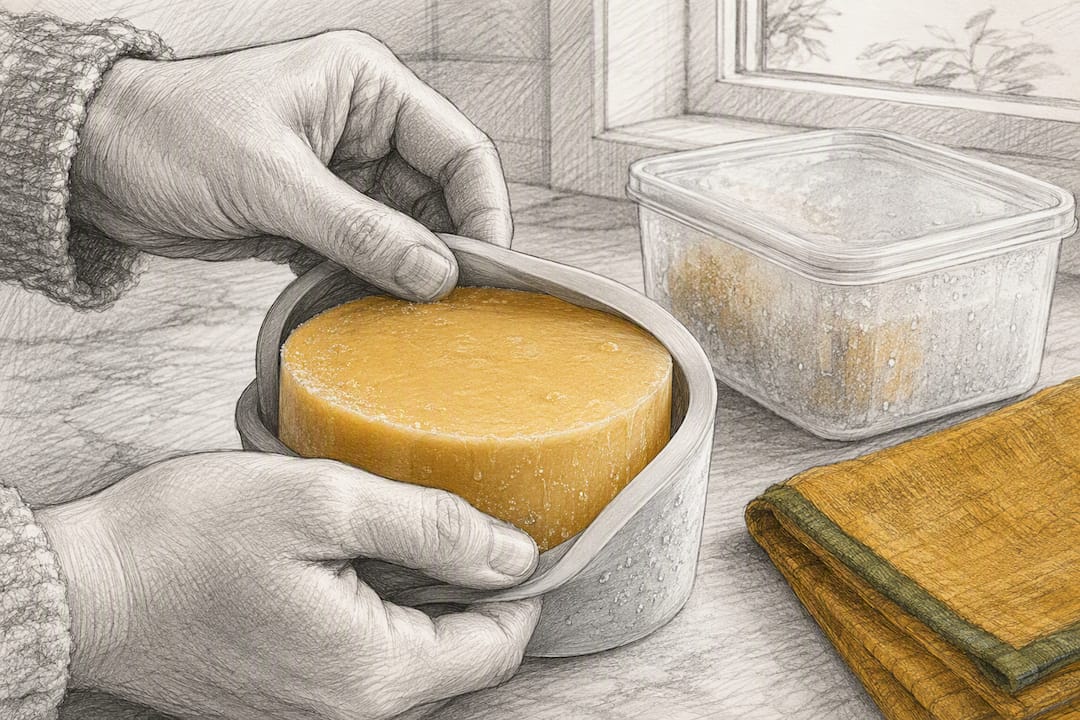
A well-made mold should survive hundreds of pours if you treat it right. Clean it with mild soap and warm water only. Skip harsh solvents, bleach, or abrasive scrub pads, since they degrade the silicone’s surface over time and dull fine detail. Let every mold air-dry completely before storing it.
- Favor molds with 3 to 4 millimeter walls or thicker for anything you’ll pour repeatedly
- Avoid overstretching thin or floppy molds; use a support shell or box for oddly shaped designs
- Store flat or hung in a cool, dark spot away from UV light and solvent fumes
- Replace a mold once you spot thin patches, visible tears, or spots that no longer spring back to shape
Oil-based release agents are rarely needed with beeswax and can shorten a mold’s lifespan if used often. A light dusting of cornstarch handles the rare sticky pour, particularly with high-soy blends or very intricate patterns, without leaving residue that degrades the silicone.
Where Should You Buy Molds, and What Should the Listing Show?
Look for the same checklist on every product page before you buy: a clear material claim, a stated temperature rating, wall thickness in millimeters, visible wick and base plug detail in the photos, and a return policy that covers shipping damage.
- Material and temperature rating stated plainly, not buried in a FAQ
- Wall thickness given in millimeters, not vague terms like “thick” or “sturdy”
- Photos showing the wick hole, base plug, and any seam lines
- Customer photos of finished candles, not just the empty mold
- A workable return window in case the mold arrives flawed
Specialist sellers who design specifically for beeswax cut down the guesswork considerably, since molds built for one wax type reduce trial-and-error compared to generic molds meant for soy or paraffin. If you’re sourcing beeswax itself alongside your mold, beeswax cakes from a dedicated supplier give you consistent material to test pour temperatures against. Local buyers should also confirm delivery windows before ordering, especially around holiday seasons when mold demand spikes.
What I’ve Learned Making Molds Built Specifically for Beeswax
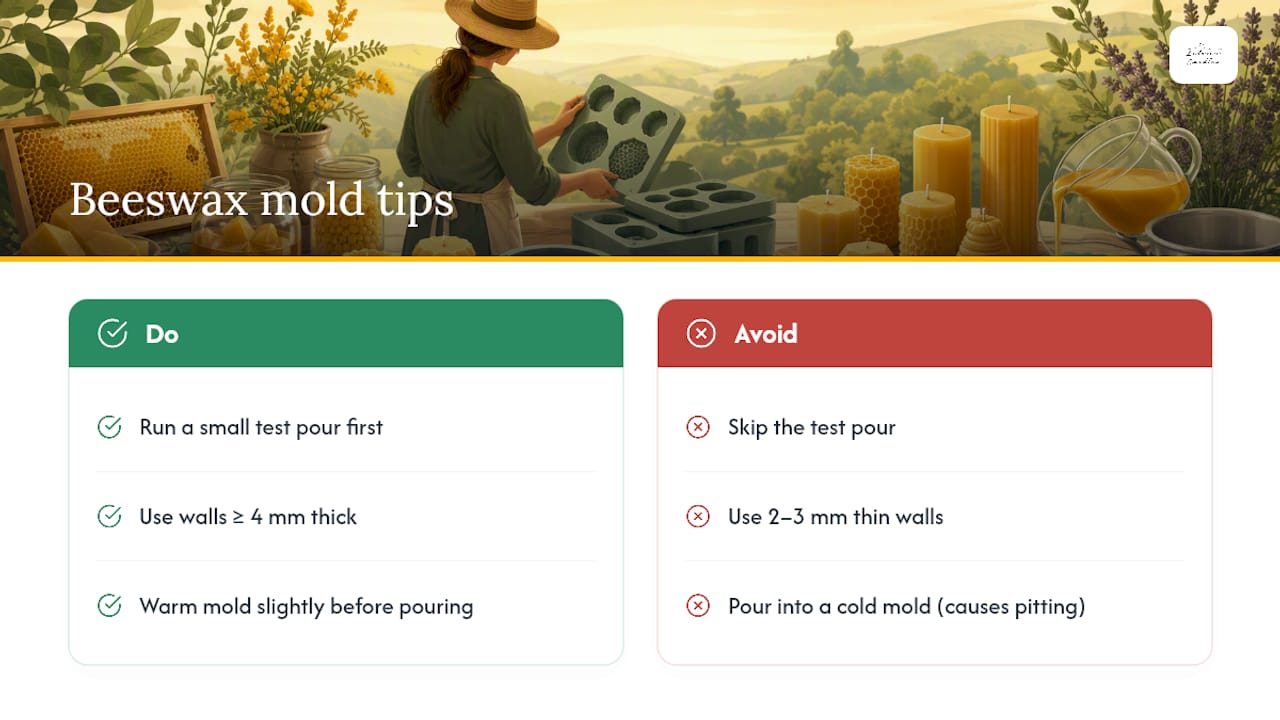
Marks has spent years designing and testing silicone molds specifically for beeswax’s particular quirks, such as higher pour heat, stronger shrinkage, and sensitivity to air bubbles. The biggest mistake beginners make isn’t choosing bad silicone. It’s skipping the test pour.
Run one small pour before committing a full batch to a new mold, especially a detailed one like bee cell patterns. Walls at 4 millimeters or thicker survive far more repeat pours than the industry-standard 2 to 3 millimeters. And in a cold workshop, warm the mold slightly before pouring. It costs you two minutes and prevents the surface pitting that cold silicone causes almost every time.
— Marks
Get Molds Built for Beeswax From the Start
Some molds are designed specifically for beeswax’s higher pour heat and stronger shrinkage, with wall thickness, wick placement, and heat tolerance intended to meet specialized requirements, reducing the risk of purchasing molds without a temperature rating.

Browse the full catalog of silicone molds made for beeswax candles to find a shape that fits your first project, then check the wick holder accessories so your wick stays centered from the first pour. If you want to start with a design built specifically for beeswax texture and detail, the Bees on Cells silicone mold is a solid first choice. Pick one shape, grab a wick holder, and run a single test pour before committing to a full batch.
Sources
- Vai silikona veidne ir labāka par plastmasu? - Zināšanas
- How to Use Silicone Candle Molds Properly (Temps, Wicking, Demolding) - DIY Products 101
- Ultimate Wax Candle Molds Guide (2025) | Candle Making Craft
FAQ
Is Food-Grade Silicone Safe for Candle Making?
Yes, food-grade silicone is safe for candle molds as long as it’s genuine silicone with a stated heat rating, not a plastic hybrid marketed loosely as “silicone-like.” The food-safety label confirms material purity but doesn’t guarantee wall thickness or durability, so check those specs separately.
What Wall Thickness Should a Beeswax Candle Mold Have?
Aim for at least 3 to 4 millimeters, and go thicker for molds you plan to reuse often. Thinner walls under 3 millimeters tend to tear after fewer pours, especially around detailed or narrow sections.
Do I Need a Release Agent for Silicone Candle Molds?
Usually not with beeswax, since silicone’s nonstick surface releases most beeswax candles cleanly on its own. A light cornstarch dusting helps with sticky high-soy blends or very fine detail, but skip oil-based sprays, which can degrade silicone over repeated use.
What Temperature Should I Pour Beeswax At?
Beeswax generally pours hotter than soy or paraffin, often near 185°F (85°C), though your exact blend and room conditions may shift that slightly. Always test a small pour first to confirm the temperature works for your specific mold.
Where Can I Buy Reliable Silicone Molds for Beeswax?
Latvian Candles builds molds specifically for beeswax’s pour heat and shrinkage, with wall thickness and wick placement matched to that wax rather than adapted from a soy or paraffin design. Current prices and the full range are listed on the Latvian Candles catalog.


