
10 Minute Fix for Stuck Beeswax Candles in Custom Silicone Molds
Make a basic silicone mold yourself when you need a one-off shape or want to test a design idea, and order custom silicone molds when you need repeatable results for a small product line. Both routes work well for beeswax, but beeswax adds a wrinkle neither shortcut skips: you still need to test your wick size on every new shape. Start with one small prototype pour before committing to a full batch, and if a finished candle sticks in the mold, ten minutes in the refrigerator usually frees it without damage.
TL;DR:
- Silicone molds are easier to use for textured beeswax candles and can withstand the heat, but they may trap air bubbles if poured too quickly.
- The mold’s lifespan depends on silicone grade, wall thickness, pouring temperature, and handling, with platinum cure silicone lasting longer over repeated uses.
- Making a reusable silicone mold requires a master model with draft, careful silicone mixing, bubble removal, and a test pour before full production.
- Beeswax’s slight shrinkage and natural scent require specific wick testing for each shape, using partial pours and the top-up method to prevent sinkholes.
- Custom molds should specify material type, cavity count, lifespan, surface finish, and venting, with European vendors offering easier import and consistency advantages.
Table of Contents
- What makes pielāgotu sveču formu izgatavošana easier with silicone?
- How do you make a reusable silicone mold for beeswax candles?
- Why does beeswax need different casting and wick-testing steps?
- What should you specify when ordering custom candle molds?
- How do you clean, store, and extend the life of a silicone candle mold?
- Should you buy from a local craft supplier or an EU mold maker?
- Choosing between DIY and ordering for your small business
- Where to buy ready-made beeswax molds instead of building your own
- Sources
- FAQ
What makes pielāgotu sveču formu izgatavošana easier with silicone?
Custom candle mold making, or pielāgotu sveču formu izgatavošana, comes down mostly to material choice, and silicone wins that argument for most beeswax work. It flexes enough to release detailed shapes without tearing, holds fine texture like bee-cell patterns, and tolerates the heat of poured beeswax without warping.
Silicone isn’t flawless. It can trap air bubbles during pouring if you rush, and its surface finish is matte rather than glossy, which some crafters need to buff out on the finished candle. Compared with polycarbonate, which resists heat to about 120°C and works well for rigid pillar shapes, silicone is far easier for extracting textured or undercut beeswax pieces, though polycarbonate holds a crisper glossy surface for simple cylinders.
What actually determines mold lifespan:
- Silicone grade: platinum cure silicone generally outlasts tin cure for repeated beeswax pours.
- Wall thickness: thin walls flex more but tear sooner around detailed cavities.
- Pour temperature: pouring wax too hot accelerates silicone degradation over time.
- Handling: gentle demolding technique matters more than the silicone brand you buy.
How do you make a reusable silicone mold for beeswax candles?
Build the master model first. Whatever shape you want to replicate, whether it’s a carved taper or a found object like a pine cone, needs enough draft (a slight taper) so the cured silicone can peel away without tearing. Plan your wick channel now, not after the mold is cured; a thin metal rod or skewer set into the master leaves a clean channel to run the wick through later.
Materials and tools checklist:
- RTV (room temperature vulcanizing) silicone rubber, mixed with catalyst at the ratio your product specifies
- A release agent, unless your silicone brand claims to be self-releasing
- A mold box or container slightly larger than your master
- A digital scale, mixing cups, and a stir stick
- Thin needles or a heat gun for bubble control
Step-by-step process:
- Suspend the master inside your mold box using a pin or peg so it hangs without touching the sides.
- Mix silicone and catalyst according to the product’s ratio, stirring slowly to limit air incorporation.
- Pour a thin base layer, roughly 1 centimeter, and let it partially set before pouring the remainder around the master.
- Pop surface bubbles with a thin needle as the silicone levels out.
- Let the mold cure fully, typically around 12 hours, before disturbing it.
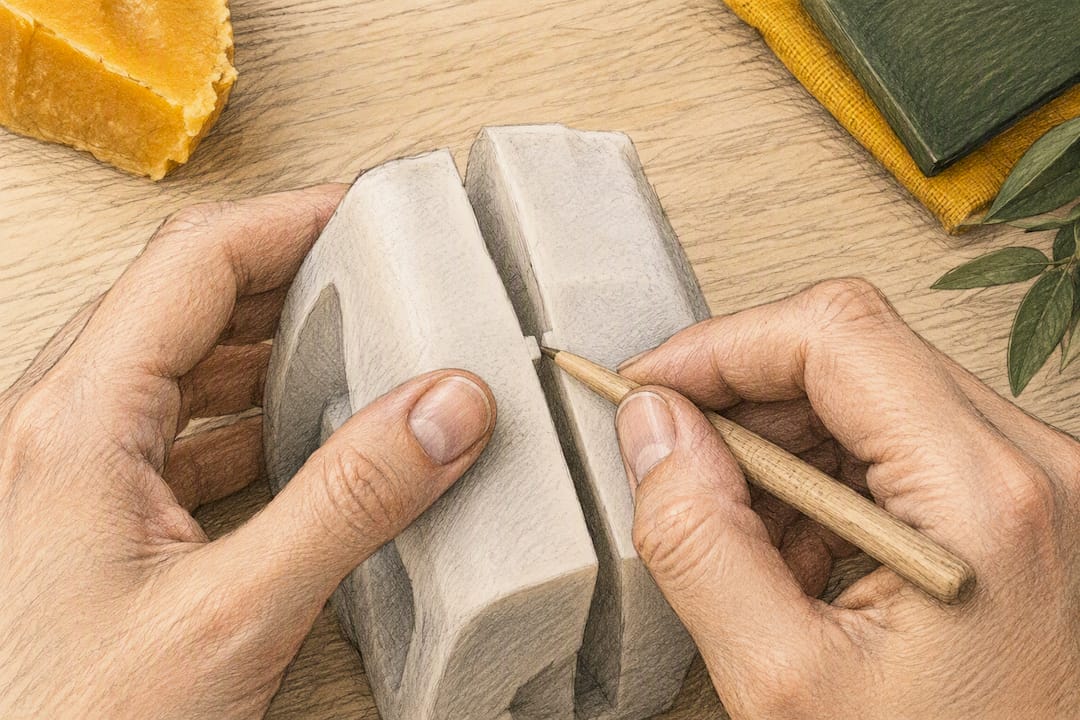
- Trim the flash line and split multi-part molds carefully, scoring alignment marks at the top and bottom so the halves reassemble true.
- Run a test pour with beeswax before trusting the mold for a full batch.
Work in a ventilated space, keep silicone off skin until cured, and label your catalyst ratio on the container so your next batch is repeatable.
Pro Tip: Score a small notch at the top and bottom seam of a multi-part mold before you separate the halves. It takes five seconds and saves you from guessing which edge lines up with which on your next pour.
Why does beeswax need different casting and wick-testing steps?
Beeswax shrinks slightly more than paraffin as it cools, which can leave sinkholes in the center of a pillar if you pour it all at once. Pour most of the wax, let it set partially, then top it up to fill the dip before it fully hardens. Beeswax also carries its own natural scent and burns hotter than some soy blends, which throws off wick sizing if you borrow a wick chart built for a different wax.
There’s no universal wick size for a new mold shape. Test each design with multiple burns, watching the melt pool width and soot output, and adjust the wick size up or down until the candle burns clean edge to edge.
Quick first-pour checklist:
- Pour at room temperature, away from drafts or direct sun.
- Use the top-up method to prevent sinkholes.
- Anchor the wick straight before the wax sets.
- Let the candle cool fully before attempting to demold it.
If a finished candle won’t budge, set the mold in the refrigerator for about 10 minutes. The wax contracts just enough to break its grip on the silicone without cracking the candle.
What should you specify when ordering custom candle molds?
A clear spec sheet gets you an accurate quote and avoids surprises when the mold arrives. Vendors need specifics, not vague descriptions, to price a job correctly.
- Material and shore hardness: tell the supplier you need silicone rated for beeswax pours, not a generic soap or resin mold.
- Cavity count: single cavity molds cost less per unit but take longer per batch; multi-cavity molds cost more upfront but speed up production.
- Pour lifespan target: specify how many pours you expect the mold to survive so the supplier picks an appropriate wall thickness.
- Surface finish and tolerances: note whether you need a matte, satin, or textured finish, and how tight the dimensions need to be.
- Draft and venting: confirm the design includes enough taper and air vents for clean demolding.
Simplifying geometry, reducing cavity count, and choosing one-part molds for straightforward shapes all bring the price down. Lead times for small custom batches often run a few weeks once a sample is approved. Treat vague pricing, no sample policy, or a refusal to share a material datasheet as reasons to look elsewhere.
How do you clean, store, and extend the life of a silicone candle mold?
Warm water and a mild dish soap remove wax residue without degrading the silicone; skip abrasive scrubbers, which scratch fine detail out of textured cavities like bee-cell patterns. Properly cleaned and stored molds hold up across hundreds of pours, while neglected ones crack or lose detail far sooner.
- Store molds flat or hung, never folded, to avoid permanent creases.
- Keep them out of direct sunlight and away from heat sources like radiators.
- Check seams and thin walls periodically for small tears.
- Patch minor nicks with a silicone repair caulk rated for food-safe use; replace a mold once tears reach a cavity wall.
Pro Tip: Hang your molds on a wall rack by their pour spout instead of stacking them in a drawer. Stacked silicone slowly deforms under its own weight, and a warped mold changes your candle’s dimensions before you even notice.
Should you buy from a local craft supplier or an EU mold maker?
Check four things before ordering from any supplier: a material datasheet, a willingness to send a sample, clear shipping terms, and upfront clarity on VAT and import handling.
- Ask for the silicone’s shore hardness and pour-count rating in writing.
- Request a small sample piece to test pour quality and finish before committing to a full mold.
- Confirm whether shipping quotes to Latvia include customs handling or leave it to you.
- EU-based mold makers generally simplify VAT and import paperwork compared with suppliers outside the EU, which matters more for repeat orders than one-off buys.
Local craft suppliers tend to turn prototypes around faster since there’s no cross-border shipping wait. EU vendors usually win out for consistent small production runs, where uniform quality across dozens of molds matters more than speed on a single piece. When you get a sample, run at least one real beeswax pour on it and check the melt pool, the demolding ease, and how the surface holds up after that first burn.
Choosing between DIY and ordering for your small business
The decision flow is simple: prototype first, validate the wick, then decide whether to scale it yourself or order a production mold. DIY molds cost less upfront but eat your evenings; ordered molds cost more per unit but free your time for wax work and sales. Keep a test log for every wick size and pour temperature you try. That log is what turns trial and error into a repeatable process.
— Marks
Where to buy ready-made beeswax molds instead of building your own
If your test log tells you a shape is worth repeating, buying a finished mold saves the hours you’d spend cutting a master and pouring silicone yourself. A specialized vendor makes silicone molds engineered specifically for beeswax, not repurposed soy or paraffin designs, with over 180 artisan patterns ranging from bee cells to tapers and holiday shapes.

For catalog shapes and repeatable production runs, browse the full mold collection to find a design that matches what your test pours already proved works. Need something no catalog covers? A custom candle mold can be commissioned for $100 to $300 depending on complexity. Pair either route with dedicated wick holders built for silicone molds, which keep your wick centered through the exact top-up pours described above. Check current designs and request a custom quote directly on the vendor’s website.
Sources
- Beeswax candle moulds — practical tips
- Creative candles do it yourself — how to make molds and castings
FAQ
Can you make a silicone candle mold at home?
Yes, using RTV silicone rubber mixed with a catalyst, poured around a master model and left to cure for about 12 hours. A basic mold box, mixing cups, and a digital scale for accurate ratios are the only tools required beyond the silicone itself.
How do you get a stuck beeswax candle out of a mold?
Place the mold in the refrigerator for about 10 minutes. The cold makes the wax contract slightly, which breaks its grip on the silicone without cracking the candle.
How many pours will a custom silicone mold last?
A well-designed silicone mold used and cleaned correctly can handle hundreds of beeswax pours over its lifetime, according to workshop routines documented by Latvian Candles. Mishandling, excessive heat, and abrasive cleaning shorten that lifespan considerably.
How much does a custom candle mold cost to order?
Latviancandles prices custom candle molds between $100 and $300 depending on complexity, available directly through the Latviancandles store. Ready-made designs from the existing catalog don’t carry a published price online and are best checked on the product page directly.
Do you need a different wick for every mold shape?
Yes. Wax type, fragrance, dye, and mold geometry all affect burn performance, so testing multiple burns per design is the only reliable way to find the correct wick size for a new shape.


