
Fix Beeswax Pouring Mistakes for Hobby Candle Makers: 5 to 10% Top Up
Most failed beeswax pours trace back to four things: wrong pour temperature, unfiltered wax, the wrong wick, or cooling too fast. Fix those and sinkholes, cracks, tunneling, and crackling mostly disappear. The short version: check your thermometer, filter and re-melt cloudy wax, match wick size to your mold diameter, and let everything cool slowly, with a second pour ready if you’re working with a pillar or thick-walled mold.
TL;DR:
- Pour beeswax at a temperature between 155°F and 165°F to prevent sinkholes or cracks caused by cooling issues.
- Filter raw wax thoroughly through multiple stages to remove debris that can clog wicks and cause surface pits.
- Use a burn test to confirm proper wick sizing, ensuring the flame is neither too small nor too tall or sooty.
- Re-melt and filter contaminated wax to eliminate particulate residue or moisture that causes sputtering or crackling during burning.
- Preheat molds and avoid drafts to promote even cooling, and consider a second pour or relief holes for thick or detailed molds.
Table of Contents
- Common Beeswax Pouring Mistakes and Their Warning Signs
- How to Diagnose and Fix Each Beeswax Problem
- Your Prevention Checklist Before the Next Pour
- The 5 to 10 Percent Top-Up Method for Detailed Molds
- Expect Mistakes, Track Them, and Keep Testing
- Supplies That Make Fewer Mistakes Possible
- Sources
- FAQ
Common Beeswax Pouring Mistakes and Their Warning Signs
Beeswax is less forgiving than paraffin or soy. It shrinks more as it cools, holds onto plant debris from the hive, and reacts badly to temperature swings. Most beeswax pouring mistakes fall into one of these eight categories, and each leaves a distinct fingerprint on the finished candle.
- Pouring too hot or too cold. Wax poured too hot shrinks hard as it drops in temperature, leaving sinkholes and surface cracks. Wax poured too cool sets before it can fill the mold evenly, creating visible jump lines or a lumpy, uneven surface.
- Skipping filtration. Raw beeswax carries pollen, propolis, and bits of comb debris called slumgum. Left in, it clogs wicks and pits the candle’s surface.
- Wrong wick size or type. A wick too thin drowns in its own melt pool. One too thick burns a narrow tunnel straight down the middle, leaving unmelted wax on the sides.
- Pouring into cold molds or exposing them to drafts. A cold mold cools the wax’s outer edge before the core sets, which invites cracking and uneven texture.
- Cooling too fast. A candle rushed into the fridge or set near a fan or open window cools unevenly, and beeswax responds with cracks or a collapsed center.
- Skipping the second pour or relief holes. Pillars and thick molds shrink as they cure, and a single pour almost always leaves a void beneath the surface.
- Trapped moisture. Water hiding in reclaimed or poorly rendered wax turns to steam once the candle burns, producing sputtering, crackling, or small pops at the flame.
- Not leaving headspace. Beeswax contracts as it solidifies, and a mold filled to the brim overflows or leaves a rough, domed top instead of a flat one.
If you’re just getting your bearings on beeswax basics, Latvian Candles’ guide to melting beeswax at home covers the groundwork this article builds on.
How to Diagnose and Fix Each Beeswax Problem
Sinkholes and cracks almost always trace back to pour temperature and cooling speed. Beeswax is commonly poured somewhere in the 155°F to 165°F range (68°C to 74°C), though sources vary slightly depending on additives and mold type. Pour your first layer, let it set until a slight indentation or dip appears near the wick, then poke one or two thin relief holes down to the void with a skewer. Re-melt a small amount of reserved wax, warm it a few degrees above your original pour temperature, and fill the depression. Wrapping the mold in a towel or a layer of cardboard while it cools slows heat loss from the outside, which keeps shrinkage even instead of concentrated in one spot.
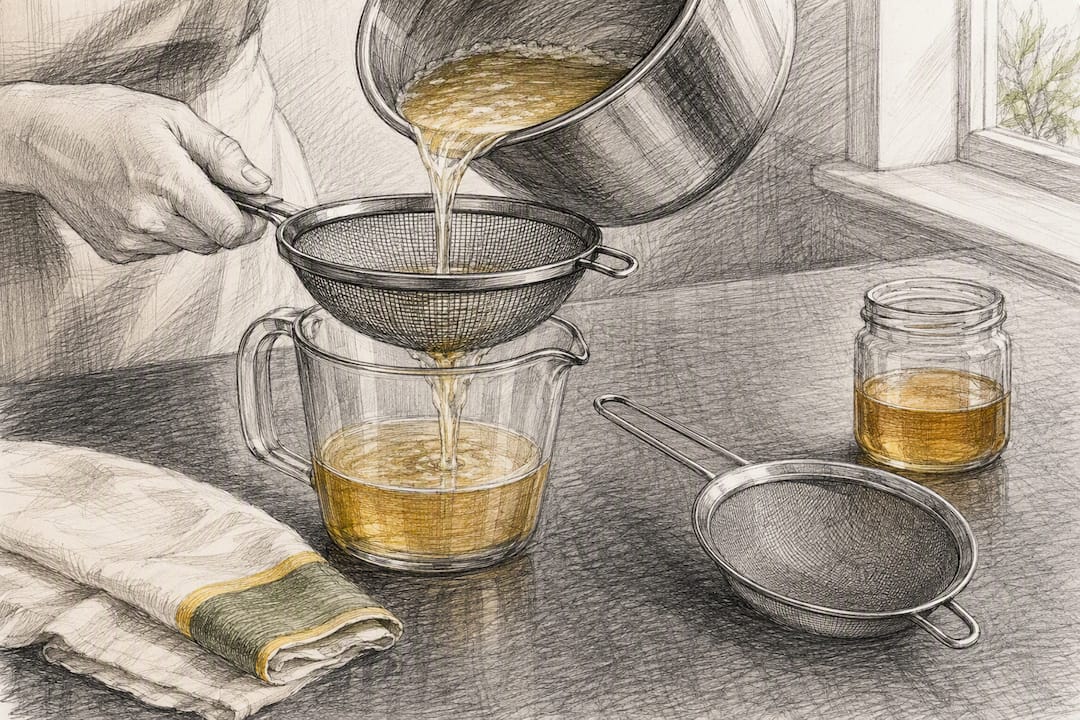
Slumgum and filtration problems show up as gritty specks, dark flecks, or a wick that keeps drowning despite being the right size. The fix is a re-melt and re-filter cycle: pour the melted wax through a coarse strainer first, then step down to cheesecloth or muslin, and finish with a finer nylon or silk mesh if the wax still looks cloudy. This isn’t a sign of ruined wax. Slumgum is just particulate residue from pollen and propolis, and it filters out cleanly with patience and the right mesh progression.
Wicking issues need a burn test, not a guess. Light the candle and watch it for at least four hours. A flame that drowns in its own pool, or a melt pool that never reaches the mold’s edge, means the wick is undersized. A tall, flickering flame with soot and a narrow tunnel straight down the center means it’s oversized. Change one wick size at a time and re-test. Chasing two variables at once (wick and wax blend, say) makes it impossible to tell which change actually fixed anything.

Water contamination sounds like tiny pops and crackles once the candle is lit, and sometimes shows as cloudy streaks in the cooled wax. Hold your melted wax at pouring temperature for several extra minutes before you pour. That gives residual moisture time to evaporate. Never walk away from wax on active heat, and keep a lid nearby in case of unexpected sputtering.
Demolding trouble in detailed silicone molds usually means the wax hasn’t fully cured, or it went from hot straight to cold with no buffer. Let the candle reach room temperature first, then chill it in the refrigerator for 10 to 20 minutes. That brief chill causes slight contraction that releases the wax without tearing fine details. If it still won’t budge, don’t force it. Warm the mold gently in your hands for a minute, or accept the loss and re-melt rather than risk splitting a good mold.
Pro Tip: Keep a small notebook next to your pouring station. Log your melt temperature, pour temperature, wick size, and mold for every batch. When something goes wrong, that log tells you exactly which variable to change next time instead of leaving you to guess.
Your Prevention Checklist Before the Next Pour
A little preparation prevents most of the mistakes above before they happen. Run through this before you pour:
- Use a thermometer every time. Track both melt and pour temperatures rather than eyeballing color or texture.
- Melt low and slow. A double boiler or a dedicated slow cooker set on low avoids scorching and gives you better control than direct heat.
- Filter in stages. Coarse strainer first, then cheesecloth or muslin, then a finer mesh if needed, following the same staged filtration process used for processing raw beeswax.
- Check a wick chart before you commit. Match wick size to your mold’s diameter, then confirm it with a real burn test rather than trusting the chart alone.
- Preheat your mold or container. A warm mold slows the outer cooling that causes cracking.
- Kill the drafts. Pour away from open windows, fans, or air conditioning vents.
- Keep the room temperature steady. Big swings during cooling are one of the most overlooked causes of cracked pillars.
- Do a visual check and a test burn before calling a batch finished. Record what worked in your notes for next time.
For anyone still working through basics like tunneling or drowned wicks, Latvian Candles’ candle troubleshooting primer walks through wick sizing in more depth.
The 5 to 10 Percent Top-Up Method for Detailed Molds
Detailed silicone molds, like bee-cell patterns, shrink unevenly because thin walls and raised details cool faster than the thicker core. Latvian Candles’ workshop has settled on a top-up method that reserves 5 to 10 percent of the melted batch specifically for this problem. Pour the main volume first, let it set until a slight dip forms near the center, then poke one or two relief holes if the surface looks tight. Reheat the reserved wax to a few degrees above the original pour temperature and top up the depression. Let the candle cure fully at room temperature before demolding.
A top-up is enough when the dip is shallow and the rest of the pour looks clean. Full re-melt and filtration is the better call when the wax looks cloudy or gritty, not just sunken. Work near ventilation, keep your mold on a stable, flat surface while it sets, and give it the brief refrigerator chill described earlier before attempting to pull it from a detailed mold.

Expect Mistakes, Track Them, and Keep Testing
Every candle maker ruins a batch or two before things click. That’s normal, not a sign you’re doing it wrong. Log your wax source, temperature, wick, and mold for each pour, and let the burn test have the final word. Change one variable at a time, and try the top-up method above on your next detailed mold.
— Marks
Supplies That Make Fewer Mistakes Possible
A lot of pouring problems come down to equipment, not skill. A mold with uneven wall thickness will cause shrinkage headaches no matter how carefully you pour, and a flimsy wick holder can shift mid-pour and throw off your whole candle. Some silicone molds are designed specifically for beeswax’s shrinkage behavior, which is why detailed shapes like bee-cell patterns hold up well through the top-up method described above.

If you’re setting up a workspace from scratch, the DIY candle making starter kit bundles molds with the basics (wick holders, a starter mold set) so you’re not troubleshooting equipment gaps on top of pouring technique. Browse the full collection of silicone candle molds to find a shape suited to your skill level, and start your next batch with gear that’s already built for how beeswax actually behaves as it cools.
Sources
- Thriving Hives: Processing and Using Beeswax - Candles and Cosmetics | USU
- Beeswax and candles (Beeculture)
- Preventing Sinkholes: Tips For Perfect Beeswax Candles | CyCandle
- 6 tips for demolding wax projects (CandleScience)
FAQ
What temperature should I pour beeswax at?
Most guidance clusters around 155°F to 165°F (68°C to 74°C), though the exact number shifts slightly depending on your mold and any additives in the wax.
Why does my beeswax candle have a sinkhole in the middle?
Sinkholes form when the wax shrinks unevenly as it cools, usually from pouring too hot or cooling too fast; a relief hole and a warm top-up pour fix most cases.
How do I know if my wick is the wrong size?
Run a four-hour burn test. A wick that drowns in melted wax is too small, and one that tunnels straight down with soot and a tall flame is too large.
Can I reuse beeswax that has slumgum or debris in it?
Yes. Re-melt it and filter through progressively finer materials, coarse strainer first, then cheesecloth or muslin, then nylon or silk if needed, until it runs clean.
Why does my beeswax candle crackle or sputter when I light it?
That usually means trapped moisture. Hold the melted wax at pouring temperature a few extra minutes before pouring to let residual water evaporate.
How do I get a beeswax candle out of a detailed silicone mold without damage?
Let it reach room temperature first, then chill it in the refrigerator for 10 to 20 minutes; the slight contraction usually releases fine details cleanly.


