
Candle Retail Customer Education Strategies for Beeswax Makers
Teach one rule before anything else: the mold dictates the wax, and the wax dictates the wick. Retailers who lead with that sentence, then show a single pour workflow, cut buyer confusion fast. Candle Making Craft’s guide traces a significant proportion of beginner failures back to improper mold preparation, not bad wax or a weak wick.
- Product-rule template: “This mold works best with beeswax poured at [X]°F using a size [Y] wick.”
- 30-45 second video script: (1) show the mold and its wall thickness, (2) pour at the correct temperature with a digital thermometer in frame, (3) demold using the freezer trick.
- Cheat sheet: one downloadable page mapping cavity size to wick style and size.
Pro Tip: Put the product-rule sentence directly under the “Add to Cart” button. Customers read that line before they read anything else on the page.
Key Takeaways
Teaching customers that the mold determines wax and wick choice, before they buy, is the single highest-leverage education strategy in beeswax retail.
| Point | Details |
|---|---|
| Lead with the pairing rule | State mold-wax-wick logic in one sentence on every product page, not buried in a blog post. |
| Publish specs and burn-test data | List wall thickness, max temperature, and wick size range next to the “Add to Cart” button. |
| Fix common failures with a table | Sinkholes, cracking, and sticking each have a known, specific quick fix worth publishing. |
| Bundle education into starter kits | Ship pre-matched wicks, a thermometer, and a printed cheat sheet with every beginner mold. |
| Latviancandles applies this directly | Its starter kit collection and product pages pair specs with beeswax-first guidance for new makers. |
Table of Contents
- What Belongs on a Silicone Mold Product Page?
- Which Wax, Mold, and Wick Combination Actually Works?
- How Do You Walk a Customer Through the Mold-to-Candle Process?
- Why Do Candles Sink, Crack, or Stick in the Mold?
- Which Content Formats Actually Reduce Buyer Anxiety?
- What Should Go in a Beginner Beeswax Starter Kit?
- How Do You Package an Education-First Starter Kit?
- Sources
- FAQ
What Belongs on a Silicone Mold Product Page?
A mold product page should answer every question a buyer would otherwise email you about. That means specs, not just photos.
Publish these details on every listing:
- Wall thickness in millimeters (4mm or thicker for repeated use)
- Cavity dimensions, including depth
- Recommended wax types, with beeswax listed first
- Maximum safe pour temperature for the silicone
- Suggested wick size range for that cavity
- Whether a rigid mold box is required for support
- Expected pour lifespan before the mold shows wear
Pair the spec list with trust signals: a short burn-test protocol summary, an SDS link for the wax you recommend, real customer photos, and reported burn times with scent-throw notes. A quality-standards page that explains how specs get verified builds more confidence than any five-star badge alone.
| Element | Why it matters |
|---|---|
| Wall thickness (mm) | Determines how many pours the mold survives before tearing |
| Max pour temperature | Prevents customers from melting or warping the silicone |
| Wick size chart | Removes the single most common source of return requests |
| Burn-test summary | Shows real performance instead of a marketing claim |
Keep the micro-copy simple: a one-line product rule, a “best for beeswax makers” sentence, one safety bullet about hot wax, and a link to the downloadable cheat sheet.
Which Wax, Mold, and Wick Combination Actually Works?
The mold decides which wax works. Silicone flexes enough to release soy, paraffin, and beeswax, but each behaves differently once poured. Soy has lower shrinkage, typically below 15%, and releases cleanly at cooler pour temperatures, according to Candle Making Craft. Beeswax shrinks moderately and pours hotter, but it still performs well in silicone when you manage temperature and cooling correctly.
Beeswax melts at roughly 147 degrees Fahrenheit and does best with a slow double-boiler melt rather than direct heat, according to Carolina Honeybees. Pour too cool and you get poor detail capture; pour too hot and you invite sinkholes as the mold retains heat during cooling. A second pour around 45 minutes after the first fills any sinkhole before it sets permanently.
Some retailers recommend blended pillar waxes, often a 70/30 ratio, to balance hardness with the workability beeswax alone can lack, per Candle Culture. That blend approach suits customers who want beeswax’s look without its full shrinkage behavior.
| Cavity size | Wick style | Typical size range |
|---|---|---|
| Small (tea light, under 2 in.) | Cotton, flat-braid | Small (e.g., CD-6 to CD-8) |
| Medium (pillar, 2-3 in.) | Cotton or hemp | Medium (CD-10 to CD-14) |
| Large (pillar, over 3 in.) | Hemp, wood-core | Large (CD-14 and up) |
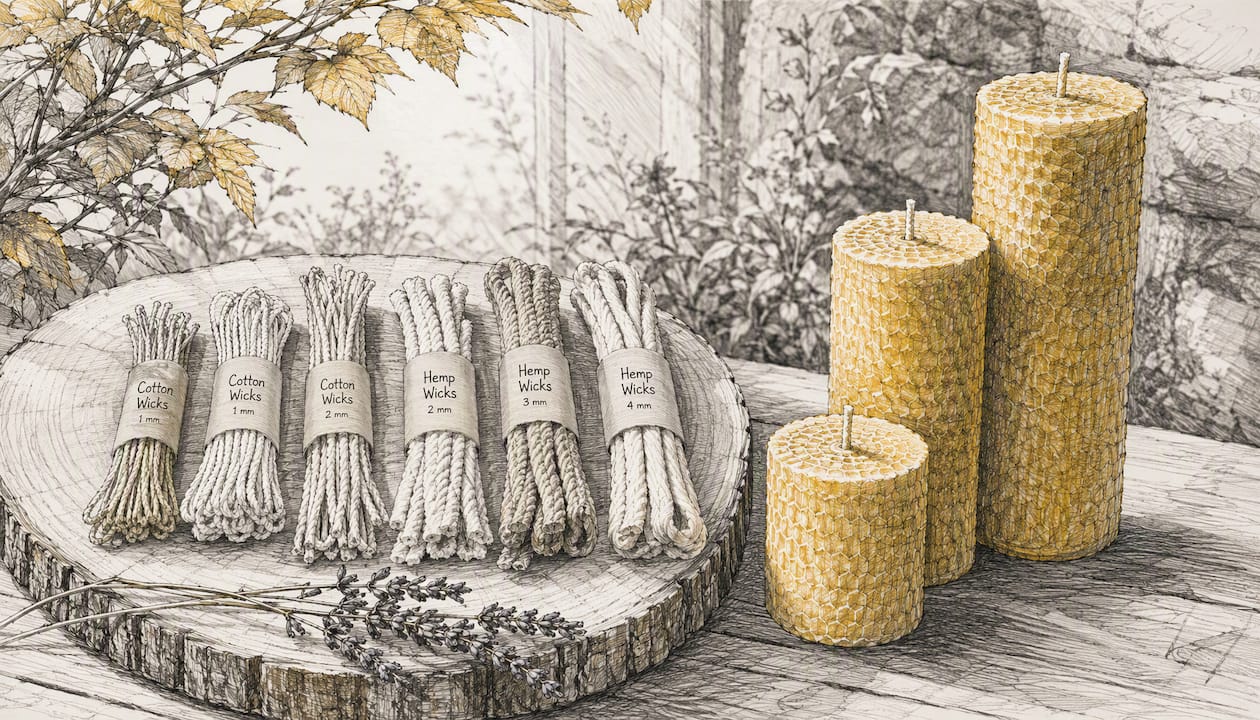
Publish your own wick-trial results and a sample burn-test summary on every product page. A beeswax-specific wick guide removes the guesswork that drives most support emails.
How Do You Walk a Customer Through the Mold-to-Candle Process?
One sentence covers the whole workflow: check the mold, secure it, pour at the right temperature, cool it slowly, then demold with patience. Break that into steps customers can follow without guessing.
- Inspect the mold. Check for splits along seams and confirm the walls feel firm, not floppy. Thin or well-used molds may need a rigid outer box for support during pouring.
- Set the wick. Center it using a wick bar or holder, then secure split molds with rubber bands so wax doesn’t leak at the seam.
- Melt slowly. Bring beeswax to around 147°F using a double-boiler method rather than direct heat.
- Pour at temperature. Aim for the range your wax supplier recommends, using a digital thermometer rather than guesswork.
- Cool in a draft-free space, ideally between 65 and 70°F, and leave undisturbed.
- Do the second pour around 45 minutes later if a sinkhole has formed at the top.
- Demold with patience. Many makers wait overnight for beeswax before demolding, since rushing can snap a candle that hasn’t fully hardened.
- Clean the mold with warm, soapy water and let it air dry before storing flat.
Pro Tip: If a beeswax pillar sticks after cooling, ten to fifteen minutes in the freezer usually loosens it without cracking the wax, per Candle Making Craft.
For mold longevity, favor walls of 4mm or thicker. Anything under 3mm can tear after 20 to 30 uses, which is exactly the kind of detail that belongs on a product page rather than discovered the hard way.
Why Do Candles Sink, Crack, or Stick in the Mold?
Most support tickets trace back to four problems, and each has a known fix.
| Problem | Likely cause | Quick fix |
|---|---|---|
| Sinkhole at the top | Slow cooling, heat retention in silicone | Second pour at a slightly cooler temperature once the top firms |
| Cracking | Cooling too fast | Warm the mold slightly or lower the pour temperature next time |
| Candle won’t release | Wax still soft or mold too warm | Freeze 10-15 minutes, then flex gently or run warm water over the mold’s exterior |
| Torn mold wall | Wall too thin for the pour or demold force | Use 4mm+ walls and a rigid mold box for detailed or floppy molds |
- Add a “when to contact us” note on packaging: ask customers for a photo, the mold’s product name, and any burn-test notes before they request a replacement.
- Recommend a light dusting of cornstarch only for sticky soy blends, never for straight beeswax, which typically releases cleanly from silicone with no additive.
Which Content Formats Actually Reduce Buyer Anxiety?
Short, specific formats outperform long guides. A pouring video under 45 seconds, a printable wick-sizing chart, and a one-page demolding cheat sheet cover most first-time questions before they turn into emails.
Structure a three-email post-purchase sequence:
- Day 0: “Here’s what to expect” plus the pouring video link.
- Day 3: Care and troubleshooting tips with the downloadable cheat sheet attached.
- Day 14: How to get the best burn, plus a request for a photo or review.
- Add a single-sided packaging insert with a QR code linking straight to the pouring video and cheat sheet.
- Track open rates and review-submission rates after adding these assets. Retailers who pair troubleshooting guides with mold purchases tend to see noticeably higher satisfaction than those relying on generic wax FAQs alone.
What Should Go in a Beginner Beeswax Starter Kit?
A well-built starter kit teaches the pairing rules by putting the right tools in the box, not by adding another instruction sheet nobody reads.
- Pre-tabbed wicks matched to common cavity sizes
- One silicone pillar mold with 4mm+ walls
- A digital thermometer
- A stainless steel pouring pitcher
- A wick centering tool
- A printed wick-sizing chart
Publish a minimum burn-test protocol alongside the kit: test three candles per mold-and-wick combination, record burn time and melt-pool formation, note wick trim frequency, then post the average burn time and recommended wick on the kit’s page. Configure at least two SKUs, a core beeswax starter and a premium pillar kit with hemp or cotton wick options, and link SDS documentation for every wax variant offered.
| Kit component | Purpose |
|---|---|
| Pre-tabbed wick set | Removes wick-sizing guesswork for first-time buyers |
| 4mm+ silicone pillar mold | Withstands repeated pours without tearing |
| Digital thermometer | Prevents overheating or underheating the pour |
| Printed wick chart | Gives a physical reference next to the workspace |
A note from the maker
I’ve watched beeswax snap from rushed demolding more times than any wax defect. Clear, specific guidance, not more marketing copy, is what stops that. Since 2015, our family has built over 180 silicone designs around this lesson. Use the resources we publish; they exist because we needed them ourselves.
How Do You Package an Education-First Starter Kit?
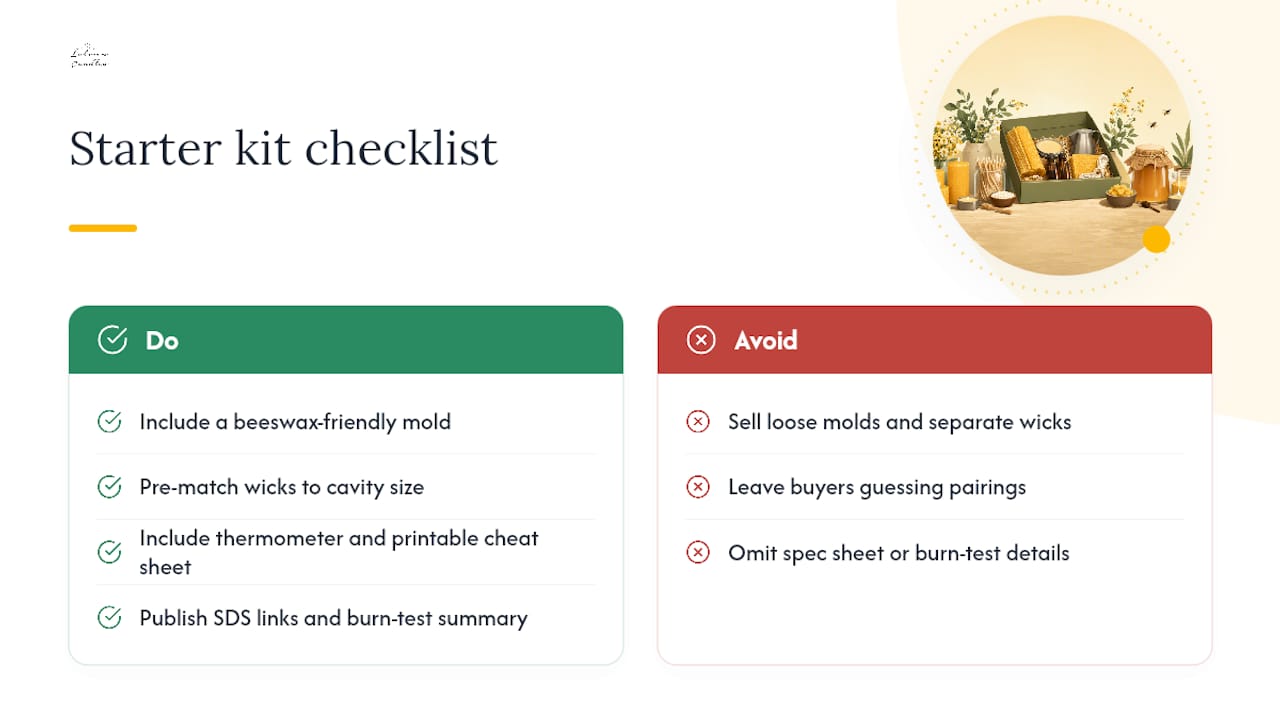
Retailers selling loose molds and separate wicks leave customers to guess at pairing on their own. An education-first bundle solves that by shipping the answer alongside the product: a beeswax-friendly mold, wicks pre-matched to its cavity size, a thermometer, and a printable cheat sheet in one box.
Latviancandles builds its starter kit collection around exactly this pairing logic, so a beginner isn’t left cross-referencing three different blog posts before their first pour. Every mold in the catalog lists wall thickness, cavity size, and a recommended wick range directly on the product page, following the same quality-standards approach covered earlier. If you’re assembling your own kit or shopping for one, check that the seller publishes SDS links and a burn-test summary before you buy, since that’s the detail that predicts whether your first candle turns out clean or sinks in the middle.
Browse the full mold catalog to see how over 180 designs each publish their own spec sheet, then add a starter kit to your cart with the pairing already worked out for you.
Sources
- Ultimate Wax Candle Molds Guide (2025) | Candle Making Craft
- DIY Candle Making Kit Materials: A Complete B2B Exporter’s Guide - Alibaba.com Seller Blog
- Making beeswax candles using silicone molds | Carolina Honeybees
- How to Use a Silicone Candle Mold - Candle Culture
FAQ
What Wick Size Works Best for a Beeswax Pillar Mold?
It depends on cavity diameter, but medium pillars in the 2 to 3 inch range typically pair with a cotton or hemp wick in the CD-10 to CD-14 range, adjusted after a burn test.
Why Does My Beeswax Candle Sink in the Middle?
Sinkholes usually form when the silicone mold retains heat and the wax cools unevenly; a second pour around 45 minutes after the first, at a slightly cooler temperature, usually fixes it.
How Long Should I Wait Before Demolding Beeswax?
Many makers wait overnight, since beeswax that’s rushed out of the mold too early is more likely to crack or snap.
Does Latviancandles Sell Starter Kits for Beginners?
Yes. Latviancandles offers a starter kit collection that pairs a beeswax-friendly silicone mold with pre-matched wicks and a printable cheat sheet.
What Mold Wall Thickness Should I Look for?
Look for at least 4mm of wall thickness for repeated use; thinner walls, under 3mm, tend to tear after 20 to 30 pours.


