
Float on First Try: Seal Tea Lights & Pour Beeswax for Hobbyists
Two methods produce reliable floating candles: pour them in shallow silicone molds for the cleanest finish, or convert store-bought tea lights for a faster project. Whichever you pick, one detail decides success or failure: the underside of a modified tea light must be fully sealed with wax, flush and smooth, or water will reach the wick and snuff the flame within minutes. Get that seal right and a tea light will burn for roughly 45 minutes to 90 minutes, on the water.
TL;DR:
- Sealing the underside of a modified tea light with wax is crucial to prevent water from reaching the wick and extinguishing the flame within minutes.
- Beeswax offers better shape retention and cleaner burn, making it ideal for mold casting, while soy and paraffin waxes have specific melting and cooling considerations.
- Properly centered wicks and even pouring at slightly lower-than-melting temperature reduce air pockets, sink marks, and uneven burning in molded candles.
- Testing each candle in water before display helps identify buoyancy issues caused by density or weight imbalance, which can be fixed with trimming or mold adjustments.
- Using eco-friendly materials like beeswax, silicone molds, and remelting leftover wax reduces environmental impact and increases the durability of floating candle projects.
Table of Contents
- What Do You Need for Peldošu Sveču Liešana?
- How Do You Pour Floating Candles in Silicone Molds?
- Can You Turn a Tea Light Into a Floating Candle?
- How Do You Test and Troubleshoot Floating Candles?
- Are Floating Candles Safe to Use Indoors and Outdoors?
- How Do You Style and Reuse Floating Candle Wax?
- How Do You Color and Scent Floating Candle Wax?
- Are Floating Candles Environmentally Friendly?
- What Do Hobbyists Get Wrong About Floating Candles?
- Where to Find Molds and Kits for Floating Candles
- Sources
- FAQ
What Do You Need for Peldošu Sveču Liešana?
Candle pouring (or peldošu sveču liešana, as the technique is known in Latvian craft circles) starts with the right wax. Beeswax floats reliably, burns cleaner than most paraffin blends, and holds detail well in a mold, which is why so many hobbyists reach for it first. Straight paraffin melts and pours easily but tends to shrink more as it cools, leaving sink marks you’ll need to fix with a second pour. A hard pillar-style soy wax is a solid middle ground for molded candles, since firmer wax blends hold their shape better during unmolding and everyday handling.
For wicks, use pre-tabbed wicks sized to your candle’s diameter. If you’re converting tea lights, the wick is already tabbed and centered. Beyond wax and wick, gather:
- A double boiler or a pouring pot set inside a water bath
- A candy or wax thermometer (don’t eyeball the temperature)
- Silicone floating candle molds, which flex for easy release and hold up to repeated pours
- A wick holder or two clothespins to keep the wick centered while the wax sets
- Scissors for trimming, plus optional fragrance oil and candle dye
Silicone molds simplify unmolding because you can peel them back rather than pry the candle loose, which matters when you’re running several batches in an afternoon. If you’d rather skip the shopping list entirely, a starter kit with molds included covers the basics in one order.
How Do You Pour Floating Candles in Silicone Molds?
Molded candles give you the cleanest edges and the most consistent shape, which matters if you’re floating several together in one bowl and want them to look uniform. This is the method to choose when appearance counts.
- Prep the mold and wick. Thread the wick through the mold’s center hole, then anchor it above the mold with a wick holder or a pencil balanced across the rim so it stays straight and centered as the wax cools.
- Melt the wax carefully. Melt paraffin to roughly 185°F, or 85°C, using a double boiler rather than direct heat. Beeswax and soy blends have their own target ranges, so check the label, but the same principle applies: low, steady heat prevents scorching and uneven color.
- Pour at a slightly lower temperature. Let the wax cool a few degrees below melting point before pouring. A slightly cooler pour reduces the pitting and rough texture that show up when wax is poured too hot.
- Watch for air pockets. Tap the mold gently on the counter after pouring to release trapped air. If you see a sink hole forming as it cools, don’t panic, just reheat a small amount of wax and top it off once the first pour has firmed up.
- Cool, unmold, and trim. Let the candle cool fully at room temperature. Rushing this with a fridge or freezer often causes cracking. Once solid, peel back the silicone mold and trim the wick to about a quarter inch.
Sink marks and shrinkage are normal, not a sign you did something wrong. A second top-up pour once the first layer has set is standard practice, not a fix for a mistake.
Pro Tip: Before you commit a whole batch to the water feature, float one test candle in a bowl first. If it tips or rides low, trim a sliver off the base rather than remelting the whole thing.
Can You Turn a Tea Light Into a Floating Candle?
Yes, and it’s the fastest route to a floating candle if you already have a bag of tea lights in the drawer. The trade-off is durability: this method is quicker, but the results are less polished and often good for a single float.
- Remove the tea light from its metal cup. Warm it slightly if it’s stuck, then pop it free without cracking the wax disc. You’ll see the metal wick holder poking through the bottom.
- Seal the underside completely. This is the step that makes or breaks the whole project. Drip melted wax over the bottom of the candle to ensure the metal tab is completely covered and sealed with a smooth, flush surface. Any gap or thin spot is where water will find the wick.
- Let it cure. Give the sealed base a few minutes to firm up completely before testing.
- Trim and test. Trim the wick if needed, then float it. A properly sealed tea light burns for about 45 to 90 minutes, which is roughly the same as a typical unmodified tea light, just now safe to float on open water.
Don’t expect to reuse the shell more than once or twice. Once the wax burns down, you’re left with a shallow pool and a bare wick holder, better off remelted into a fresh pour than patched again.
How Do You Test and Troubleshoot Floating Candles?
Float every candle in a bowl of room-temperature water before it goes anywhere near a display. Watch how it settles for the first thirty seconds. It should sit level, without tipping to one side or riding dangerously low in the water.
- Sinks or rides too low: the wax is too dense for its shape, or there’s too much wick holder weight relative to the wax volume. Trim the base flatter or switch to a shallower mold.
- Flame goes out shortly after lighting: almost always a seal failure on a modified tea light. Water has found a gap in the underside coating.
- Burns unevenly, drips to one side: the wick was off-center during the pour, or the candle’s top surface isn’t level. Both are easier to prevent than fix.
Pro Tip: Keep a small pot of remelted wax on hand while testing a new batch. A failed candle is rarely wasted material, it’s just a candle that needs a second try.
Are Floating Candles Safe to Use Indoors and Outdoors?
Use a heat-resistant, stable container. Glass bowls and ceramic vessels both work, as long as they’re wide enough that the flame stays well clear of the sides. Place the display away from curtains, table runners, and anything else that could catch a stray spark.
- Never leave floating candles burning unattended, even though they self-extinguish if they eventually take on water.
- Trim wicks before lighting so they burn evenly and don’t produce excess smoke.
- Keep the display on a stable, level surface where it won’t be bumped or tipped.
- If you’re floating flowers or greenery alongside the candles, anchor them with a small pebble or clip so they can’t drift into the flame.
These are the same fundamentals most manufacturers recommend for any open-flame water display, and they apply whether you’re setting up a dinner table or an outdoor pond feature.
How Do You Style and Reuse Floating Candle Wax?
Choose a vessel wide enough that candles have room to drift without knocking into each other or the glass. A crowded bowl looks messy and raises the chance of one candle’s flame catching a neighboring wick or decoration. Shallow, wide vessels tend to keep candles more stable than tall, narrow ones.
- Anchor submerged florals or greenery with small glass pebbles or a discreet clip so they hold position instead of drifting toward the flame.
- Add a layer of colored glass pebbles or marbles at the bottom of the vessel for a finished look without cluttering the water’s surface.
- Save leftover wax scraps and trimmed sink-mark shavings in a labeled jar. Remelt them in your next double boiler batch instead of tossing them out.
- If you’re building a centerpiece around the candles, pairing them with a seasonal floral arrangement gives the display more visual weight than candles alone.
How Do You Color and Scent Floating Candle Wax?
Dye floating candles the same way you’d dye any poured candle, but go lighter on concentration than you might for a pillar or jar candle. A softer tint reads better once the candle is sitting low in water, surrounded by light reflecting off the surface. Add dye chips or liquid dye to fully melted wax and stir thoroughly before pouring, since uneven mixing shows up as streaks once the candle cools.
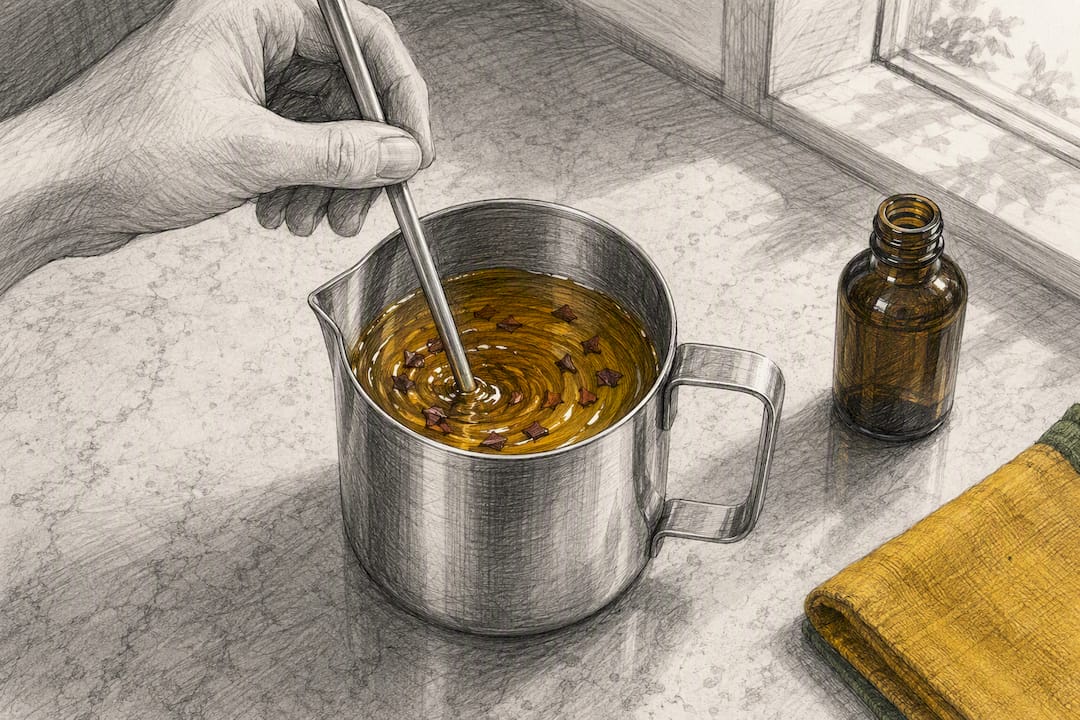
Fragrance oil needs a firmer hand. Heavy fragrance loads can change wax density enough to affect buoyancy, which matters more for a candle that has to float than one that just sits on a shelf. Stick to a modest amount, roughly half of what you’d use in a standard container candle, and add it once the wax has cooled slightly past pouring temperature so the scent doesn’t burn off in the heat.
If you’re scenting a modified tea light, skip the added oil altogether unless you’re pouring fresh wax for the seal layer. Tea light wax is already a thin volume, and extra oil in that small amount of wax throws off the density balance fast.
For color, natural dye blocks tend to distribute more evenly in beeswax than liquid dyes, which can pool if the wax isn’t stirred long enough. Test a small sample candle first if you’re chasing a specific shade, wax color shifts as it cools, so what looks right in the pot won’t always match what you see once it’s solid.
Are Floating Candles Environmentally Friendly?
Beeswax is the more sustainable choice among common candle waxes. It’s a natural byproduct of beekeeping, burns cleaner than paraffin, and biodegrades rather than lingering as petroleum residue. Paraffin, by contrast, is a fossil fuel derivative, and while it’s cheap and easy to pour, it’s not the wax to reach for if environmental impact matters to your project.
Reusable silicone molds cut down on waste that disposable plastic or metal molds generate over repeated use. A silicone mold can handle dozens of pours across years of use, unlike single-use containers that get tossed after one or two candles. Choosing cotton wicks over wire-core wicks avoids the small amount of metal that ends up in the water or wherever the spent candle is discarded.
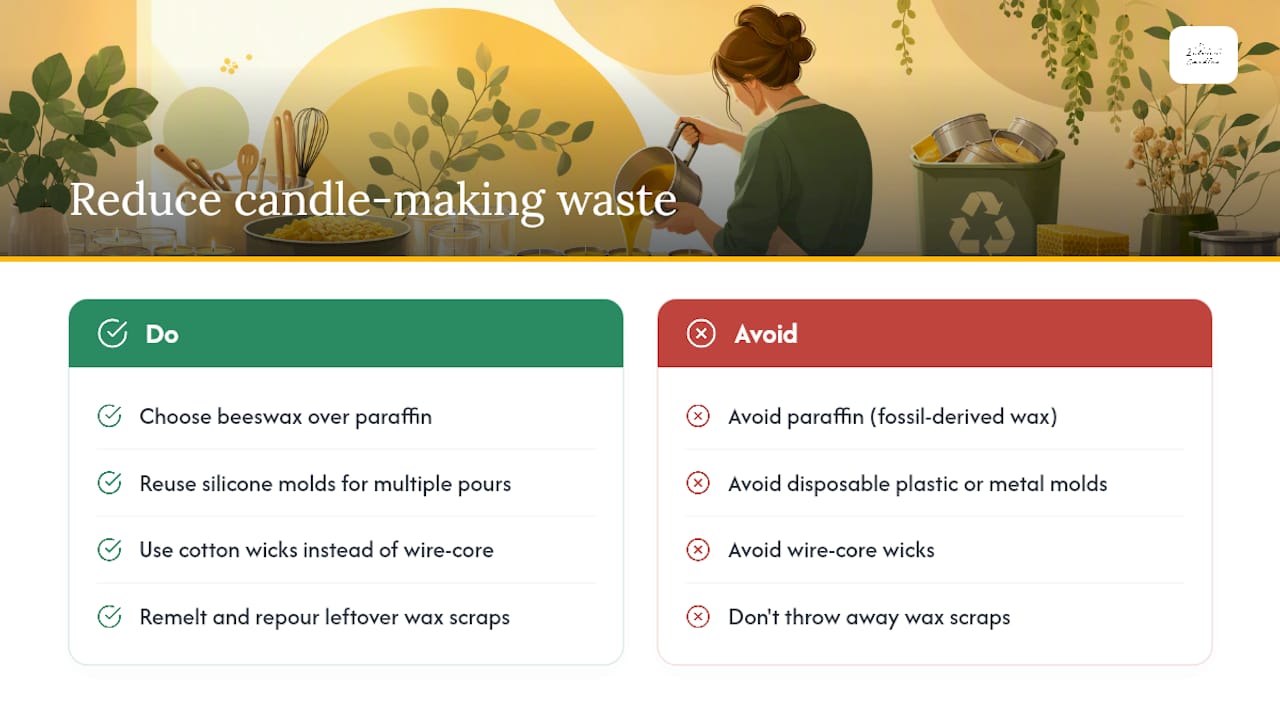
Leftover wax scraps don’t need to go in the trash. Remelting and repouring trimmed edges, sink-mark shavings, and burned-down tea light remnants keeps material in circulation instead of adding to landfill waste, and it’s a habit that costs nothing but a little patience with the double boiler.
What Do Hobbyists Get Wrong About Floating Candles?
Most guides treat floating candles as a footnote to regular candle making, a quick tea light hack and nothing more. That undersells the craft. Purpose-made shallow molds change the outcome more than most hobbyists expect, because a mold designed for a floater’s proportions produces a candle that sits level in water on the first try, rather than after two or three failed attempts with a mold meant for a tall pillar.
Beeswax rewards this kind of precision. It’s less forgiving of a sloppy mold release than soy or paraffin, but a properly shaped silicone mold means that stops being a problem. Interest in candle casting as a hands-on craft skill continues to draw beginners into local workshops, and the ones who stick with it are usually the ones who got a clean result early rather than fighting a stuck candle out of a rigid mold on their first attempt.
— Marks
Where to Find Molds and Kits for Floating Candles
Building a floating candle collection gets a lot less frustrating once you’re pouring into a mold designed for the job rather than improvising with whatever’s in the kitchen drawer. Specialized beeswax silicone molds are designed to accommodate beeswax’s specific pour and unmold behavior, with flexible silicone that helps release candles cleanly instead of cracking them.

The Bees on Cells silicone mold is shallow enough to work well for floaters and gives every candle a distinct honeycomb texture that catches light on the water’s surface. For a beginner batch, the DIY starter kit bundles molds and accessories so you’re not piecing together supplies from three different stores. Browse the full collection of over 180 silicone mold designs to find a shape that fits your next centerpiece, and place an order to have molds in hand before your next pour.
Sources
- How to Make Floating Candles: Part II — The Art of Doing Stuff
- How to Make a Floating Candle: A Simple DIY Guide — The Candle Dust (2026)
- How to Make Floating Candles — CandleScience
FAQ
How Long Do Floating Candles Burn?
A properly sealed modified tea light burns for 45 minutes to 90 minutes, roughly the same as an unmodified tea light. Molded candles burn longer depending on their wax volume and wick size.
Why Does My Floating Candle Sink or Tip Over?
The wax is too dense for the candle’s shape, or the wick holder adds too much weight relative to the wax volume. Switch to a shallower mold or trim the base flatter.
Why Does My Tea Light Go Out After a Few Minutes on Water?
The underside seal has a gap letting water reach the wick. Redo the seal so melted wax fully covers the metal tab, flush and smooth, with no thin spots.
What Wax Works Best for Floating Candles?
Beeswax and hard pillar soy wax hold their shape best for molded floaters, while beeswax also burns cleaner and biodegrades, making it the more sustainable option.
Can I Reuse a Modified Tea Light Floating Candle?
Rarely more than once or twice, since the shell is thin and the wax burns down fast. Remelt the leftover wax and shell material into a fresh batch instead of discarding it.


