
Avoid Sinkholes in Beeswax: 5–10% Top Up for Artisan Candle Makers
“Burbuļi bišu vaskā” can mean two very different things: a bee’s nectar-concentrating bubble, or a decorative bubble and honeycomb texture pressed into a beeswax candle. This guide focuses on the second meaning, the artisan candle design, and walks through how those cell-like surfaces get made, how to pour them cleanly, and where to buy molds or finished pieces.
TL;DR:
- Proper molds with fine detail are essential to producing crisp honeycomb textures on candles, with quality directly affecting the clarity of the pattern.
- Controlling wax pour temperature, pouring slowly down the mold side, and gentle tapping or vibrating the mold minimize trapped air bubbles and ensure detailed cell formation.
- A second pour around 15 to 30 minutes after the initial one helps fill any sinkholes caused by wax contraction and results in a smoother finished surface.
- Using a consistent, natural wick and trimming it before the first burn improve burn quality and prevent soot or uneven melting around the honeycomb pattern.
- Choosing simpler shapes for batch gifts is practical, while highly detailed molds are better suited for display pieces meant to emphasize the honeycomb texture.
Table of Contents
- What Does “Bubbling” Mean in Bees vs. Candle Design?
- How Are Bubble and Honeycomb Candle Shapes Made?
- Pouring Technique: Temperature, Speed, and Mold Handling
- Fixing Sinkholes and Finishing the Candle
- Buying a Bubble Candle vs. Making Your Own
- Why Trust This Guide
- When Is the Honeycomb Look Worth the Extra Work?
- Get the Molds Behind This Honeycomb Look
- Sources
- FAQ
What Does “Bubbling” Mean in Bees vs. Candle Design?
The biology comes first, and it has nothing to do with wax at all. Certain small solitary bees, including species in the genus Hylaeus, regurgitate nectar into a visible bubble at the mouth, then reabsorb it, repeating the motion to evaporate excess water. This concentrates the nectar into a thicker, tackier food source before it goes into a nest cell, a behavior documented in detail by naturalists studying the “bubble bee”. Video observers have filmed common yellow-face bees repeating this blow-and-suck cycle for what looks like a tiny, patient ritual.
Candle “bubbles” are something else entirely. They are raised, rounded cells cast or carved into the surface of solid beeswax, meant to echo the look of honeycomb. No insect is involved once the wax leaves the hive. The confusion between the two meanings is common enough that it’s worth stating plainly which world you’re in before you start shopping or crafting:
- Nature writing and pollinator blogs use “bubbling” to describe the nectar behavior above.
- Candle product pages and craft tutorials use “bubble” or “honeycomb” to describe a decorative texture achieved with molds or hand tools.
Once you know which conversation you’re having, the rest of this guide gets a lot more useful.
How Are Bubble and Honeycomb Candle Shapes Made?
Most bubble and honeycomb textures on the market come from silicone molds carved with raised or recessed cell patterns. The finer the mold’s detail work, the crisper each individual cell reads once the wax sets, which is why mold quality matters more here than in a plain pillar shape. A shallow, blurry mold produces a candle that looks more like bubble wrap than honeycomb.
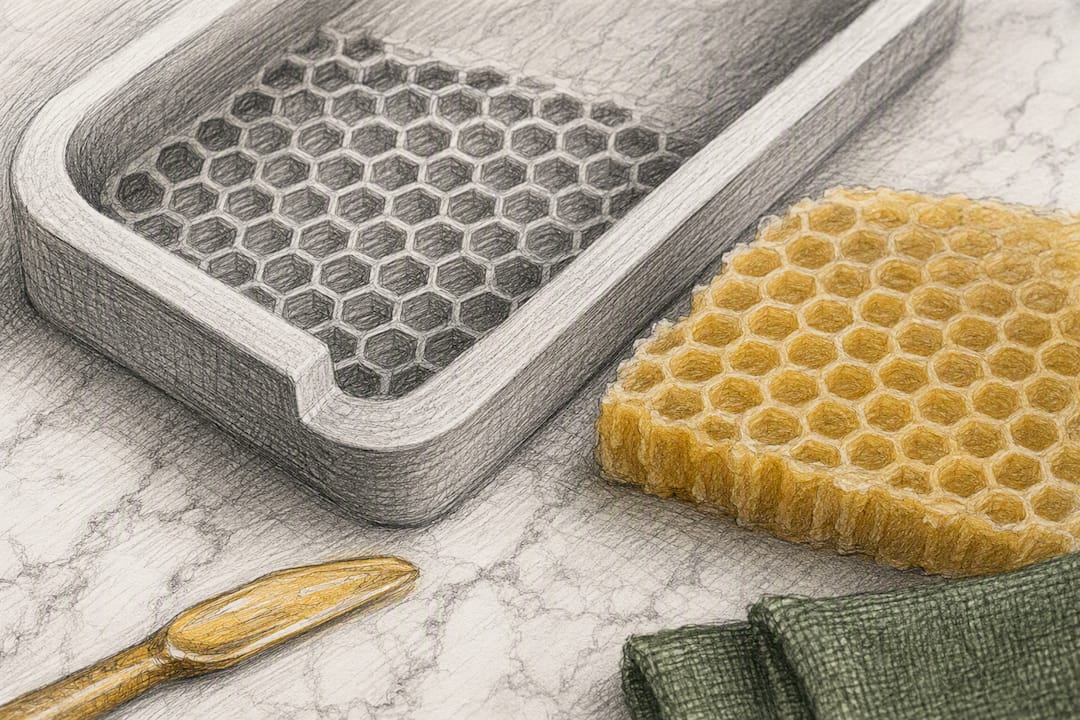
Artisans without a dedicated mold sometimes build the look by hand, using layered pours (letting one thin layer set before adding the next to build dimension) or light surface carving once the wax has firmed but hasn’t fully hardened. Both techniques take practice and produce more variation piece to piece than a mold does, which is part of their appeal for one-off pieces.
Product listings for these candles typically disclose a few consistent details worth checking before you buy:
- Wax content, ideally listed as 100% beeswax rather than a wax blend.
- Wick type, often a natural cotton or hemp braid suited to beeswax’s density.
- Scent source, either none, or a natural essential oil rather than a synthetic fragrance oil.
- Form factor, since the same honeycomb texture shows up on tea lights, solo pillars, and larger multi-wick pillars.
Pouring Technique: Temperature, Speed, and Mold Handling
The difference between a crisp honeycomb candle and a bubbly, pitted disappointment usually comes down to three variables you can control before the wax ever touches the mold.
- Pour down the side, not onto the wick. A slow, steady stream against the mold wall lets air escape as the wax rises, instead of trapping it under the wick or inside fine cell detail.
- Watch your pour temperature. Beeswax that’s too hot loses viscosity and pulls in more air on contact with a cool silicone mold; too cool, and it sets before it can fill fine detail. The role of wax temperature in mold filling covers the specific range worth targeting for detailed molds like these.
- Tap or gently vibrate the mold right after pouring to coax trapped air bubbles up to the surface before the wax skins over.
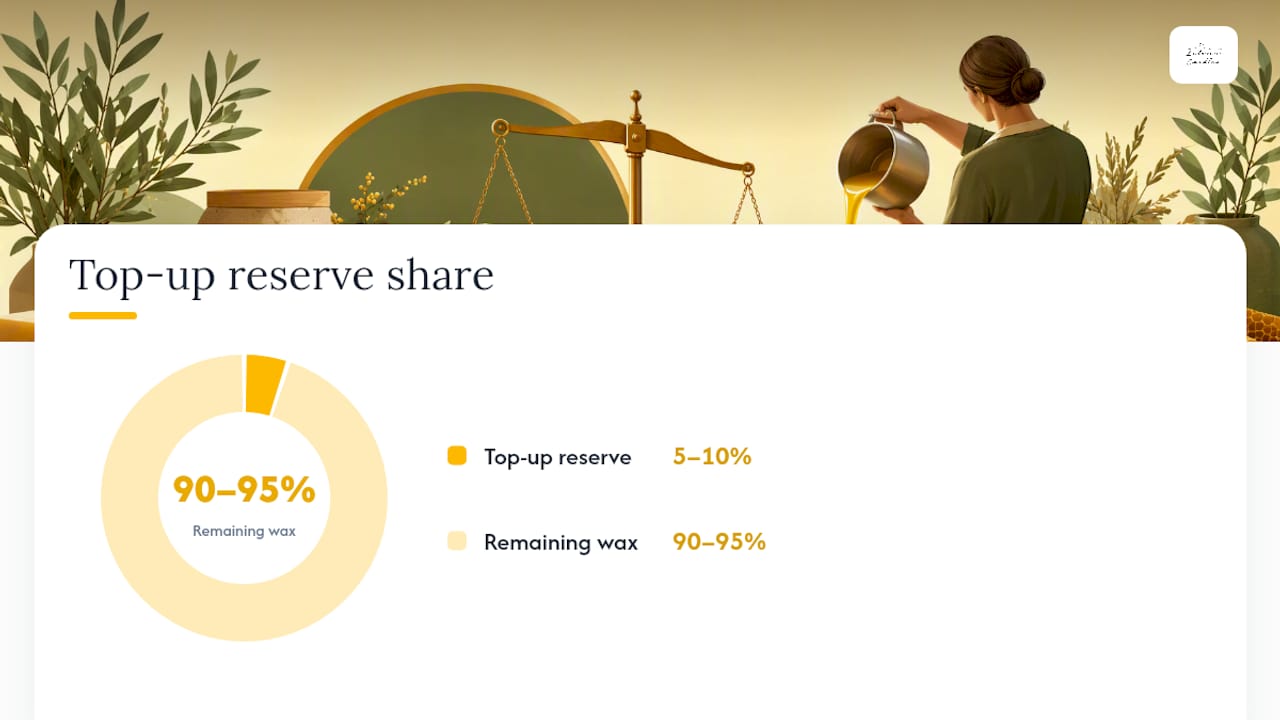
- Reserve 5 to 10 percent of your melted wax at a slightly cooler temperature for a top-up pour later. Beeswax shrinks as it cools, and that reserve is what fixes the sinkhole that forms around the wick.
Wick choice affects more than burn time here. A square-braid cotton or hemp wick tends to burn more evenly across a textured surface, which matters on a honeycomb pillar where wax pools differently around each raised cell than it would on a smooth candle.
Pro Tip: Skip the aggressive stir when adding fragrance oil. Overstirring warm beeswax whips air into the mix, and that air has nowhere to go but into your finest mold detail. Fold gently and let the wax rest a minute before pouring.
Craft guides on beeswax candle making consistently point to slow pouring and temperature control as the two biggest levers against unwanted bubbles, and honeycomb molds simply raise the stakes because every trapped bubble shows up as a flat spot in an otherwise crisp cell pattern.
Fixing Sinkholes and Finishing the Candle
Even a careful pour can leave a small crater around the wick once the wax cools and contracts. A second pour, done roughly 15 to 30 minutes after the first while the surface has firmed but the core is still warm, fills that gap without leaving a visible seam. Reheat your reserved wax to the same working temperature and pour just enough to level the surface.
Once the candle is fully cured, a few finishing choices separate a rough cast from a finished piece:
- Gentle flame smoothing, passing a lighter or heat gun briefly over rough spots, works for minor imperfections, but keep it brief and never leave a flame unattended near solid wax.
- Trim the wick to about a quarter inch before the first burn; a long wick on a wide honeycomb pillar will smoke and soot the surrounding cells.
- First burn matters, since it sets the “memory ring” that determines how evenly the candle burns going forward.
Not every bump is a flaw. If the raised cell pattern is even and repeats the mold’s design, that’s the honeycomb look doing its job. A flaw is asymmetrical, appears where the mold shows no cell at all, or sits directly over the wick where it can affect burn quality.
Buying a Bubble Candle vs. Making Your Own
A ready-made bubble or honeycomb candle gets you a finished piece with no equipment, no cleanup, and predictable results. Making your own with a mold costs more time upfront but gives you control over wax purity, scent, and size, plus a mold you can reuse for dozens of future candles.
If you’re buying molds, check for:
- Food-grade silicone rated for the pour temperatures beeswax requires.
- Sharp, consistent cell detail, since shallow molds produce a flatter, less convincing honeycomb texture.
- Reasonable release characteristics, so beeswax lets go cleanly without tearing fine cells.
If you’re buying a finished candle, look for a 100% beeswax label, a natural wick, a stated burn time, and a scent that comes from essential oils rather than an unnamed “fragrance.” Price differences across artisan beeswax candles usually track three things: wax purity, the labor of hand-finishing, and how complex the mold behind the design actually is. A simple round bubble candle costs less to produce than a fully detailed honeycomb pillar with dozens of individual cells.
Why Trust This Guide
A company specializing in silicone molds for beeswax candle making since 2015, starting as a family candlemaking operation in Latvia and growing into a catalog of a large number of mold designs. That work sits behind the mold recommendations here, including honeycomb-specific options like the Bees on Cells mold, Bee Cells Tea Lights mold, and Bee Cells Pillars Solo mold. For deeper troubleshooting, the sinkhole top-up method walks through the fix step by step.
When Is the Honeycomb Look Worth the Extra Work?
Beeswax already has natural color variation and a soft, waxy sheen that flat candle shapes barely show off. A honeycomb or bubble texture catches light differently across every cell, which is exactly why the extra pour effort pays off on a display piece meant to sit somewhere visible.
I’d save the highly detailed molds for candles you plan to burn slowly and look at often, and reach for a simpler shape when you’re batching gifts or testing a new wax blend. If your last pour came out pitted instead of crisp, go back through the pouring and mold handling steps above before blaming the wax.
— Marks
Get the Molds Behind This Honeycomb Look
Reproducing a clean bubble or honeycomb texture without guesswork starts with a mold that holds fine detail through repeated pours. Latviancandles’ silicone molds are built specifically for beeswax, which behaves differently under heat than soy or paraffin, so the cell patterns hold their shape pour after pour.

A few starting points worth a look:
- The Bees on Cells mold for a full pillar covered in raised honeycomb cells.
- The Bee Cells Tea Lights mold for small-format candles with the same texture at a lower wax cost per piece.
- The Bee Cells Pillars Solo mold for a single, standalone honeycomb pillar.
- The DIY candle making starter kit if you’re pouring your first beeswax candle and need the basics alongside the mold.
Browse the full collection of 180+ silicone mold designs to compare sizes and detail levels before your next pour, and pick the honeycomb mold that matches the candle you actually want sitting on your shelf.
Sources
For the biology behind natural bee bubbling, see the bubble bee behavior write-up and filmed nectar-bubble footage. For pouring technique, the step-by-step beeswax candle guide and Latviancandles’ notes on common beginner mistakes cover the practical side, alongside general candle care and burn practices that apply once your candle is finished.
- Common yellow face bee blowing nectar bubbles film — Nurturing Nature
- How to Make Beeswax Candles: A Step-by-Step Guide - Rustic Roots Living
FAQ
Is “Bubbles in Beeswax” a Bee Behavior or a Candle Design?
It’s both, depending on context. Solitary bees like Hylaeus create nectar bubbles as a feeding behavior, while candle makers create bubble or honeycomb textures as a decorative surface design.
Why Does My Beeswax Candle Have Unwanted Bubbles?
Trapped air from a fast pour, overheated or overstirred wax, or a cold mold surface are the usual culprits. Slowing the pour and watching your temperature window fixes most cases.
What Causes a Sinkhole Around the Wick?
Beeswax contracts as it cools, pulling wax down around the wick and leaving a small crater. A second, lower-temperature top-up pour after the first has firmed fills the gap.
Should I Buy a Finished Bubble Candle or Make One Myself?
Buy ready-made for convenience and predictable results; buy a mold if you want control over wax purity, scent, and size, plus a tool you can reuse for future candles.


