
Three Levers That Fix Any Artisan Candle's Finish
The finish on a handmade candle comes down to three controllable factors: wax and blend choice, pour temperature paired with cooling control, and the finishing pass at the end. Get those three right and frosting, sinkholes, and dull tops mostly disappear. Artisan candle finishing techniques aren’t a mystery reserved for production studios. They’re a sequence of small, testable decisions.
If you’re troubleshooting a batch tonight, try these first:
- Warm the jar or mold slightly before pouring to slow surface cooling.
- Do a gentle reheat pass with a heat gun over cooled tops to melt out light frosting.
- Trim the wick to the length your wax family recommends before you judge the finish at all.
These fixes are safe on candles you already own, and they buy time while you diagnose the bigger issue: wax choice or pour temperature. The ASTM F2058 standard governs fire safety labeling for candles sold commercially, and it’s worth knowing before you scale any hobby into sales. Latviancandles has spent years pouring beeswax into silicone molds, and most finish problems trace back to one of these three levers, not bad luck.
Key Takeaways
The finish on any handmade candle comes down to wax choice, controlled pour and cooling temperature, and a disciplined finishing pass before it is ever sold or lit.
| Point | Details |
|---|---|
| Wax choice sets the ceiling | Paraffin trends glossy, soy trends matte, and blending with stearic acid or carnauba shifts either direction. |
| Pour temperature drives smoothness | A 5 to 10°C shift in pour temperature reliably changes surface texture more than any other single variable. |
| Test one variable at a time | Log pour temp, room conditions, and cooling time per batch, and photograph results to compare. |
| Cure before judging or burning | Give scented candles about a week to cure so scent throw and surface appearance stabilize fully. |
| Mold prep prevents micro-voids | Warming silicone molds before pouring beeswax helps intricate detail release cleanly. |
Table of Contents
- How Wax Type Changes a Glossy or Matte Finish
- What Pour Temperature Does to the Cooling Profile
- Why Do Candles Get Frosting, Sinkholes, or Wet Spots?
- The Finishing Checklist Before a Candle Is Ready to Sell
- Which Advanced Finishing Techniques Are Worth Trying?
- What Tools and Workspace Setup Actually Matter?
- A Beeswax Starter Recipe Built for Silicone Molds
- Shop Silicone Molds Built for Beeswax Finishing
- What Actually Moves the Needle on Candle Finish
- Sources
- FAQ
How Wax Type Changes a Glossy or Matte Finish
Wax choice sets your finish ceiling before you even light the burner. Paraffin crystallizes in a way that reads glossy and reflective, which is why most retail pillar candles look almost lacquered. Soy wax leans matte and slightly cloudy because its crystalline structure is looser and less uniform. Beeswax sits in between: naturally satiny, with a warm color that hides minor surface irregularities better than either paraffin or soy. Coconut wax tends toward a soft, creamy matte finish and is rarely used alone for structural pours because it’s soft on its own.
Blending shifts these tendencies predictably, according to DIY Products 101’s breakdown of surface finish factors. Add a percentage of paraffin to soy and the top gets shinier. Add stearic acid and you get a harder, more opaque surface with better mold release. Additives matter here more than most beginners expect:
- Stearic acid (2 to 10 percent) hardens the wax, opacifies the surface, and helps container candles pull cleanly from stiff molds.
- Polyethylene wax (5 to 15 percent) boosts gloss and raises melt point, useful for pillar and taper candles that need to hold shape in warm rooms.
- Carnauba wax (1 to 5 percent) adds a hard, glassy shine and is a common addition in high-end pillar work, though it raises the melt point noticeably.
For a glossy finish, try 90 percent paraffin with 10 percent polyethylene wax, poured hot and cooled slowly. For a satin look that splits the difference, blend 70 percent soy with 30 percent beeswax. For matte, straight soy or a soy-coconut blend with no hardening additives gives the softest, cloudiest top.
Pro Tip: Test any new blend in a small batch of three to five candles before committing a full production run. Wax behavior shifts more than people expect when scent oil, dye, or a new supplier’s wax enters the mix.
What Pour Temperature Does to the Cooling Profile
Pour temperature and cooling speed control surface texture more than any other variable you can adjust in a home workshop. Melt temperature is how hot you liquefy the wax; pour temperature is how hot it is when it hits the container or mold, and the two are rarely the same number once you’ve added fragrance oil or dye. Shifts in pour temperature reliably change whether you get a glassy top or a dull, textured one, per DIY Products 101’s guidance on pouring and cooling.
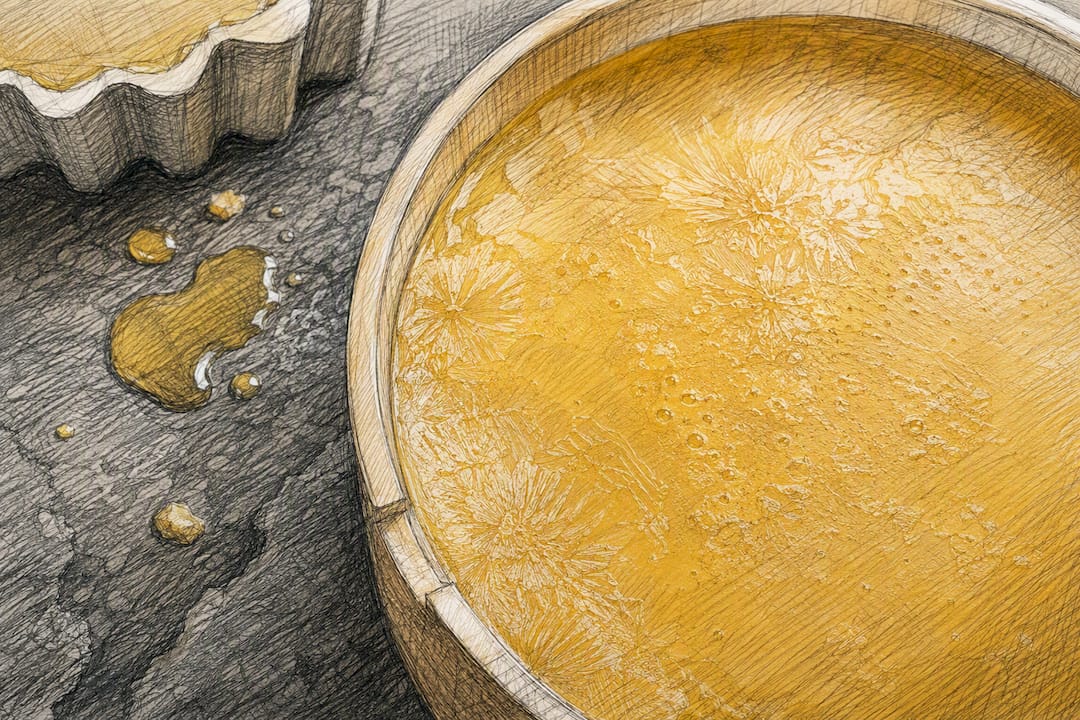
Paraffin generally pours best around 71 to 82°C (160 to 180°F). Soy wax usually pours cooler, closer to 54 to 60°C (130 to 140°F), because pouring soy too hot invites frosting as it cools. Beeswax runs hotter than both, often poured near 71°C (160°F) to keep it liquid long enough to fill fine mold detail before it sets.
Container and mold temperature matters just as much as the wax itself. A cold glass jar or a cold silicone mold pulls heat out of the wax unevenly, which is exactly what causes wet spots and rippled tops. Warming jars in a low oven (around 49°C/120°F) for ten minutes before pouring, or pre-warming silicone molds under a heat gun for a few seconds, slows that uneven pull and gives the surface time to level.
If you want repeatable results instead of guesswork, run a simple three-step test:
- Pick one variable. Change only the pour temperature, not the wax blend or fragrance load, between batches.
- Log every batch. Note pour temp, room temperature, cooling time, and container material in a notebook or spreadsheet.
- Photograph the tops. A side-by-side photo record shows subtle shifts your memory won’t catch three batches later.
Pro Tip: Change one variable at a time and give it a full cooling cycle before judging the result. Small, incremental adjustments of 5 to 10°C, tracked in a test log, are how most small-batch makers dial in a finish without starting a recipe from scratch, an approach echoed in DIY Products 101’s testing insight.
Why Do Candles Get Frosting, Sinkholes, or Wet Spots?
Most surface defects have a short list of causes, and most have a safe first fix that doesn’t require dumping the batch. Here’s how to read what your candle is telling you.
| Defect | Likely Cause | First Safe Fix | Rework or Not |
|---|---|---|---|
| Frosting (white crystalline bloom) | Natural wax crystallization, common in soy and beeswax, worsened by cool rooms | Gentle heat gun pass over the surface to re-melt the top layer | Cosmetic only, safe to leave |
| Sinkholes | Wax shrinking as it cools, often from pouring too hot or too fast | Reheat and top off with a second thin pour once the first layer sets | Rework if the hole reaches near the wick |
| Wet spots | Wax pulling away from glass as it contracts unevenly | Warm the jar exterior briefly with a heat gun or hair dryer | Cosmetic only on glass containers |
| Ripples or rings | Drafts or temperature swings during cooling | Move future batches away from vents; can’t fix after the fact except by remelt | Rework if severe and visible |
Frosting affects an estimated one in five candles poured with natural waxes under typical home conditions, largely because soy and beeswax crystallize more visibly than paraffin as they cool. It’s rarely a safety issue and almost never affects burn quality.
Sinkholes are the one defect worth taking seriously before you sell anything. A shallow depression near the surface is purely cosmetic and fixable with a second thin pour once the top has fully set. A deep hole that tunnels toward the wick can trap air pockets that cause uneven burning, and that candle should be reworked, not just topped off and sold. When in doubt, cut the candle in half. If you can’t see inside it, you can’t be sure it’s sound.
The Finishing Checklist Before a Candle Is Ready to Sell
A candle isn’t done the moment it sets. The gap between “poured” and “ready to sell” is a short, ordered sequence that professional suppliers follow every time, according to Lone Star Candle Supply’s finishing workflow.
- Remove wick bars or centering devices once the wax has fully hardened, usually 24 to 48 hours after pouring depending on candle size.
- Trim the wick to length. Soy and coconut blends generally burn cleanest around 6mm (¼ inch); paraffin and beeswax can often handle a touch longer, closer to 6 to 10mm, since they burn slightly cooler.
- Clean wax drips off the jar exterior or mold seam lines using a bit of rubbing alcohol on a soft cloth, or a gentle heat gun pass to melt stray drips flush.
- Cure before burning. Most scented container candles benefit from about a week of cure time, which lets the fragrance oil bind fully into the wax and stabilizes the surface appearance, per Lone Star’s curing guidance.
Skipping cure time is the mistake we see most often from hobbyists eager to test a new mold. A candle burned the same day it’s poured almost always throws less scent and can show a rougher top than the same candle burned a week later. Latviancandles covers the broader quality checks worth running before any handmade candle ships in its guide to handmade product quality standards.
Pro Tip: Label the cure date on the bottom of every jar in pencil before it goes into storage. It’s the easiest way to stop yourself from burning or selling a candle a day too early.
Which Advanced Finishing Techniques Are Worth Trying?
Once the basics are solid, a handful of advanced techniques can push a candle from good to genuinely distinctive. Not all of them belong on a candle you plan to light.
- Overdips. Dipping a finished candle briefly into a slightly hotter pool of compatible wax evens out minor surface flaws and can add a deep glossy shell. CyCandle’s polishing guide notes overdips can be burnable, but only after you’ve confirmed the dip wax is compatible with the base candle and the finished piece still burns cleanly in a full test burn.
- Buffing and micro-sanding. A soft cloth (some makers use pantyhose) rubbed briskly over a cooled candle raises sheen on harder waxes like paraffin and carnauba blends. Soft waxes like pure soy don’t respond well; they tend to smear rather than polish.
- Glazing or varnish coatings. These raise gloss dramatically but should be treated as display-only unless the product is explicitly formulated as heat-safe for candles, per DIY Products 101’s burnability notes. Most craft-store varnishes are not.
- Heat-fusion napkin decoupage. Pressing a thin paper napkin design onto a candle surface and fusing it with a heat gun is one of the more reliable decorative methods for pillars and tapers, according to South House Designs’ decoupage tutorial. It demands steady heat control and matching the napkin scale to the candle’s curve, or the design wrinkles.
Pro Tip: Never trust a decorative fix to also solve a burn problem. A candle with a rough top from underheating won’t burn evenly just because you hid the flaw under an overdip.
What Tools and Workspace Setup Actually Matter?
A repeatable finish depends less on fancy equipment and more on consistent conditions. The essentials:
- A reliable thermometer. Digital candy or wax thermometers with a quick response time matter more than the melter itself.
- A heat gun. Used for topping frosted surfaces, cleaning drip lines, warming molds before pouring, and fusing decoupage designs.
- Buffing cloths. Soft, lint-free cloth for raising sheen on hardened wax surfaces.
- A wick trimmer or sharp scissors. Long wicks cause soot and uneven melt pools that ruin an otherwise good finish.
- A draft-free pouring area. Even a cardboard windscreen around your pouring station reduces the ripple defects that come from uneven cooling.
Mold material changes the surface as much as any tool. Rigid, polished molds produce sharp edges and a more reflective surface because they hold their shape under pressure and transfer their own smoothness to the wax. Flexible silicone molds, by contrast, can imprint fine texture and read slightly more matte, according to DIY Products 101’s mold finish comparison, though a well-made silicone mold still captures crisp detail that a floppy or worn one cannot.
Once candles are finished, protect that work. Store them away from direct sunlight and humidity swings, both of which dull surface gloss over time and can cause color fading in dyed wax. Latviancandles covers this in more depth in its guide to storing beeswax candles.
A Beeswax Starter Recipe Built for Silicone Molds
Beeswax behaves differently in silicone than it does in metal or glass, and most of the finish problems hobbyists report trace back to skipping mold prep, not the wax itself.
- Starter ratio: 90 percent beeswax to 10 percent coconut wax softens the pour slightly and helps beeswax release from fine mold detail without tearing.
- Melt and pour temps: melt to roughly 71°C (160°F), pour around 68 to 71°C (155 to 160°F) to give the wax time to fill detailed cavities before it sets.
- Wick suggestion: a cotton wick sized one step larger than you’d use for paraffin, since beeswax burns slightly cooler and needs a bigger flame to maintain a full melt pool.
- Mold prep: warm the silicone mold gently with a heat gun for a few seconds before pouring. Pre-warming reduces abrupt cooling at the mold walls, which helps intricate shapes release cleanly and cuts down on micro-voids, a technique Latviancandles has refined across its range of over 180 mold designs built specifically for beeswax.
- Release technique: once cooled, flex the mold gently from the edges rather than pulling straight up. This protects fine details like the bee cell pattern mold.
Shop Silicone Molds Built for Beeswax Finishing
Every technique in this guide assumes you’re starting with a mold that holds detail and releases cleanly, which is exactly what Latviancandles has built its business around since 2015. The full collection of silicone candle molds covers bee cell patterns, tapers, tea lights, and pillar shapes, all designed with beeswax’s higher pour temperature and slower release in mind. If you’re new to mold-based pours, the DIY Candle Making Starter Kit bundles a tested mold with the accessories most hobbyists end up buying separately anyway.
For a first project that shows off a clean, rigid-mold finish, the Well mark silicone mold is a good test case for the pour-temperature protocol described above, since its detail level makes surface defects easy to spot and correct.
What Actually Moves the Needle on Candle Finish
Most advice on candle finishing treats decoration as the interesting part and temperature control as boring background detail. That’s backward. The overdips, the buffing, the heat-fusion decoupage, all of it sits on top of a foundation that either holds or doesn’t, and that foundation is set entirely by wax choice and pour temperature before any decorative step happens.
The conventional wisdom oversells additives and undersells discipline. A stearic acid percentage or a carnauba addition matters, but not nearly as much as whether you poured at a consistent temperature and let the candle cool without a draft hitting one side. Hobbyists chase recipe tweaks when the real gain sits in a notebook: log the batch, change one variable, compare the photos.
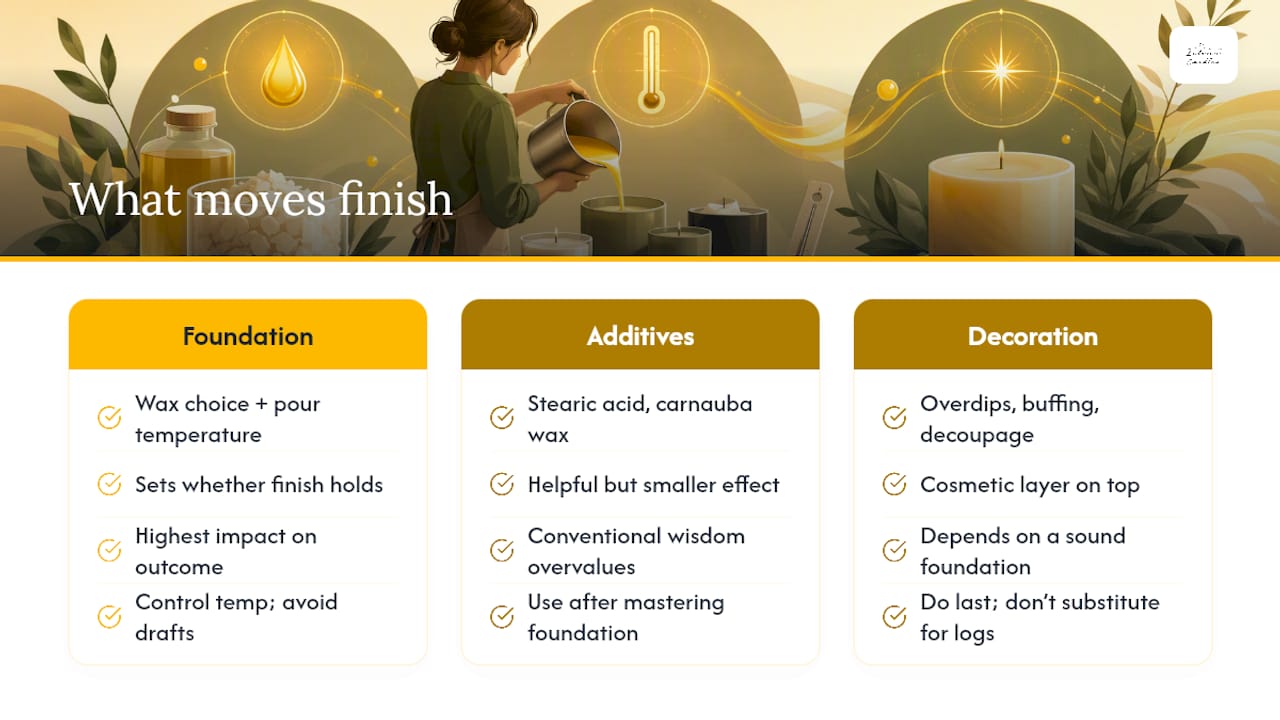
If you take one thing from this guide, make it the test log. Not the fanciest wax blend, not the newest decorative trick. A disciplined, one-variable-at-a-time habit will fix more finishes than any additive ever will.
Sources
- Glossy vs Matte Candle Finishes: Wax, Pouring, Cooling, and Surface Techniques - DIY Products 101
- The Ultimate Guide To Polishing Your Candles | CyCandle
- How to Finish a Candle | Lone Star
- How To Decorate Candles The Simple Way: With Amazing Results! | South House Designs
FAQ
What are some effective techniques for finishing candles?
The most effective techniques are controlling pour temperature within 5 to 10°C of your wax’s ideal range, pre-warming containers or molds, and following an ordered finishing pass of trimming, cleaning, labeling, and curing before the first burn.
What is the 8:10 rule for candles?
The “8:10 rule” isn’t a standardized industry term with a fixed definition; it’s used informally in some candle-making circles to describe burn duration guidelines, but there’s no consistent authoritative source defining it. Treat any version you find online as anecdotal rather than a verified safety standard.
What is the 30/50/20 rule for candles?
Like the informal burn duration guidelines mentioned earlier, this isn’t a recognized industry standard. It circulates informally among hobbyists with varying definitions, so it shouldn’t be treated as an authoritative benchmark for wax ratios, burn times, or cure schedules.
What is the 84 rule in candle making?
This is another informal phrase without a consistent, sourced definition across the candle-making industry. If you’ve seen a specific ratio or rule attached to this number, verify it against a wax manufacturer’s own guidance rather than a general online reference.
How long should a candle cure before its first burn?
Most scented container candles benefit from about a week of cure time, which lets fragrance oil bind into the wax and stabilizes both scent throw and surface appearance.
Is it safe to burn a candle with an overdip finish?
Overdips can be burn-safe when the dip wax is compatible with the base candle and the finished piece passes a full test burn, but glazing or varnish-style coatings should generally be treated as display-only unless the product is specifically formulated as heat-safe for candles.
Recommended
- Candle Troubleshooting Basics: Fixing Common Wax and Wick Problems – Latvian Candles
- Craft Fair Candle Display Ideas That Actually Sell – Latvian Candles
- Candle Retail Customer Education Strategies for Beeswax Makers – Latvian Candles
- How Latvian Candles Molds helps you in Your Candle-Making Business


