
Candle Photography for Sellers: What Actually Converts
Photos that sell candles do three things: show the product clearly, suggest the scent, and prove the thing is real and well made. That means one clean studio shot, one mood-driven lifestyle image and at least one close-up on texture, wick, or label. Skip any of the three and you leave money on the table.
Here’s the checklist to shoot before you list anything:
- White-background e-commerce shot (straight-on, cropped for the marketplace)
- One lifestyle or mood scene per SKU
- One detail shot showing wax texture, wick, or label
- One lit-flame frame and one extinguished-smoke frame (optional but strong for gift buyers)
Product images shape roughly 75% of buyer purchase decisions, and professional photography can lift sales by up to 30% on the same source’s figures. That gap between an amateur snapshot and a deliberate shot list is where most small candle sellers lose conversions.
Key Takeaways
Candle photos convert when a clean product shot, a scent-driven lifestyle scene, and a texture or label close-up all appear together for every SKU.
| Point | Details |
|---|---|
| Shoot three core image types | Deliver a white-background shot, a lifestyle scene, and a detail close-up for every SKU. |
| Separate lit and unlit lighting setups | Use soft diffused light for studio shots and a darker room with fast shutter bursts for flame shots. |
| Style around one scent cue | Pair each candle with one ingredient prop and one mood setting, nothing more cluttered. |
| Prioritize color and label accuracy | Accurate color and a legible label affect conversion more than any creative filter. |
| Use AI scene tools cautiously | Start from a real baseline photo before generating variants to avoid distorted labels or unrealistic wax and glass textures, per Graphic. |
| Start with a photogenic mold shape | Textured molds from Latviancandles, like the Bees on Cells design, reduce retouching and strengthen lifestyle scenes. |
Table of Contents
- Sveču Fotografēšana Pārdošanai: The Shot Types That Sell
- What Lighting and Camera Settings Work Best for Candles?
- How Do You Style Candle Photos to Suggest Scent?
- Post-Processing and Marketplace File Specs That Matter
- How Should You Price Candle Photography Services?
- Where Should You Actually Use These Photos to Sell?
- Why Mold Shape Changes How a Candle Photographs
- Cleaning and Preparing Candles Before You Shoot
- Do You Need Permission to Photograph Branded Candles?
- How Do You Run an Efficient Candle Photo Shoot?
- Source Photogenic Candles Before You Even Pick Up a Camera
- Where to Learn More About Candle Photography
- Sources
- FAQ
Sveču Fotografēšana Pārdošanai: The Shot Types That Sell
Candle product photography for sellers, known in the Latvian craft market as sveču fotografēšana pārdošanai, comes down to matching each shot to a specific buyer question. A shopper on a product page wants proof of shape and scale. A shopper scrolling Instagram wants a feeling. You need both, plus a texture shot that answers “is this actually handmade well?”
Here’s what to deliver per SKU:
- White-background studio shot: straight-on, even lighting, this is your marketplace primary image and the one Etsy and Shopify crop for thumbnails.
- Lifestyle/mood scene: candle in context (bedside table, bathtub edge, holiday mantel) that signals occasion and scent.
- Hero/detail close-up: macro on the wax surface, wick, or embossed label, portrait orientation, built for Instagram and Pinterest pins.
- Packaging/scale shot: candle next to a hand, coin, or ruler so buyers stop guessing at size, a common return-driver for candles bought online.
- Lit flame and extinguished smoke variants: the flame shot builds warmth; the smoke trail (shot right after blowing out) works surprisingly well for seasonal and gift campaigns.
Aim for 3 to 5 e-commerce angles, 2 lifestyle scenes, and 2 detail shots per SKU, mixing portrait crops for social with landscape for banners.
Pro Tip: Shoot the plain white-background frame first, even if you plan to use AI-generated scenes later. That baseline image locks in accurate label position and shadow shape, which keeps AI scene generation from warping your logo or casting a shadow that doesn’t match the light source.
What Lighting and Camera Settings Work Best for Candles?
Unlit candles want soft, even light from two directions; lit candles want a darker room and a fast shutter. Those are two different setups, and trying to shoot both with one lighting rig is the most common mistake new candle photographers make.
For unlit product shots, use a large diffused light source, a softbox or a north-facing window, positioned at roughly 45 degrees to avoid a hard reflection on glass jars. Shoot at f/5.6 to f/8 for enough depth of field to keep the whole candle sharp, ISO 100 to 200 to keep noise out of the wax texture, and set white balance manually rather than trusting auto, since auto white balance tends to shift warm on cream-colored wax.
For lit-flame shots, dim the room, drop your shutter speed only as low as your tripod allows, and shoot in bursts. Flame shape changes every fraction of a second, so capturing many frames in quick succession and picking the cleanest one beats trying to time a single perfect shot. Set white balance for candlelight around 2,000 to 3,000K, or the frame reads orange and muddy.
Gear checklist:
- Tripod (non-negotiable for both flame shots and consistent framing across a SKU catalog)
- One key light plus a white foam-core reflector for fill
- A 50mm prime or macro lens for detail shots
- Remote shutter release to avoid camera shake during long exposures
Pro Tip: Beeswax has real translucency, and side lighting reveals it. Light straight-on flattens the wax into plastic-looking mush. Move your key light to a 45 to 60 degree angle and watch the wax glow from within instead of just reflecting light off the surface.
How Do You Style Candle Photos to Suggest Scent?
Pair every candle with one clear scent cue and one mood cue, nothing more. A lavender candle photographed with dried lavender sprigs on linen tells the story in half a second; add three more props and you dilute it.
Pairing a candle with its actual fragrance ingredients, like coffee beans for a coffee-note candle or dried citrus peel for a bergamot blend, gives buyers something concrete to imagine instead of a vague “smells nice” claim. Some working vignette ideas:
- Lavender or floral: dried sprigs, linen fabric, muted natural light
- Coffee or vanilla: whole beans, a ceramic mug, warm wood surface
- Coastal or fresh linen: shells, driftwood, soft white textiles
- Spiced or seasonal: cinnamon sticks, pinecones, deep amber tones
Minimal styling (one prop, lots of negative space) tends to read as modern and performs well on clean product pages. Richer, fuller scenes work better for seasonal and gift-driven Instagram ads. Mood-driven, cozy styling consistently outperforms clinical white-background shots for self-care and giftable candle categories specifically.
Pro Tip: Every prop should point back to the scent story, not compete with the candle. And no matter how styled the shot, keep the label sharp and fully legible. A gorgeous photo that hides the scent name loses the sale it just earned.
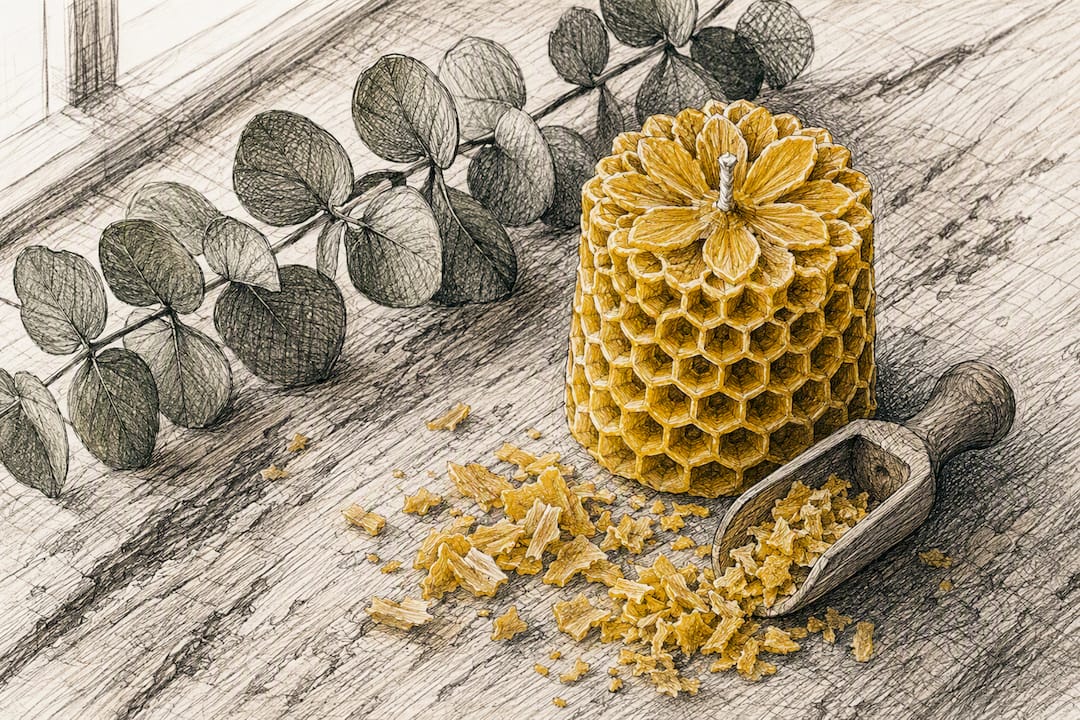
Post-Processing and Marketplace File Specs That Matter
Color accuracy and label legibility affect conversion more than any filter or preset you apply. A buyer who can’t read the scent name, or who orders a “cream” candle that photographs blue, becomes a return and a bad review.
Retouching checklist, in order:
- Remove dust and lint from the wax surface and jar (candles attract both like magnets)
- Correct white balance and set an accurate white point before any creative color grading
- Sharpen the label just enough to read clearly at thumbnail size
- Tame highlights on glass and metallic lids so they don’t blow out to pure white
- Touch up flame shots only lightly. An obviously edited flame looks fake fast
File specs for marketplaces:
| Element | Recommendation |
|---|---|
| Color profile | sRGB |
| File format | JPEG for listings, WebP for site speed |
| Pixel size | 2000px minimum on the long edge |
| File naming | product name plus SKU, e.g., lavender dream tealight sku.jpg
|
| ALT text | describe scent, shape, and use case, not just “candle photo” |
If you’re using AI tools to generate additional scene variants from one baseline photo, know the risk going in. AI models not specifically trained on product photography often distort labels, render glass textures wrong, or produce flame and wax shapes that look subtly off. Always compare the AI output side by side with your real baseline shot before publishing.
How Should You Price Candle Photography Services?
Price by deliverable and usage rights, not by hour. A single retouched e-commerce file, a lifestyle bundle, and a full-SKU package are three different products with three different price points, and buyers understand that structure quickly.
Three sample package shapes:
- Starter (per-image): one retouched file, basic e-commerce usage rights, one revision round
- SKU package: 5 to 7 images per product (studio, lifestyle, detail), standard commercial usage, two revisions
- Seasonal retainer: monthly shoot for new collection drops, extended ad usage rights included, priority turnaround
Etsy sellers shooting their own catalog usually need one-off SKU packages. Shopify stores with rolling collections do better with a retainer, since new drops need fresh imagery every season. On invoices, spell out rights plainly: “Basic e-commerce license” covers the seller’s own listings and site; “Extended commercial/ad rights” covers paid social and print use, and should cost more.
Where Should You Actually Use These Photos to Sell?
Use studio shots for listings, lifestyle shots for ads and social, and detail shots in carousels and Pinterest boards. Matching image type to platform is where a lot of sellers waste good photography by uploading the wrong shot to the wrong place.
Etsy and Amazon both crop your primary image aggressively, so lead with the cleanest white-background shot there. Shopify product pages can carry a full gallery, which is where lifestyle and detail images earn their keep. On Instagram and Pinterest, lifestyle images with a short, scent-led headline (“The smell of a Sunday morning”) consistently pull a higher click-through than a plain product shot with no story attached.
- Test hero images in ads before committing budget: run the studio shot against the lifestyle shot for the same SKU
- Build a Pinterest board per scent family, not per product line
- If you sell photography as a service, publish a small portfolio and case-study blurb so new clients can see real results before hiring you
Why Mold Shape Changes How a Candle Photographs
Distinctive shapes photograph faster and get recognized on a crowded feed quicker than a plain cylinder ever will. A textured bee-cell pattern catches side light and creates natural shadow detail with almost no styling effort.
Pair a raised bee-cell texture with a single warm side light for detail shots; it does half your styling work for you. Pillar shapes with clean geometric lines suit minimal, modern product pages, while thematic shapes (holiday, folk motifs) shine in richer lifestyle scenes. A mold with strong natural texture, like the Well Mark silicone mold, often needs less retouching because the shadow pattern is already built into the wax.
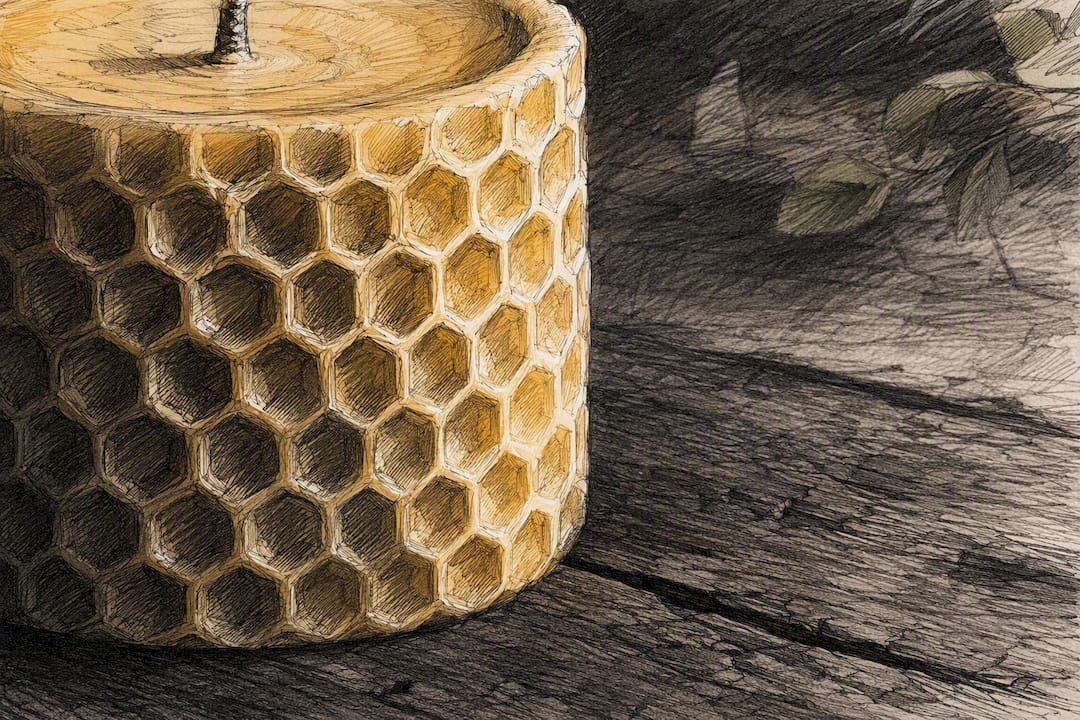
Pro Tip: If your current mold library photographs flat, the fastest fix isn’t more lighting gear. It’s a mold with texture already baked in.
Cleaning and Preparing Candles Before You Shoot
Dust shows up brutally in macro and studio lighting, even dust you can’t see with the naked eye. Wipe every candle with a lint-free cloth immediately before it goes in front of the camera, not the night before.
For glass and ceramic vessels, use a glass cleaner on the container only, keeping liquid well away from the wax and wick. Fingerprints on jars are one of the most common ruined-shot causes; handle finished candles by the base or with cotton gloves once they’re clean.
Wax imperfections need a different fix than dust. Small air bubbles or a slightly uneven pour line can sometimes be minimized with gentle heat from a hairdryer held several inches away, which lets the surface re-flow just enough to smooth minor flaws. Don’t overdo it; too much heat distorts the shape and can pull the wick off-center. A visible wick sitting crooked is one of the fastest ways to make a listing photo look unprofessional, so straighten and trim it before every shoot, not just the first one.
If you’re photographing multiple burn stages, which buyers increasingly expect for transparency, keep one candle pristine for the hero shot and dedicate a second, identical candle to burning down for the partial and pooled-wax stages. Trying to shoot both looks from a single candle mid-shoot wastes time and risks damaging your only clean sample. Set fresh, partially-burned, and melted-pool candles up as three distinct mini-shoots, each with its own five minutes of prep.
Do You Need Permission to Photograph Branded Candles?
If you’re photographing your own candles under your own brand, there’s no third-party permission issue. The question only gets complicated when you photograph someone else’s branded product, whether that’s a competitor’s candle for a comparison post, a client’s private-label line, or a candle carrying a licensed design or character.
Trademarked logos and copyrighted label art belong to whoever created them. Photographing a branded candle for editorial or comparison purposes generally falls under fair use in most jurisdictions, but reselling or heavily featuring someone else’s branded imagery in your own marketing without a license crosses into infringement territory. If you’re a photographer shooting for a candle brand as a client, put usage rights in writing before the shoot, not after: who owns the final files, where the client can use them, and whether you can display the work in your own portfolio.
Private-label and white-label candlemakers face a specific wrinkle. If you’re producing candles under someone else’s brand name, any photography featuring their logo or trade dress should be covered by your manufacturing agreement, not assumed. When in doubt, a short written release covering both the mold design and the finished product’s branding protects everyone involved and costs far less than a dispute after the fact.
How Do You Run an Efficient Candle Photo Shoot?
Build the shot list before you turn on a single light, not during the shoot. A written list, SKU by SKU with the five shot types checked off, keeps you from wrapping a session and discovering later you forgot the packaging shot on three products.
Batch by lighting setup, not by product. Shoot every white-background frame across your whole SKU lineup first, then reset the room for lifestyle scenes, then reset again for lit-flame shots. Reconfiguring lighting between each individual product instead of each shot type can double your total shoot time for no visual benefit.
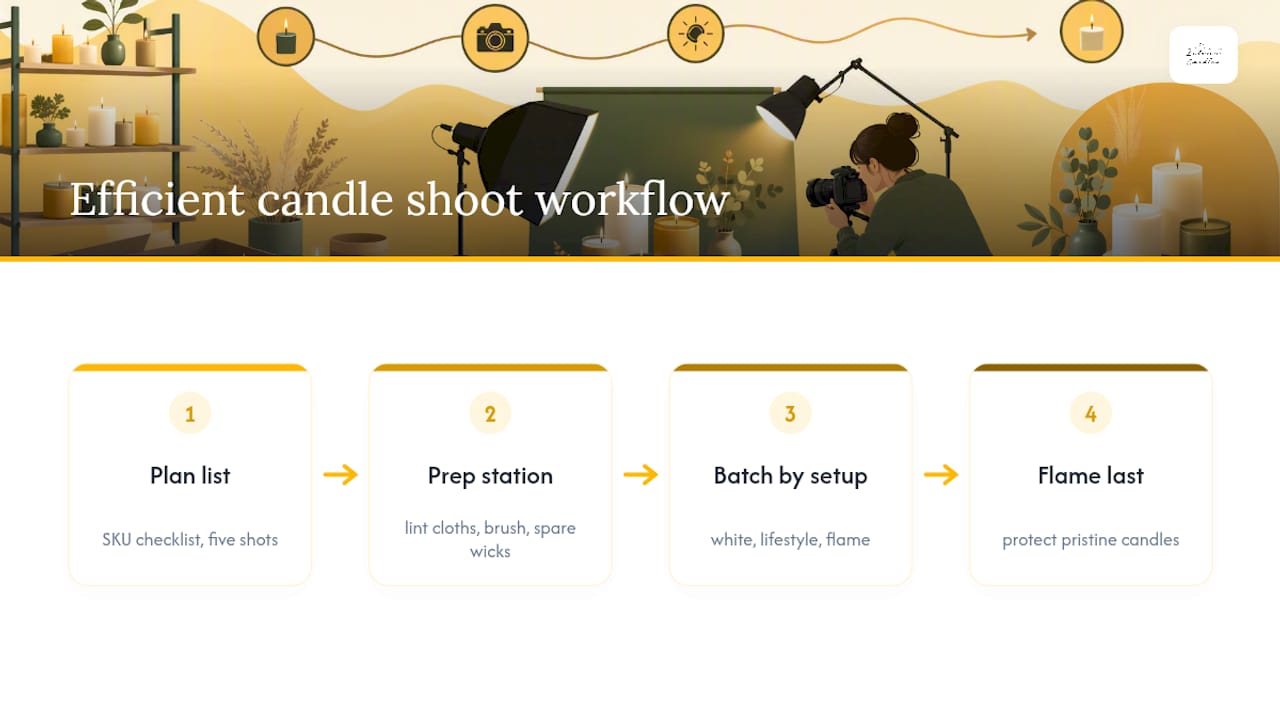
Keep a simple prep station beside your shooting area: lint-free cloths, a small brush for wick debris, spare wicks, and a lighter with a long neck for flame shots. Clean each candle immediately before it’s placed on the set, not in a batch an hour earlier, since dust resettles fast in most home studios.
For flame photography specifically, shoot that segment last. Once a candle has burned even briefly, it’s no longer usable for the clean white-background or detail shots, so sequence your list to protect the shots that need a pristine candle.
A Working Shoot Routine From Someone Who Sells These Photos
When a new candle collection lands on my desk, I shoot white-background first, lifestyle second, flame and smoke last, always in that order to protect the pristine candles. I keep one reference photo pinned nearby so label position and color stay consistent across every SKU in the batch. For retouching, I built a single preset for white balance and highlight recovery, then apply it to every shot before touching anything individually, which cuts hours off a full-collection edit. When testing new scent stories in ads, I run the lifestyle shot before the studio shot. Feeling sells faster than specs.
Source Photogenic Candles Before You Even Pick Up a Camera
The fastest way to cut retouching time isn’t a better lens. It’s starting with a candle shape that already photographs well, which is exactly what a textured or sculptural mold gives you before a single light gets turned on. Latviancandles makes over 180 silicone mold designs for beeswax candles, several built specifically around the kind of raised texture and natural shadow detail that reads beautifully in both studio and lifestyle shots.

If your catalog leans toward plain pillars and tea lights, look at shapes with built-in texture and story: the Bees on Cells mold for a raised honeycomb pattern that catches side light without extra styling, the Light Waves mold for a rippled surface that photographs distinctively in both flat and warm lighting, or the DIY starter kit if you’re building a photography-first product line from scratch. Browse the full mold collection at Latviancandles and pick a shape that does some of your styling work before the camera ever comes out.
Where to Learn More About Candle Photography
- Candle photography guide, Skylum Blog: tripod technique and flame-consistency basics
- 8 candle product photography setups, Kittl Blog: the Atmosphere-First AI workflow
- Candle product photography tips and types, UK Clipping Path: detailed exposure and white-balance settings
- AI product photography, Graphic.lv: scent-visualization styling advice
- AI candle product photography, EcomShot: AI lifestyle image generation for seasonal drops
- SellShots for candle makers: mood-driven conversion data
- AI image to video content strategy, Squish Games: turning still photos into short-form video content
- Latviancandles mold collection: photogenic silicone molds for beeswax candles
Sources
- Candle photography guide — Skylum Blog
- 8 candle product photography setups — Kittl Blog
- Graphic
- Produktufotografs — professional product photography (portfolio)
- SellShots for candle makers — SellShots
FAQ
What Are the Three Must-Have Candle Photos for Selling?
A white-background e-commerce shot, a scent-driven lifestyle image, and a detail close-up on wax, wick, or label cover the buyer questions that drive most candle purchases.
What Camera Settings Work Best for Lit Candle Shots?
Shoot in a dimmed room with a fast shutter and burst mode to catch a clean flame shape, and set white balance manually to around 2,000 to 3,000K so the light doesn’t render orange.
Is It Safe to Use AI-Generated Backgrounds for Candle Listings?
AI scene generation works best when it starts from a real baseline studio photo, since models not trained specifically for product imagery can distort labels or render glass and wax textures incorrectly.
How Should I Price Candle Photography for Other Sellers?
Price by deliverable and usage rights, offering a per-image starter option, a full-SKU package with 5 to 7 photos, and a monthly retainer for sellers launching seasonal collections.
Does Candle Shape Affect How Well Photos Perform?
Yes. Textured and sculptural shapes, like the bee-cell molds sold by Latviancandles, catch natural shadow and light detail that reduces retouching time and strengthens lifestyle scenes.


