
Latvian Tested 5–10% Fix for Beeswax Cooling in Silicone Molds
Beeswax cools from the outside inward: a rigid shell forms first while the center stays molten, and that gap between shell and core is what causes cracks and sinkholes. The single most effective control is managing the cooling rate itself through mold warming, insulation, and correct pour temperature so the shell and core set close together in time. If a sinkhole still shows up once the surface skins over, a second top-up pour at the right moment fixes it almost every time.
TL;DR:
- Using a mold warmed to about 150°F (65°C) significantly reduces thermal shock and promotes better surface quality during beeswax candle casting.
- Pouring beeswax at approximately 155 to 165°F (68 to 74°C), rather than hotter temperatures, minimizes shrinkage cracks and surface defects.
- Thin candles like tea lights can fully set in under an hour, while thicker pillars may require several hours to cool through the center.
- Applying insulation during cooling helps prevent sinkholes and cracks, especially for larger or high-relief molds, by slowing the overall set time.
- Planning a small top-up pour with wax reheated to a slightly lower temperature ensures a smooth surface and avoids collapse after demolding.
Table of Contents
- Why Beeswax Cooling in a Silicone Mold Behaves Differently
- Controlling the Cool: Mold Prep, Pouring, and the Top-Up Pour
- Demolding and Fixing Cracks, Sinkholes, and Sticky Spots
- Notes From the Latvian Candles Workshop
- Molds Built for This Exact Cooling Process
- Sources
- FAQ
Why Beeswax Cooling in a Silicone Mold Behaves Differently
Beeswax doesn’t cool at one uniform speed through the whole candle. It solidifies from the outer surface toward the middle, so the wax touching the silicone wall hardens first while the core underneath can stay semi-liquid for a while longer. That mismatch is the root cause of almost every visible defect a candle maker fights.
Silicone itself changes the equation. Compared to metal molds, silicone insulates rather than conducts heat away quickly, which slows the overall cooling rate but lets the wax crystallize more evenly. That’s a trade worth understanding:
- Slower overall set time because the mold walls hold heat instead of pulling it out fast.
- More even crystallization, which usually means fewer surface cracks than you’d get in an aluminum mold.
- Longer wait before demolding, since “cool to the touch” on the outside doesn’t guarantee the core has caught up.
Thickness changes the timeline substantially. A thin tea light sets in well under an hour. A thick pillar or taper bundle can take several hours to fully firm up through the center, and rushing that wait is where most sinkhole disasters begin.
Thermal shock is the other failure mode worth knowing by name. Pour hot wax into a cold, unwarmed mold straight from a cool workshop shelf, and the wax nearest the silicone skins over almost instantly. That fast skin locks in surface tension, and as the wax underneath keeps shrinking while it cools, cracks or pull marks can show up right at the surface. It’s a classic mismatch: the outside is done shrinking before the inside has even started.
Controlling the Cool: Mold Prep, Pouring, and the Top-Up Pour
Getting a clean beeswax candle out of a silicone mold comes down to five hands-on habits, done in order and not rushed.
- Warm the mold before you pour. Silicone molds warmed to roughly 150°F (65°C) in a low oven or on a warm rack near your melting setup reduce thermal shock and noticeably improve surface finish. Skip this step and you risk that instant skin-forming reaction the moment hot wax hits cold silicone.
- Melt with a thermometer in hand, not by eye. Beeswax poured too hot, generally above 175 to 185°F (80 to 85°C), risks damaged wax properties and more aggressive shrinkage as it cools.
- Let the melt cool before pouring. Many experienced candle makers pour once the wax has dropped to roughly 155 to 165°F (68 to 74°C), a window that limits skin formation without the wax getting too thick to pour cleanly.
- Insulate the filled mold. Setting your poured mold inside a cardboard box, wrapping it in towels, or resting it on foam slows the cooling rate and cuts down on cracking and sinkholes, especially for anything thicker than a tea light.
- Plan your top-up pour before you even start. Leave about 5 to 10% headspace in your first pour. Once the surface looks semi-solid, usually 30 to 60 minutes in depending on thickness, reheat a small batch of wax to a slightly lower topping temperature and pour it in to fill the collapse. If the crust is thick, poke a couple of small relief holes down to the softer wax first so the top-up bonds instead of sitting as a separate layer.
Wick placement deserves its own line item here, because an off-center or loose wick creates uneven cooling around it and can pull the whole burn off-axis later. Center it and hold it steady with a wick holder or bar across the mold opening before you pour, not after.
Pro Tip: Keep a small notebook by your melting pot. Log your pour temperature, ambient room temperature, and time to demold for each batch. After four or five candles, you’ll know your own workshop’s rhythm better than any general guide can tell you.

Demolding and Fixing Cracks, Sinkholes, and Sticky Spots
Don’t trust the outside of the candle alone. A shell can feel cool and firm to the touch while the core underneath is still soft, so waiting an extra 30 to 60 minutes past the point where the surface feels done often prevents the collapse that happens when you demold too early. Thin tea lights clear this stage fast; thick pillars need real patience.
Once you’re confident it’s set through, demolding technique matters almost as much as the wait:
- Flex the silicone gently, working around the edges rather than pulling straight up from one point.
- If wax sticks stubbornly, run the mold’s exterior under warm (not hot) water for a few seconds to soften the contact layer just enough to release it.
- For slit-style or multi-piece molds, open the seams evenly on both sides at once instead of forcing one side further than the other.
Sinkholes that show up after demolding aren’t a lost cause. A gentle reheat with a heat gun or hair dryer, followed by a small top-up pour into the depression, usually restores the surface. Hairline cracks can often be smoothed with light filing or a careful pass of gentle heat. If a candle has cracked through in multiple places or collapsed badly, remelting and repouring the whole piece is faster than trying to patch it.
Run through this short checklist before your next pour to break the cycle of repeating the same mistake: mold warmed, wax temperature checked against your thermometer, headspace left for a top-up, and a full extra wait before you touch the mold again.
Notes From the Latvian Candles Workshop
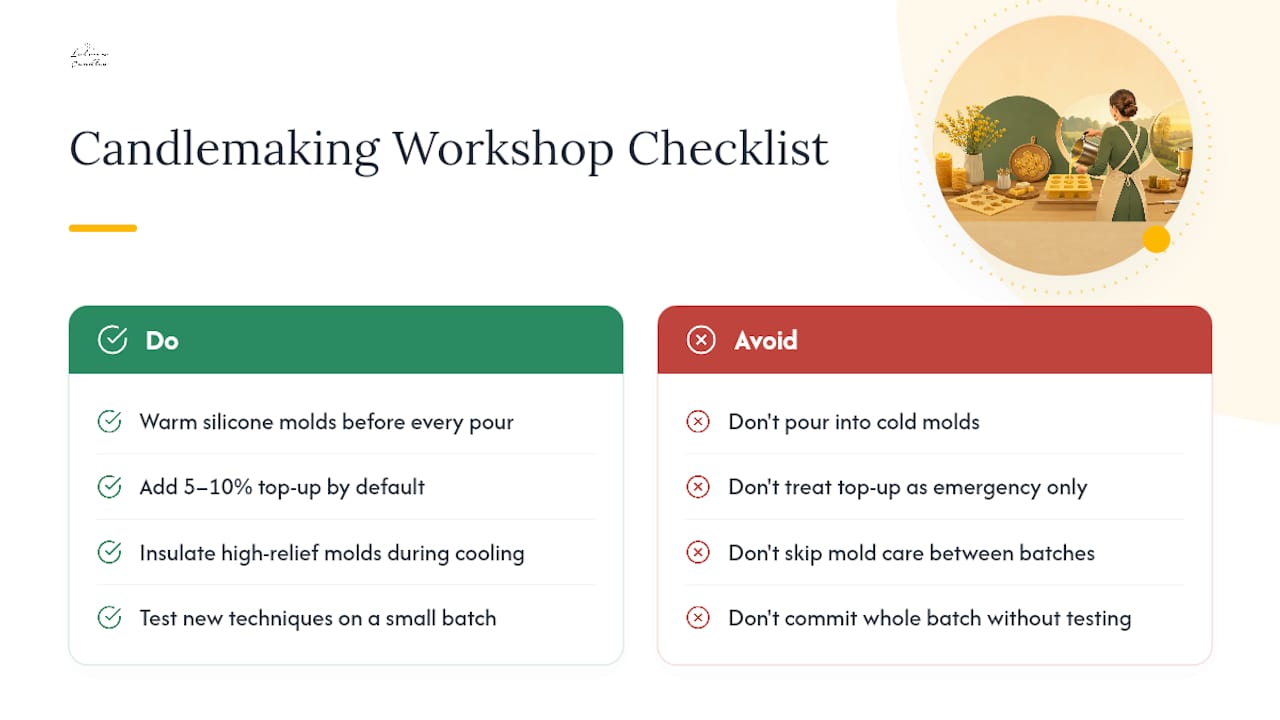
Small shop-tested habits make a bigger difference than most general guides suggest. Gently warming silicone molds before every pour, rather than pouring cold, is the single adjustment that improves surface finish the most reliably across different mold shapes. Building in a 5 to 10% top-up as standard practice, not just as an emergency fix, keeps detailed patterns like honeycomb cells looking sharp instead of sunken.
Complex, high-relief molds benefit from extra insulation during cooling since more surface area means more places for stress to concentrate. For anyone working through mold care between batches, our notes on protecting silicone molds long-term and on freezing molds briefly to ease release cover ground this article doesn’t. Test any new technique on a small batch first and write down what you observe. Two or three candles told you something useful before you commit a whole batch of wax to it.
— Marks
Molds Built for This Exact Cooling Process
A mold designed around metal or general-purpose casting will fight you at every step described above, because it wasn’t built with beeswax’s particular shrink-and-shell behavior in mind. Latvian Candles’ silicone molds are made specifically for beeswax pours, with wall thickness and slit design meant to hold detail through the slower, more even cooling that silicone produces, and to hold up through hundreds of pours rather than warping after a handful.

If wick centering has been your weak point, our wick holders for silicone candle molds keep the wick straight through the whole cooling cycle instead of drifting as the wax shrinks around it. Anyone starting out with bee-cell patterns can browse the Bee Cells collection for shapes that show off crisp mold detail once you’ve got your temperature and top-up routine down. Check the full mold catalog to find a shape that matches the project you’re planning next.
Sources
This guide draws on demolding timing research from HonestBee, pour-temperature and mold-warming steps from HonestBee’s step-by-step process guide, and troubleshooting practices from Eat Healthy 365. Latvian Candles’ own blog posts adapt these principles specifically for silicone-mold workflows.
- How To Perfectly Demold Beeswax Candles: Science-Backed Timing And Techniques - HonestBee
- Troubleshooting Your Beeswax Candle: Common Issues
- Guide To Making Beeswax Candles | Betterbee
FAQ
How Long Does Beeswax Take to Cool in a Silicone Mold?
A thin tea light can set within an hour, while a thick pillar or taper can take several hours to firm up through the center. Waiting an extra 30 to 60 minutes past when the surface feels cool helps confirm the core has caught up before you demold.
What Temperature Should I Pour Beeswax at for a Silicone Mold?
Most experienced makers pour once the melted wax has cooled to around 155 to 165°F (68 to 74°C), which limits shrinkage and skin formation compared to pouring straight from a hotter melt. Never pour above roughly 175 to 185°F (80 to 85°C), since that range risks damaging the wax and worsening shrink cracks.
Why Does My Beeswax Candle Have a Sinkhole in the Middle?
Sinkholes form because the surface skins over and hardens before the wax underneath finishes shrinking as it cools. The standard fix is a second, smaller top-up pour once the surface looks semi-solid, using wax reheated to a slightly cooler topping temperature than your original pour.
Should I Warm My Silicone Mold Before Pouring Beeswax?
Yes. Warming the mold to around 150°F (65°C) before pouring reduces thermal shock and gives a cleaner surface finish than pouring into a cold mold. It’s a small extra step that noticeably improves how the finished candle looks.
Does Latvian Candles Sell Molds That Handle Beeswax Cooling Well?
Latvian Candles makes silicone molds specifically for beeswax rather than generic wax casting, with design details meant to hold pattern detail through beeswax’s slower, more even cooling. Prices for individual molds are listed on the Latvian Candles site rather than published as a single flat rate.


